


7
User manual
UM0972260 A 07
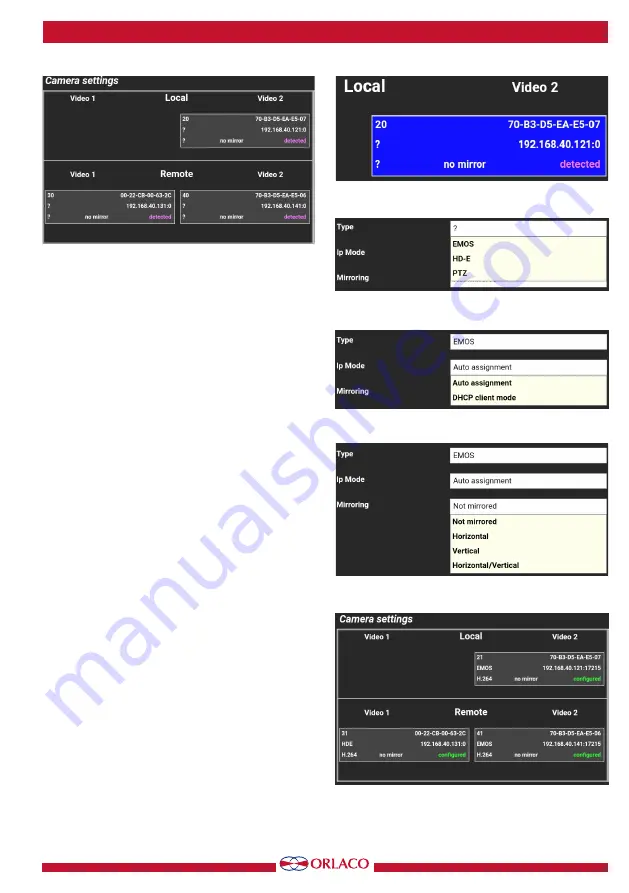
connected cameras. After a few moments a screen
like (figure 17) will appear.
Now for each ‘detected’ camera, tap on it (figure
18) and fill in the fields.
Address all three fields to assure that they contain
the right value. (figure 19, 20 and 21).
For the second field ‘Ip-Mode’ select ‘Auto assign-
ment’ (figure 20). In this system setup the ‘DHCP
client mode’ is not necessary and it requires an
extra configuration step in the app.
When all cameras are configured, tap ‘Apply’
(figure 16) and then ‘Scan’ again.
When everything is configured, it should look like
(figure 22).
When one or more cameras cause problems with
the configuration procedure shown, tap the ‘Reset’
button (figure 16), this will clear the internal list
of cams. After that repeat the paragraph to rescan
and reconfigure the cameras.
Figure 17
Figure 18
Figure19
Figure 20
Figure 22
Figure 21


