


5
User manual
UM0972260 A 07
Figure 8
Figure 9
Figure 11
Figure 10
Figure 12
connected WISR can be found by bringing up
the menu screen and tap the Connections button
(Figure 7). On the WISR connections screen select
‘COUNTRY’. See figure 5. The first country name in
blue is the configured country.
PhotonView opens with the on-screen menu, see
figure 6, this screen disappears after 10 seconds
or when you tap the screen outside this menu.
Tap the screen to toggle the on-screen menu on
and off.
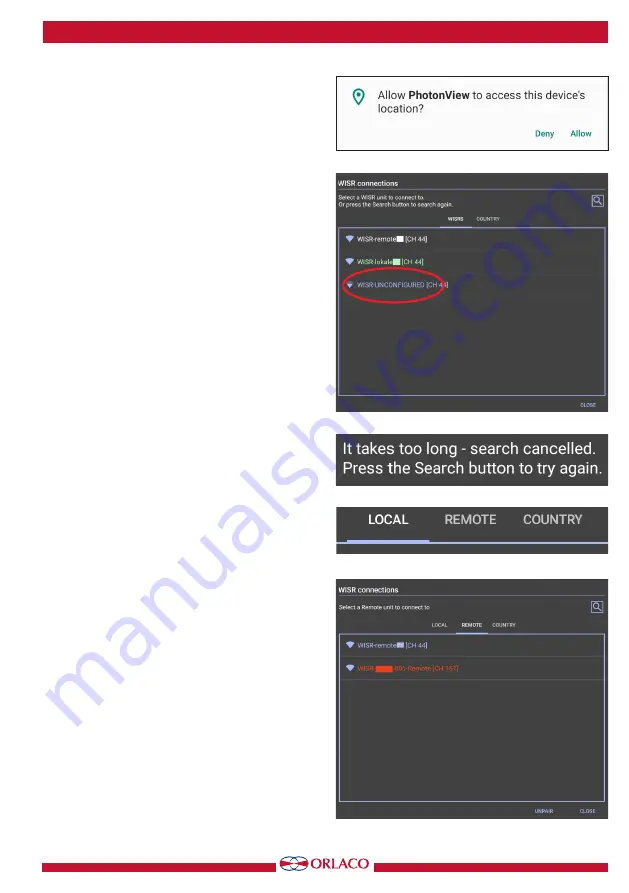
On the on-screen menu, tap the WiFi connection
icon. See figure 7. The first time it is used, it asks
to allow access to the device’s location, answer
ALLOW to it. See figure 8.
On the WiFi selection screen, figure 9, a factory
WISR has the name ‘WISR-UNCONFIGURED’.
When the WISR doesn’t show up on the screen,
tap the Search button to scan for WISR units.
Note that after tapping the search button a few
times, the screen shows an error. See figure 10.
Android prevents the PhotonView app/user to scan
too often, due to power saving issues.
Try again after some time. Eventually the screen
will refresh, but this can take a while.
Note that the WISR connections screen shows the
tabs WISRS and COUNTRY when the tablet is not
connected to a WISR or when the connected WISR
is not paired or in standalone mode.
When connected to a local or remote WISR, the
screen shows three tabs LOCAL, REMOTE and
COUNTRY. See figure 11.
Also note that colors are used for the connection
status of the WISRS:
• White: the tablet has never connected to this
WISR.
• Green: an earlier connection is remembered.
• Blue: the tablet is connected to this WISR.
• Red: the remote WISR is paired with another
tablet.
Tap and hold the ‘WISR-UNCONFIGURED’ line and


