12
13
3. In the
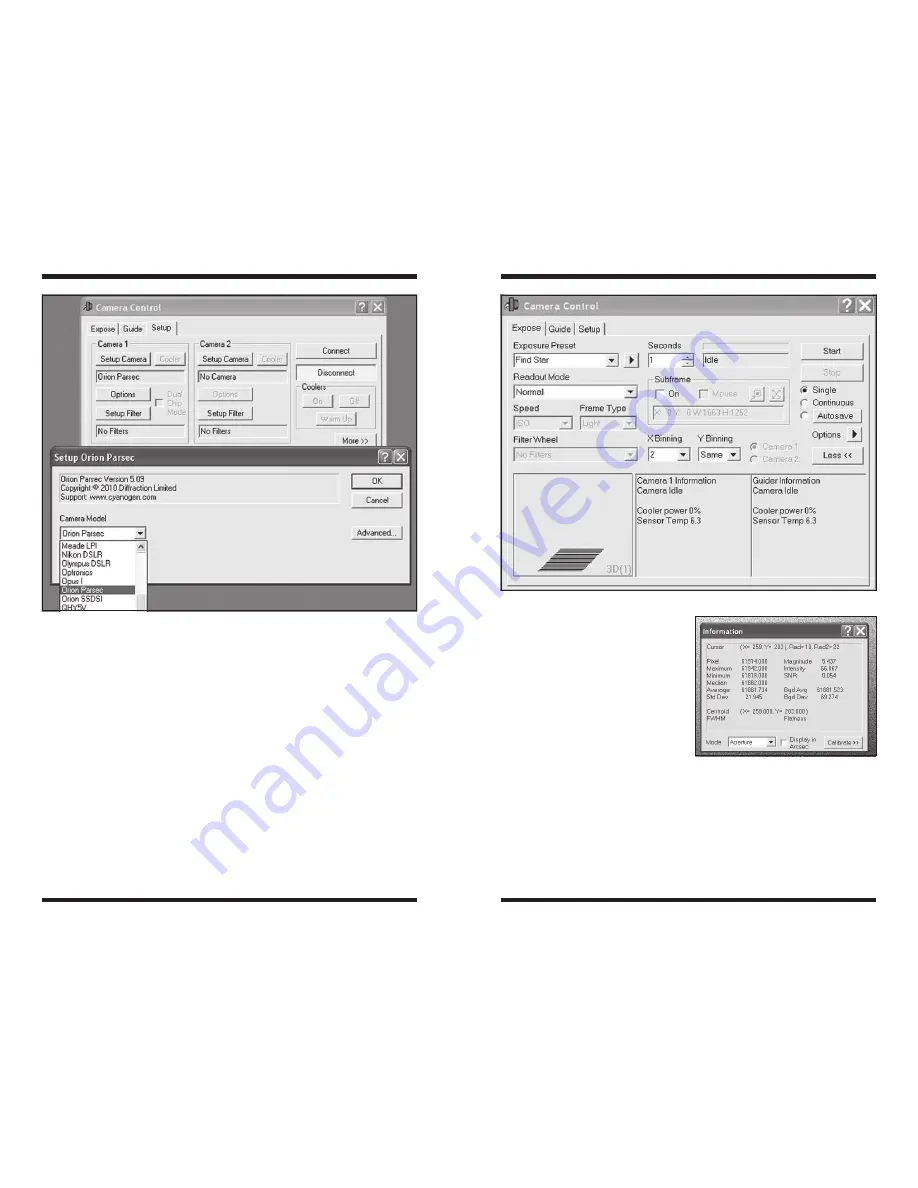
Setup tab in MaxIm DL’s Camera Control Window, select Setup
Camera. Locate the Orion Parsec in the dropdown list and click OK
(Figure 10).
4. Click
Connect and your Parsec will connect to MaxIm DL.
the Expose tab and taking your First Parsec Image
We recommend becoming familiar with the Parsec during the day. Connect the
camera to your telescope and focus on an object ¼ of a mile away. If you do not
have enough outward focus travel to focus this closely, you may need an extension
tube (available from Orion).
In the
Expose tab:
1. Select
Find Star in Exposure Preset (Figure 11). Use the default settings
and notice that
X Binning/Y Binning is set to 2/Same. This cuts the
resolution to 1/4 and speeds up the download time while making initial
focusing easier to obtain.
2. Reduce the exposure
Seconds to 0
.
1.
3. Click
Expose and you will hear the shutter. Wait a few seconds for the
image to appear. It may be over exposed or grossly out of focus. Adjust the
telescope’s focus and adjust the
exposure time as needed to get a
focused image.
4. Look at the
Pixel value in the
Information window while the
mouse cursor is over the image.
The
Pixel and Average value
should be well below 50000
or your image is overexposed
(Figure 12). If you cannot get the
Pixel value low enough during
the day, you will need to reduce
the aperture of your telescope by
creating an aperture mask.
5. You may change the
Binning X/
Binning Y to 1x1. For the Parsec
8300C, set the
Frame Type to Color
.
Note: Any time a setting is changed in the Exposure Preset, a * will appear next
to the preset name indicating the settings are different than the default. Click the
Figure 10.
Select
Orion Parsec in the pull down menu.
Figure 11.
The
Expose tab using the Exposure Preset default settings in Find Star.
Figure 12.
The
Information window
displays detailed information about the
image, including the
Pixel count which can
indicate if the image is overexposed.


