


ESP
AÑOL
ENGLISH
FRANÇAIS
DEUTSCH
POR
TUGUÊS
VR383 Manual-Eng (086-002906-020)
POR
TUGUÊS
ENGLISH
FRANÇAIS
DEUTSCH
IT
ALIANO
IT
ALIANO
ESP
AÑOL
12
13
Introduction Scanning
You can scan the first 5 seconds of all recorded messages within the current folder.
When the unit is in
Recorder Mode
, and the device is not in the midst of a playback
or a recording:
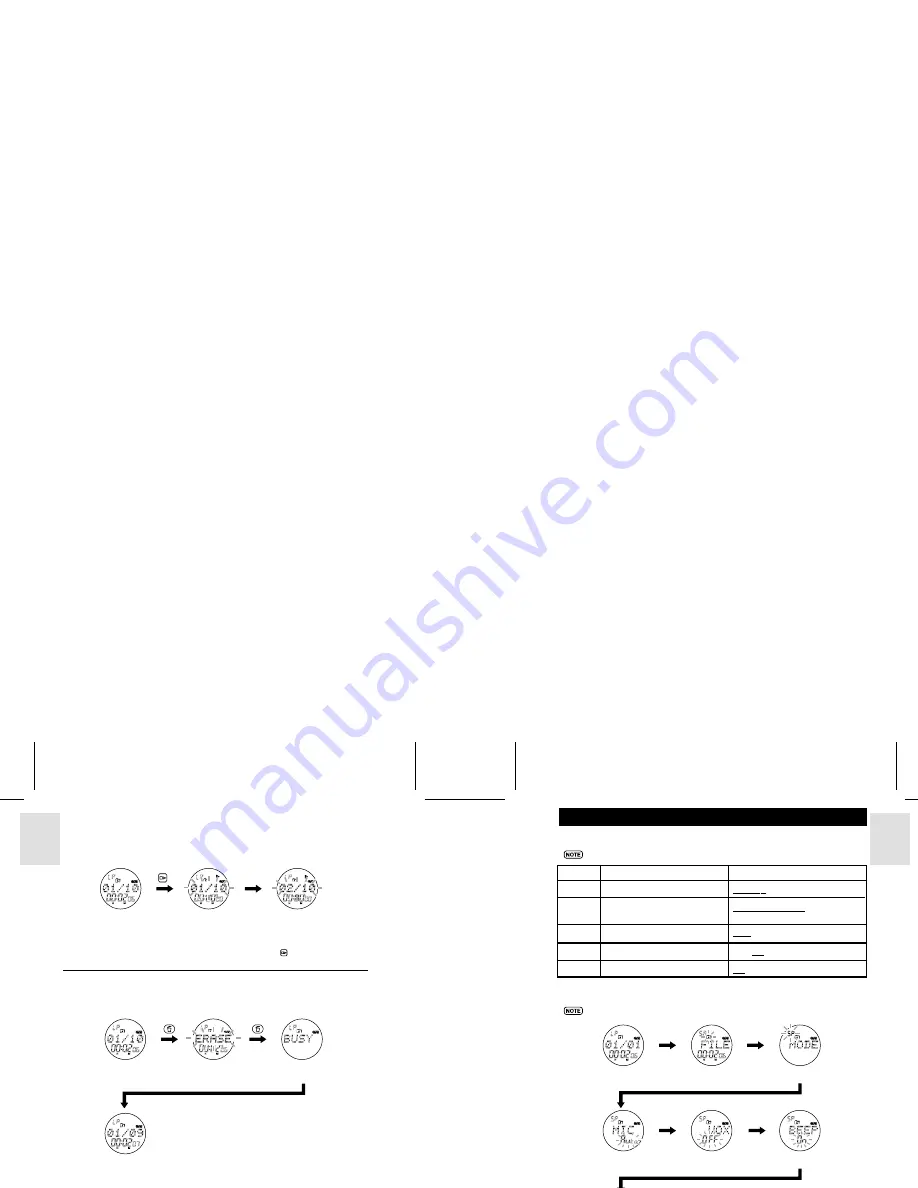
Erasing Messages
When the unit is in
Recorder Mode
, and the device is not in the midst of a playback
or a recording, you can choose to erase the messages stored:
Press & hole
Wait 5
seconds
1. Recorder Mode
2. Word “INTRO” and
current message
interchangeably
blink. Current
message plays for
5 seconds.
3. Next message plays
for 5 seconds. This
continues until all
messages are played
or
is pressed.
Press
Press
1. Recorder Mode.
Press SKIP / REVIEW
to choose message.
2. “ERASE” and
currently selected
message blinks.
3. “BUSY” displayed while
message is erased.
Wait 1 second
4. Message erased. Device
returns to Recorder Mode.
VOICE RECORDER SETTINGS
Your voice recorder has five different settings that can be configured:
Italicized and underlined options are product default options.
Setting
Description
Options
FILE
Currently active folder selected.
Folder A
/ Folder B
MODE
Different recording quality and
SP (Standard Play)
/ EP (Extended
recording capacity.
Play) / LP (Long Play)
MIC
Adjust sensitivity of microphone.
Auto
/ Hi / Lo
VOX
Enable/disable voice detection.
On /
Off
BEEP
Button press confirmation tone.
On
/ Off
Changing Voice Recorder Settings
Press VOL+/VOL- to select between options for each of the settings.
Press &
hold DISP/SET
1. Recorder Mode
Press
DISP/SET
2. Select currently
active folder.
3. Select recording quality.
4. Select microphone
sensitivity.
5. Enable/Disable
voice detection.
6. Enable/Disable beep tone.
Press
DISP/SET
Press
DISP/SET
7. Return to Recorder Mode
Press DISP/SET
Press DISP/SET


