


ESP
AÑOL
ENGLISH
FRANÇAIS
DEUTSCH
POR
TUGUÊS
DS6638 Manual-Eng (086-002975-015)
POR
TUGUÊS
ENGLISH
FRANÇAIS
DEUTSCH
IT
ALIANO
IT
ALIANO
ESP
AÑOL
2
3
GENERAL WARNINGS
•
The enclosed disc is a computer CD-ROM disc. Never attempt to play this disc
on an ordinary music CD player, as it can produce extremely high noise levels
that could damage your hearing or your audio system.
•
Do not immerse the device in water or subject the camera to impact or shock.
•
Do not, under any circumstances, touch the exposed electronic circuitry of the
device, as there is a danger of electric shock.
•
Take special care when handling a damaged LCD display, as the liquid crystals
can be harmful to your health.
•
Do not use or store the device in locations that may adversely affect the product
such as rain, snow, desert, and magnetic fields.
•
Check all major functions when the device is unused for a long period of time.
This is to ensure its full operation. Maintain regular testing and cleaning of your device.
•
Do not look through the viewfinder at the sun or other strong lights. This could
damage your eyesight.
•
Avoid leaving the camera exposed to direct sunlight, as the action of the lens
could cause fires.
•
Remove the batteries and memory card before storing the camera for long periods
of time. Then, keep it in a well-ventilated place in order to prevent moulding.
NOTES ON THE DIGITAL CAMERA
Cleaning your Camera
Lens / Viewfinder
Use a blower or a lens brush to remove dirt or dust. Wipe
carefully with a soft cloth to remove fingerprints and other
stains. Do not touch with fingers.
Body
Clean with a damp cloth; dry immediately.
•
Do not use benzene, thinner, or similar cleaning agents to clean your camera, as
these may cause permanent damage not covered by the warranty.
•
Do not scratch hard objects against the lens, LCD or viewfinder as these surfaces
are easily damaged.
Handling your Camera
•
For important photographs (such as weddings and overseas trips), always take a test
photograph and view the image to make sure that the camera is functioning normally.
•
Do not use the camera while you are walking, running, driving or operating
machinery. This can result in serious accidents.
•
Do not use this device in aircrafts or hospitals. It can cause malfunctions in the
control devices of other equipment.
•
If the camera is carried suddenly from a cold location into a warm place, con
densation may form inside the device. Switch the camera off in such cases and
wait an hour before using it again.
KEY FEATURES
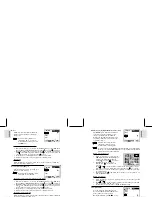
FRONT VIEW
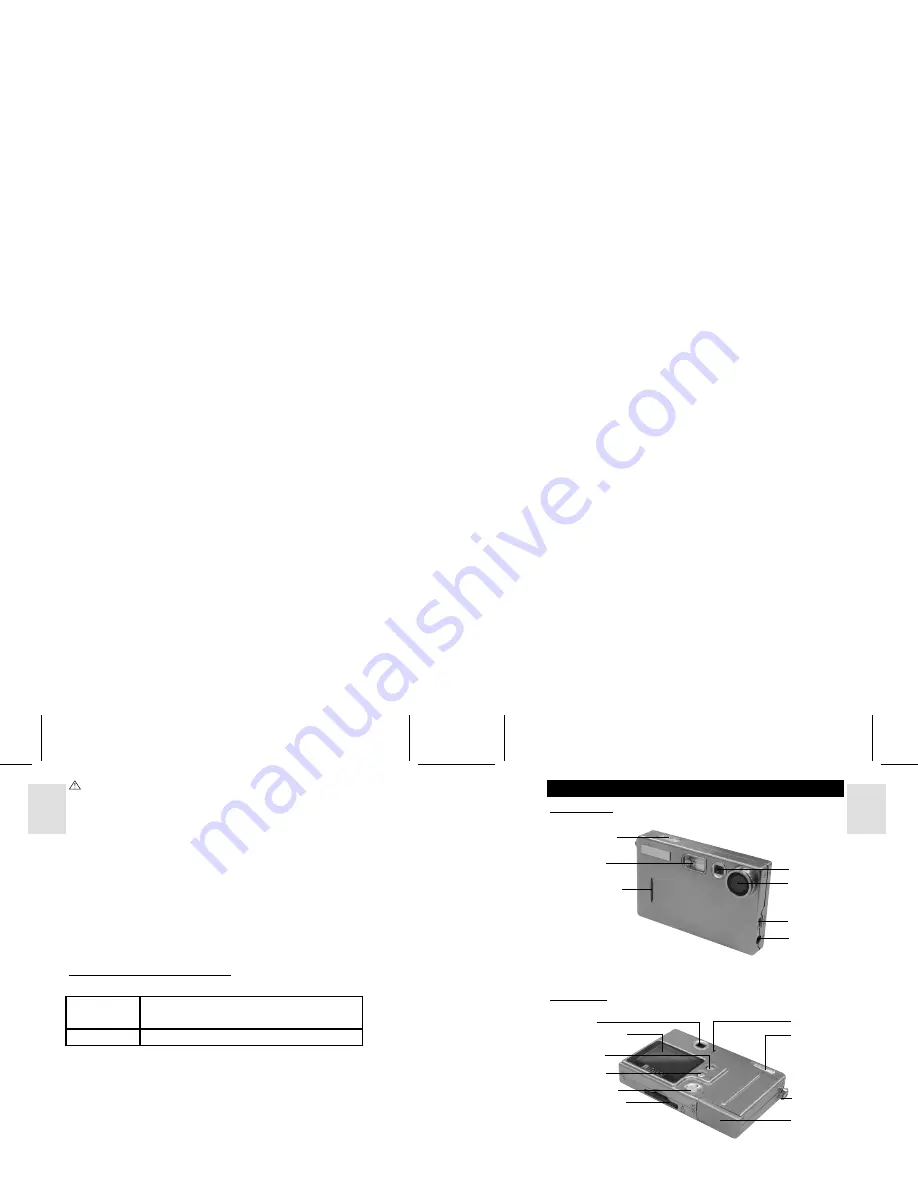
BACK VIEW
Shutter Release
Button
Built-In Flash
Self-Timer Lamp
Viewfinder
Lens
USB Terminal
Video Socket
Mode Switch
Viewfinder
Menu Button
On-Screen Display
Flash/Delete
Button
4-Way controller
Memory Card Slot
Status Lamp
Strap Ring
Battery Door


