


ESP
AÑOL
ENGLISH
FRANÇAIS
DEUTSCH
POR
TUGUÊS
DS6638 Manual-Eng (086-002975-015)
POR
TUGUÊS
ENGLISH
FRANÇAIS
DEUTSCH
IT
ALIANO
IT
ALIANO
ESP
AÑOL
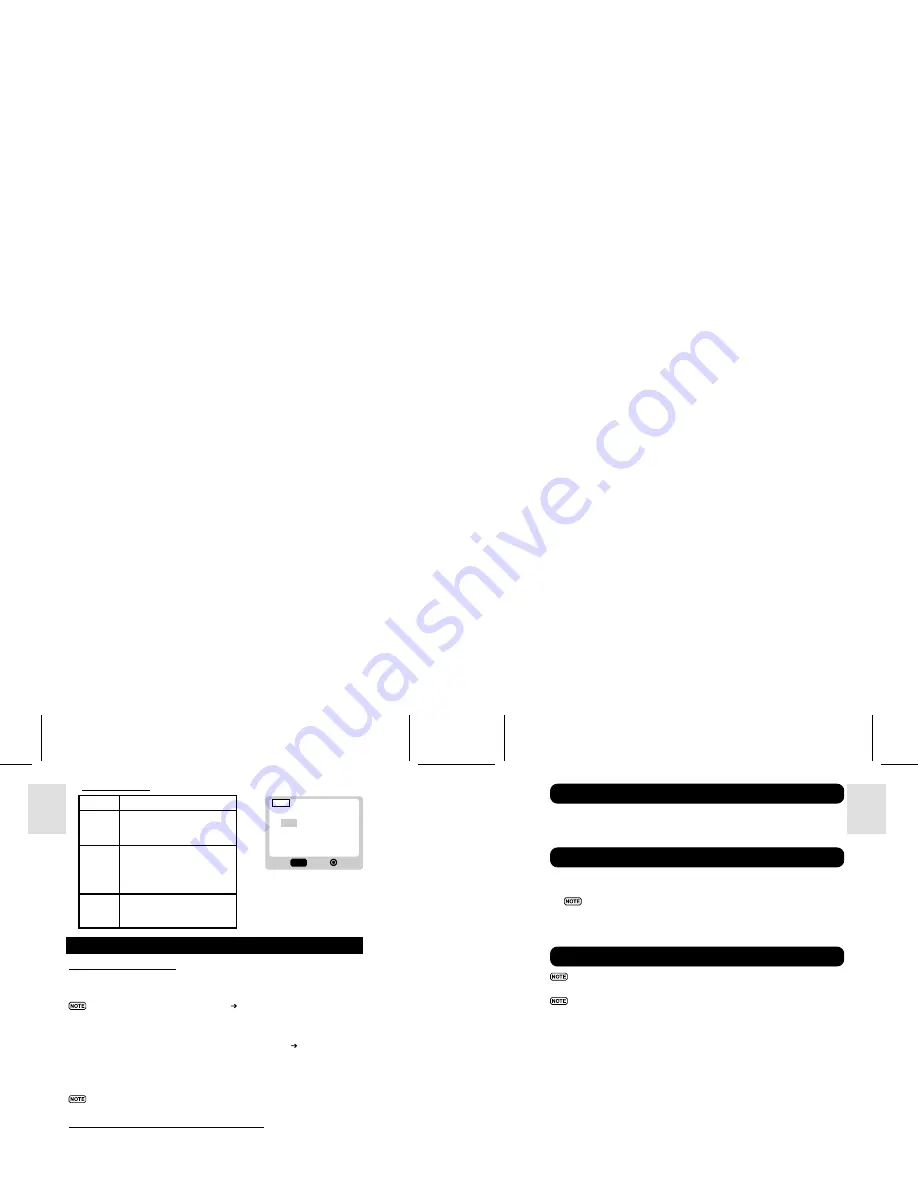
Slideshow Options
Settings
Descriptions
Start
Start Slideshow according to
the specified
Interval
and
Repeat
options.
Interval
Specifies the amount of time
the camera will display an image
before moving on to the next
image. The options are
3 sec.
,
5 sec.
, and
10 sec.
Repeat
When set to
On
, the slideshow
immediately replays when the
final image is displayed.
CONNECTING TO EXTERNAL DEVICES
CONNECTING TO A TV
You can playback the images and movies you have recorded on your TV. Connect
your digital camera to the TV via the video cable included in the camera’s gift box.
Be sure to adjust the TV Out setting (
p.13) to correspond with your
country’s system (PAL or NTSC) before connecting the camera to the TV.
Caution:
Turn off the TV and digital camera before connecting the video cable.
1. Plug the video cable into the Video Socket of the camera (
p.3).
2. Connect the video cable’s yellow connector to the yellow AV input terminal of
your TV. Refer to your TV’s manual for more information.
3. Turn the TV and camera on. Make sure to switch the TV to the appropriate AV
channel display.
The OSD is automatically off when the camera is connected to a TV.
CONNECTING TO A WINDOWS-BASED PC
Use the USB cable included to connect to your Windows PC. This enables you to
upload, download, edit, and playback pictures and movies onto your PC. However,
the software must be installed first.
Slide
Exit
OK
MENU
5s
Off
Start
Interval
Repeat
•
Pentium 66MHz
•
16-bit colour display at 800x600
•
64MBytes RAM
•
USB 1.1 interface
•
350MBytes Hard disk space
•
Windows 98/98SE/ME/2000/XP
•
CD-ROM drive
1. Insert the CD labelled “DS6638” into your CD-ROM drive. The installation
will start automatically.
If the “autorun” feature is disabled on your PC, start the installation by
running [x:\setup.exe] where “x:” is the drive letter of the CD-ROM drive.
2. Follow the on-screen instruction to complete the installation of the camera drivers
and software. When done, click on the [Finish] button on-screen to restart the PC.
Only the images and movies stored in the camera’s current memory device
(SD card or internal memory) will be visible on the PC.
The OSD is automatically off when the camera is connected to the PC.
1. Turn on your PC and allow your system’s Windows operating system to boot up.
2. Turn off your digital camera. Connect the camera and your PC via the USB
cable. Refer to your PC’s manual to locate the USB connection on the PC.
3. Turn on your digital camera to any Mode. The device’s LCD screen will display
“PC Camera”. The camera will then appear as Removable Disk drive on your
system’s [My Computer].
4. Double-click on the [Removable Disk] drive. Two folders, [DCIM] and [MISC],
are now visible. Ignore the [MISC] file (it contains DPOF information) and
double-click on the [DCIM] folder.
5. New subfolder is now visible - [100DSHOT]. The [100DSHOT] subfolder contains
all the Economy, Standard, and High Quality images stored as .JPG files. Movie
clips are also stored here as .AVI files which can be played using Windows
Media Player.
6. You can double-click on the images and movies to view them (provided the
appropriate Picture Viewer and Movie Player are installed). These files can also
be deleted, copied, or moved like normal computer files.
Pre-Installation Checklist
Installing Drivers and Software
Connecting the Camera to the PC
26
27


