2-24
INSTALLATION
ORBAN MODEL 8300
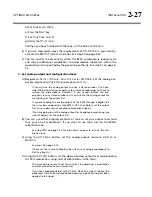
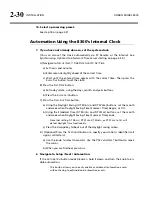
To program clock-based automation to activate modulation reduction, follow
the instructions found in “Using Clock-Based Automation” on page 2-30.
The following material provides detailed instructions on how to set up the 8300. If
QUICK SETUP does not fully address your setup needs or if you wish to customize
your system beyond those provided with QUICK SETUP, then you may need the addi-
tional information in the sections below. However, for most users, this material is
only for reference because QUICK SETUP has enabled them to set up the 8300 cor-
rectly.
Analog and Digital I/O Setup
For the following adjustments, use the appropriately labeled soft button to choose
the parameter to be adjusted. To change a parameter (like an output level), it is
usually necessary to hold down the soft button while turning the knob.
1.
Temporarily set the external AGC mode to “No.”
A)
Navigate to
S
ETUP
/
N
EXT
/
N
EXT
/
E
XT
AGC
and set
E
XT
AGC
to
N
O
.
If you are using a external AGC like the Orban 8200ST, you should restore
this setting to
Y
ES
after the setup procedure is complete.
2.
Adjust Input selector.
A)
Navigate to
S
ETUP
/
IO
C
ALIB
/
A
NLG
I
N
C
ALIB
/
I
NPUT
.
B)
Set the
I
NPUT
to Analog.
The 8300 will automatically switch to analog input if signal lock is un-
available at the AES3 input.
3.
Adjust Analog Input Reference Level.
[
9 dBu to +13 dBu (VU), or –1 to +21 dBu (PPM)] in 0.5 dB steps
The reference level VU and PPM (Peak) settings track each other with an offset
of 8 dB. This compensates for the typical indications with program material of a
VU meter versus the higher indications on a PPM.
This step sets the center of the 8300’s gain reduction range to the level to which
your studio operators peak their program material on the studio meters. This as-
sures that the 8300’s processing presets will operate in their preferred range.
You may adjust this level with a standard reference / line-up level tone from your
studio or with program material.
Note that in this step, you are calibrating to the normal indication of the studio
meters; this is quite different from the actual peak level.
Summary of Contents for 8300J
Page 1: ...Operating Manual OPTIMOD FM 8300 Digital Audio Processor Version 2 1 Software...
Page 7: ...Operating Manual OPTIMOD FM 8300 Digital Audio Processor Version 2 1 Software...
Page 24: ......
Page 94: ...2 46 INSTALLATION ORBAN MODEL 8300 This page intentionally left blank...
Page 190: ......
Page 204: ......
Page 246: ......
Page 247: ...OPTIMOD FM DIGITAL TECHNICAL DATA 6 29...
Page 254: ...6 36 TECHNICAL DATA ORBAN MODEL 8300 CPU Module...
Page 260: ...6 42 TECHNICAL DATA ORBAN MODEL 8300 8300 RS232 BOARD PARTS LOCATOR...
Page 262: ...6 44 TECHNICAL DATA ORBAN MODEL 8300 8300 POWER SUPPLY PARTS LOCATOR...
Page 264: ...6 46 TECHNICAL DATA ORBAN MODEL 8300 8300 I O BOARD PARTS LOCATOR...
Page 270: ...6 52 TECHNICAL DATA ORBAN MODEL 8300 DSP BOARD PARTS LOCATOR DRAWING 32170 000 14...
Page 278: ...6 60 TECHNICAL DATA ORBAN MODEL 8300 8300 DISPLAY BOARD PARTS LOCATOR...
Page 279: ...OPTIMOD FM DIGITAL TECHNICAL DATA 6 61 DISPLAY BOARD...


