


6212A Manual Version 14.56.docx
Page 14 of 58
File Management
File System Window
From the Main Window, push the switch (^) push button to highlight the word SYSTEM.
Scroll to the word “files” with the scroll (>) push button
Push the Select push button. The following screen will be displayed:
The file management options available by scrolling are:
Send, Receive, New Cal, Delete, Reset, Exit
Send Command
This selection transfers data files to a PC via the serial null modem cable. Before selecting this in the control box,
you must first prepare the PC to receive the data.
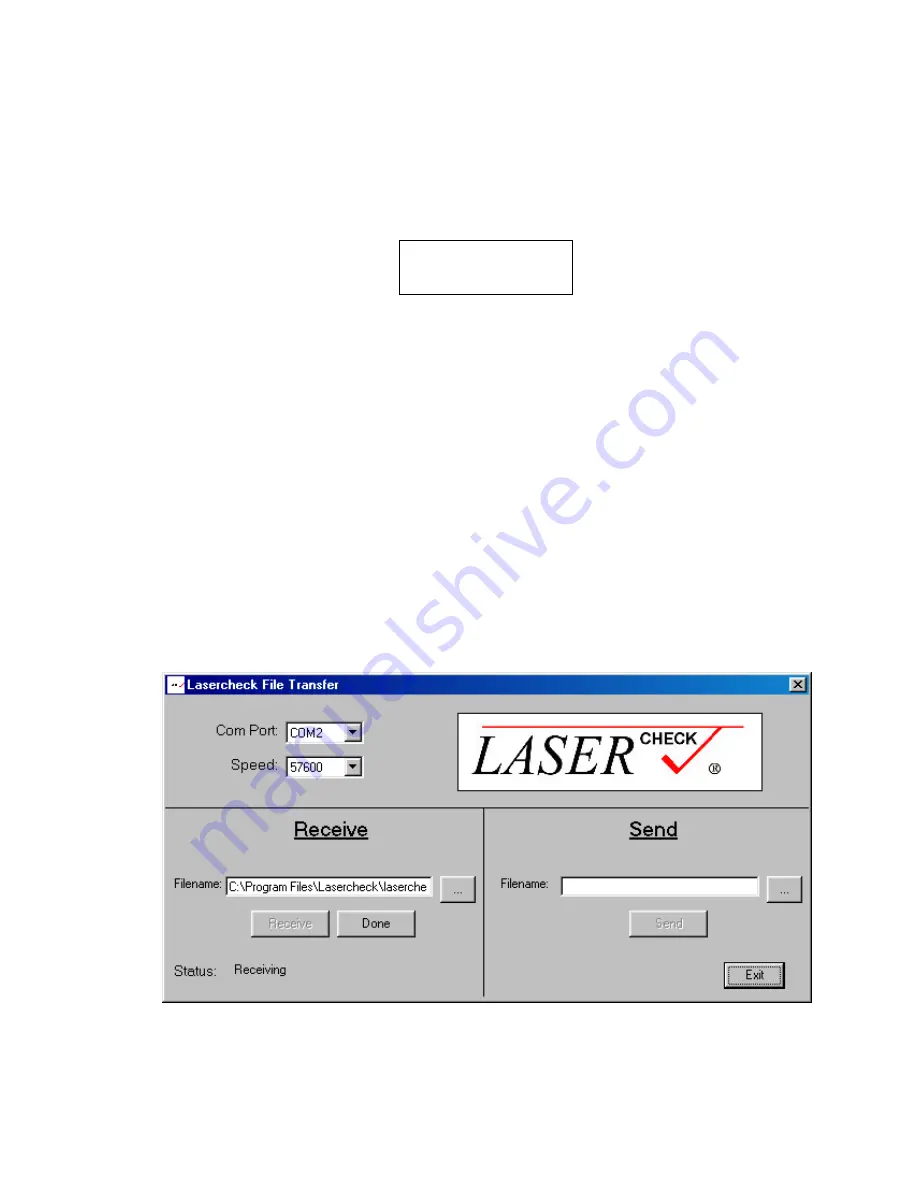
Preparing Windows Software to receive files
Start the Lasercheck File Transfer Software by clicking on icon in the Start Menu under “Programs /
Lasercheck / Lasercheck File Transfer”.
Select the following options if they are not already selected:
o
Com Port:
Select the serial port the Lasercheck cable is attached to on your computer
o
Speed: 9600
o
Filename:
C:\Program Files\Lasercheck\Lasercheck.txt
Leave the filename as “Lasercheck.txt”.
Click the “Receive” button. Click "OK" if prompted regarding overwriting the file. Follow the directions below
for sending the data from the Lasercheck Controller.
Lasercheck File Transfer Software Configured to Receive Saved Measurements
Manage files:
FILES: >Send