background image

74

Working with Jobs

 Operator Manual

OPEX Corporation

 4.7. Rescanning an Item

When configured in the Job, CertainScan allows rescanning an image while 

the job is running. The Rescan button can be accessed by clicking on the 

Actions button in the run screen (Figure 4-7).

1. 

Select the item’s thumbnail.

2. 

Take the item out of the sort bin.

3. 

Press 

Rescan

 button on run screen to replace the item in the batch.

4. 

Place the item onto the conveyor to scan.

Note: 

If an audit trail was printed on the item the first time it was scanned, 

press 

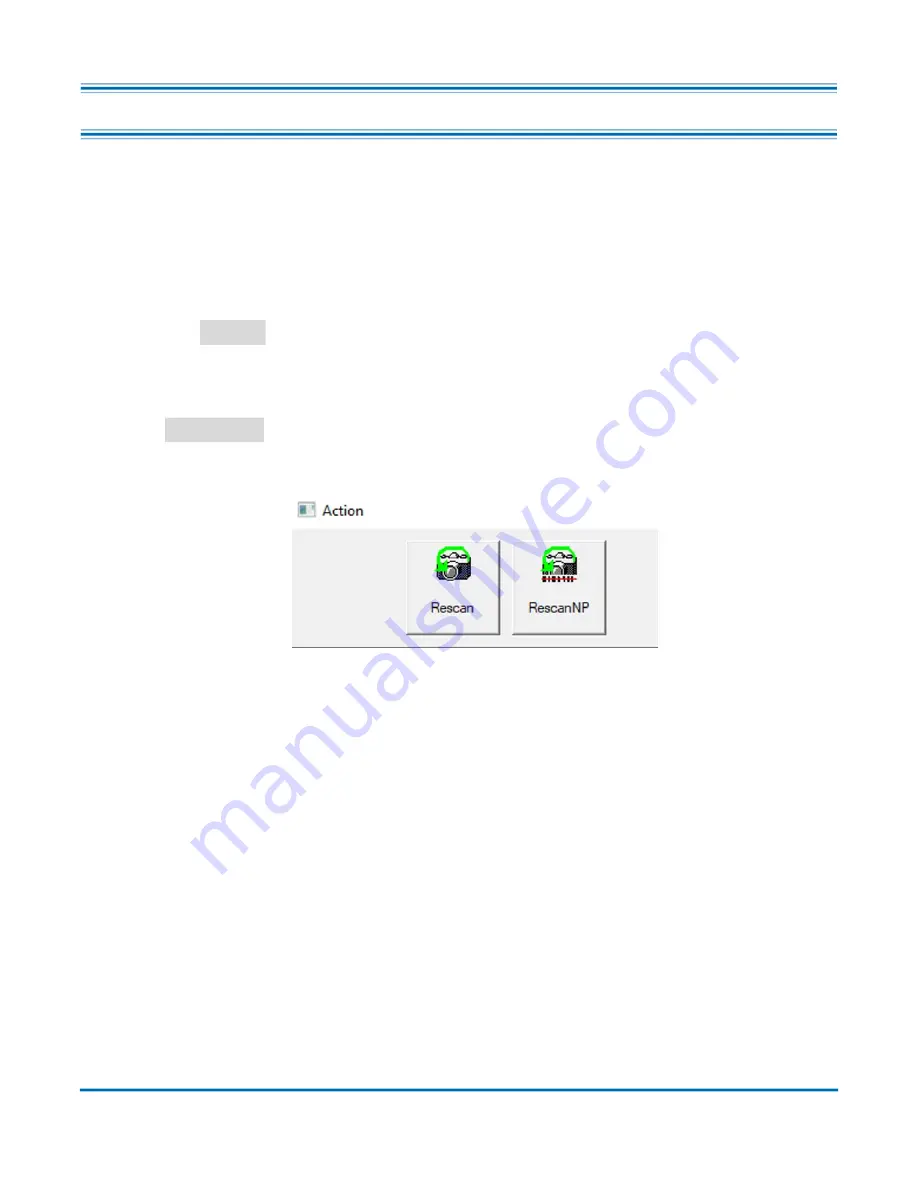
Rescan NP

 (no print) to replace the item in the batch. This way, no 

additional audit trails will be printed on the item.

Figure 4-7: Rescan Action buttons

Summary of Contents for Falcon+

Page 1: ...OM EN Revision 21 01 Original Instructions 2019 2021 OPEX Corporation All rights reserved This document is provided by OPEX for use by their customers partners and dealers No portion of these material...

Page 2: ...er of the product ready see Equipment Model Serial Number Location on page 22 for more information For other inquiries OPEX Corporation 305 Commerce Dr Moorestown NJ 08057 4234 USA Tel 1 856 727 1100...

Page 3: ...acture s Name OPEX Corporation Manufacture s Address 835 Lancer Drive Moorestown New Jersey 08057 4225 United States of America Importer s Name OPEX Corporation Importer s Address Parc Technopolis ZA...

Page 4: ...DFLOLW 7 6WDJH XVHG 0RGHO 7 SH 5HI DOFRQ DOFRQ 9 DOFRQ 9 DOFRQ GGLWLRQDO LQIRUPDWLRQ LI QHFHVVDU PD DOVR EH UHSRUWHG RQ SDJH GGLWLRQDO LQIRUPDWLRQ RQ SDJH 0 GGHG PRGHO QXPEHUV DOFRQ 9 DQG DOFRQ GGHG...

Page 5: ...19 01 Dec 9 2019 Initial release 21 01 May 10 2021 Completely rewritten new formatting and updated content throughout Table 1 Revision history for translated manuals Source English version Date Transl...

Page 6: ...1 3 Safety Guidelines 14 1 3 1 Safety Precautions 14 1 3 2 Ergonomics 15 Chapter 2 Overview 2 1 Main Controls and System Components 18 2 2 Equipment Model Serial Number Location 22 2 3 Falcon System C...

Page 7: ...t 57 3 12 1 Add new Operator 59 3 12 2 Job Access by Group 60 Chapter 4 Working with Jobs 4 1 Overview 67 4 2 Structured and Unstructured Jobs 67 4 3 Assigning a Page Type 68 4 4 Page Type Locking 69...

Page 8: ...earing Paper Jams 94 4 19 Clearing the Bins 96 Chapter 5 Maintenance 5 1 Calibrating the Touchscreen Monitor 98 5 2 Removing Replacing the Printer Cartridge 99 5 3 Removing Replacing the Graphic Print...

Page 9: ...on Operator Manual OPEX Corporation 6 1 3 Overall System Performance Measures 117 6 1 4 Performance Details 118 6 1 5 Reject Terms 119 6 1 6 Jams 122 6 1 7 Stops 128 6 2 Batch Output File Extensions 1...

Page 10: ...10 Table of Contents Falcon Operator Manual OPEX Corporation This page is intentionally blank...

Page 11: ...Falcon Operator Manual 1 Introduction 1 1 About the Manual 12 1 1 1 Manual navigation aids 12 1 2 Safety Message Conventions 13 1 3 Safety Guidelines 14 1 3 1 Safety Precautions 14 1 3 2 Ergonomics 1...

Page 12: ...ng the document revision history can be viewed on page 5 Be sure to retain the latest electronic release of the manual for your reference The latest release can be downloaded in PDF format at www opex...

Page 13: ...equipment DANGER Indicates a hazardous situation that if not avoided will result in death or severe injury The use of this signal word is limited to the most extreme situations WARNING Indicates a ha...

Page 14: ...he scanner that could spill into the machine Keep loose objects away from any exposed moving parts of the machine The moving parts of the Falcon can become jammed and or damaged by foreign objects Als...

Page 15: ...so that your elbow is approximately even with the top of the work surface when your arms are near your sides and your feet are flat on the floor Adjust your chair position to allow your torso to touch...

Page 16: ...16 Introduction Falcon Operator Manual OPEX Corporation This page is intentionally blank...

Page 17: ...2 Falcon Operator Manual 2 Overview 2 1 Main Controls and System Components 18 2 2 Equipment Model Serial Number Location 22 2 3 Falcon System Components 23 2 3 1 Software 23 2 4 Specifications 24...

Page 18: ...wer Rack System Integrated Windows 10 based Host Thickness Measuring Pass Through Printer Bin Mirror Conveyor Feeder with Bin Trays Wireless Keyboard and Mouse Rescan Feeder Programmable Sort Bins Dev...

Page 19: ...the keyboard and mouse are only used for setting up jobs and for use with other software Use the touchscreen monitor for running jobs and operating the scanner Conveyor Angled roller system that edge...

Page 20: ...ctor when you are scanning thicker pieces such as items with sticky notes attached Thickness Measuring Device TMD Override The Thickness Measuring Device Override is a feature that creates an open pap...

Page 21: ...nal In place of the standard rear audit trail printer this optional printer is capable of printing graphics such as signatures logos and Code 39 barcodes Up to five different graphics can be sprayed I...

Page 22: ...l Serial Number Location Before contacting OPEX Technical Support locate the Model Serial label on your machine so that you can provide the assisting technician with your Reference Serial Number Figur...

Page 23: ...ameters Batch Image Capture Sorting etc When selecting a Job to run scanned items are automatically matched to Page Types in the Job and all metadata is captured as configured Page Type A Page Type is...

Page 24: ...Recognition OCR OMR barcodes document type ID Media Detection Multifeed detection height length skew and envelope detection Document Separation 3 or 5 programmable output sort bins 1 programmable stra...

Page 25: ...Packet sensing technology Key Assist ID Assist Integrated workstation Thickness Measuring Device Override VRS technology image enhancement VRS is a registered trademark of Kofax Inc Optional Features...

Page 26: ...26 Overview Falcon Operator Manual OPEX Corporation This page is intentionally blank...

Page 27: ...6 Job Run Screen 34 3 6 1 Run Screen Buttons 35 3 6 2 Run Screen Preview Image Icons 36 3 7 Run Screen Display Views 38 3 8 Image Viewer Functions 49 3 9 Information Window Selections 51 3 9 1 Additi...

Page 28: ...the UPS is on and the computer is not on turn on the computer 3 Windows will launch without log on prompt unless configured for local Network access If configured log on to Windows with your username...

Page 29: ...accounts for each user setting the appropriate operator level for each user and then deleting the four default accounts Entry Level Main level access to run jobs User Level Main level access to run j...

Page 30: ...3 3 Logon To CertainScan 1 Select Operator account 2 Enter your password Figure 3 3 3 Press OK Note If the default operator accounts are not shown and you do not have a user account ask your Falcon Ad...

Page 31: ...ased on operator level The Main category is for all operators with Logout and Scan functions Selecting another category will provide that category s functions in the section below 3 Menu Selected Func...

Page 32: ...wn in Figure 3 5 Custom Jobs will normally be shown here when configured Figure 3 5 Main Screen Based on the Job selected to run the next screen displayed may either be the Run screen or a screen to s...

Page 33: ...3 7 Prompt for Dates and Batch Types Custom BatchID Operator Entry Requires operator to manually enter or select between available choices configured in the Job After entry or selection click on OK bu...

Page 34: ...ws for scanned items Right click in header for selections 2 Batch Viewer thumbnail images of scanned items based on Display View 3 Page Types based on selected Job 4 Magnify image Increase Decrease se...

Page 35: ...ees clockwise and front to back Press the Filter button to show only those items that require editing when using CertainScan Edit Press this button to filter blank images from the Thumbnail view Adjus...

Page 36: ...mages from an external camera into the batch Pause the machine Once pressed the Resume button appears Press to Resume scanning Once pressed the Pause button appears Stop the machine This does not end...

Page 37: ...reason Yes Image Unavailable Attempted to load the image from disk but failed The request did not time out so the disk to which the image is stored may be down or disconnected Yes Image Timeout Attem...

Page 38: ...splay View types to display in the header area One of these two Display View naming schemes for document separation will appear depending on whether the Customer Type is configured for Service Bureau...

Page 39: ...scription Table 4 Table 4 Runscreen Display views Set Transaction View see page 40 Group Dual View see page 44 Sequence View see page 40 Dual Image View see page 44 Bin View see page 41 Pages with Mar...

Page 40: ...xt Set One thumbnail is displayed for each page Scroll buttons appear on the left of the first shown thumbnail page when the number of thumbnails across exceeds five Figure 3 11 Figure 3 11 Set View S...

Page 41: ...ssigned for Page Type in the Job Figure 3 13 Figure 3 13 Bin View Group All scanned pages displayed in a single row from left to right in scan order with additional Groups in the Set when they exist S...

Page 42: ...ck or secondary image display view will show two thumbnails The first row will show front page and directly below is the back page or secondary image All scanned pages are displayed in scan order left...

Page 43: ...mbnails The first row will show front page and directly below is the back page or secondary image All scanned pages are displayed in scan order left to right and row header shows sequence number A new...

Page 44: ...or secondary image All scanned pages are displayed in a single row from left to right in scan order along with additional Groups within a Set when they exist Scroll functions provided to scroll withi...

Page 45: ...ers identify scanned order Sets and Groups can be expanded or collapsed by clicking on Minus Plus icon above marker Figure 3 19 Example 1 Set and Group expanded minus icon shows above each marker Grou...

Page 46: ...be expanded or collapsed by clicking on the Minus Plus icon next to marker Figure 3 20 Example 1 Set Group and Pages expanded Minus icon left of markers All displayed Example 2 Set collapsed plus icon...

Page 47: ...et scanned sequence number Figure 3 21 Images with Labels 2x1 pages are arranged in 2 columns and 1 row Images with Labels 2x2 pages are arranged in 2 columns and 2 rows Images with Labels 3x2 pages a...

Page 48: ...y or Snippets Only When Customer Type set for Remittance All pages displayed in a single row from left to right in scan order No Set Group or Page color markers Includes magnify icons to enhance displ...

Page 49: ...viewing of item selected in the run screen Figure 3 23 Figure 3 23 Image viewer full view screen Table 3 1 Image Viewer Toolbar The Reset button will return the image to its original state The Zoom I...

Page 50: ...cursor from place to place its exact position is indicated in the field Crop Fill in Redact and Rotate buttons If enabled displays the designated optical search area for the OCR MICR scan lines Clicki...

Page 51: ...e setup information is provided for selected page or marker Information headers can be collapsed or expanded by clicking on the minus plus icon next to the header name This window can also be used to...

Page 52: ...orm and running batch validation Once error corrected check off box Sorting Properties Display view Images Only Remittance Display view Snippets Only Based on images scanned sort images displayed in r...

Page 53: ...e the optional Multi Slot Id Assist Tower s Displays information regarding which slot swipe method and action has been programmed for the job Reference IDs Shows the reference IDs configured for the j...

Page 54: ...hem close against the side rail prior to entering the feeder The conveyor rollers are angled to assist the items to the side rail as they are placed Place single items far enough back so that they wil...

Page 55: ...then the system will jam for too skewed If it jams for 5 degrees or more contact your OPEX administrator Figure 3 25 Skew examples 3 10 2 Scanning Items Feed items with the face side up 8 x 11 items c...

Page 56: ...pproximately 1 1 inches 2 7 cm in height can be placed on the conveyor The conveyor rollers will carry the stack to the feeder where the top piece will be pulled off the stack and fed into the scanner...

Page 57: ...n only create Entry User and Supervisor operator accounts Groups can be added to configure Job access by Group This can limit Jobs an Operators can run based on the Group to which they were assigned a...

Page 58: ...odify Select an Operator to change current configured settings Export All Browse to location enter file name and saved Operator file SCAN Add Group This is for Job access by Group reference Enter a Gr...

Page 59: ...ormation When Groups are available select the Groups to provide Operator Group Membership Click Save for new operator or Cancel to exit without saving Existing OPEX defaults can be selected to Modify...

Page 60: ...ager login 3 12 2 1 Configure a permissions file Note This must be done first but is only configured one time 1 Define a folder path create and save a file named Permissions txt Navigate to System Set...

Page 61: ...System Setup Operator click on Add Group enter a new group name and click OK After clicking OK the new Group name will be displayed with a Description field Click in the description field box to ente...

Page 62: ...OPEX Corporation After adding Operator Groups select an operator and click on Modify button In the Operator display select Available Groups and click Add button When finished click Save Figure 3 31 F...

Page 63: ...ame and click on Insert button to place Jobs in the Folder which Groups will be assigned access Or Add new folders and insert Jobs Next select Available Group s and click on Add button to place group...

Page 64: ...64 Operation Falcon Operator Manual OPEX Corporation This page is intentionally blank...

Page 65: ...76 4 10 Voiding Item or Set Transaction 77 4 11 Editing a Batch While Scanning 80 4 12 Suspending and Resuming Multiple Batches 81 4 12 1 CertainScan Internal Batch Editor 82 4 12 2 Closing a Batch 83...

Page 66: ...66 Working with Jobs Falcon Operator Manual OPEX Corporation 4 16 Multi Slot ID Assist 91 4 17 Key Assist 93 4 18 Clearing Paper Jams 94 4 19 Clearing the Bins 96...

Page 67: ...uires the operator to scan Page Types in order For example when running a structured job CertainScan requires the operator to scan a batch ticket first then a stub then a check and or another item and...

Page 68: ...the appropriate Page Type button Figure 4 1 Figure 4 1 Sample Page Type buttons In a structured job the Page Type buttons will indicate which Page Types the system expects to see next For example if t...

Page 69: ...ed as this Page Type until the end of the Set Transaction or when the lock is released A red box around the Page Type button indicates that the lock is in place Figure 4 3 Figure 4 3 Locked Page Type...

Page 70: ...e Types in your Job contains Sub Types it will be required to assign the Sub Type item before scanning To Assign a Page Sub Type 1 When running a Job press the Page Type button configured with Page Su...

Page 71: ...en to modify the Gamma Brightness and Dropout colors for all or one image Figure 4 6 Figure 4 6 Adjust Capture Parameters 4 6 1 Adjusting Capture Parameter screen buttons Table 4 1 Adjust Capture Para...

Page 72: ...n the current job or Adjust One to make the adjustments only to the next item scanned Note These buttons have no affect on alternate track speed or alternate DPI mode Alternate Track Speed Mode This b...

Page 73: ...I resolution at 24 ips Once you click the 600 DPI button the machine slows to 24 ips automatically and stays at that speed until deselected The button works like a toggle selecting it enables the alte...

Page 74: ...n in the run screen Figure 4 7 1 Select the item s thumbnail 2 Take the item out of the sort bin 3 Press Rescan button on run screen to replace the item in the batch 4 Place the item onto the conveyor...

Page 75: ...lete the most recently scanned item from the batch Delete to End choose an item and delete the selected item and all the items scanned after the item When the Delete to End button is pressed the Confi...

Page 76: ...ured Job there are a few options to start a batch While the job is running click the Action button and select the New Batch button to start a new batch with the next scanned item Figure 4 9 Figure 4 9...

Page 77: ...Action functions will appear Figure 4 10 Press Void Item to void only the selected item or Void Set Transaction to void the selected item and all other items included in the set The Cancel button is...

Page 78: ...the batch parameter Allow Void Batch is set to Yes without Marked Image the VOID stamp will not appear over the image on the run screen However the item will be designated with a Void status in the o...

Page 79: ...tton The Action functions will display Figure 4 13 Press the UnVoid Item button to remove the void or press UnVoid Set to remove the void from the selected item and all other items included in the set...

Page 80: ...ugh any existing metadata and output images snippets are preserved during moves or copying and pasting Since image reprocessing is not performed ScanLink plug ins are not called to help sort the piece...

Page 81: ...ob and Page Types settings can be created or edited without ending the job and rescanning the batch Batches that cannot be completed within a run can be suspended and then resumed at it later time Upo...

Page 82: ...Click the OK button to continue and log into the system After logging in the following message will appear Figure 4 17 Figure 4 17 Non Fatal Problems Detected in Batch Error Message Click the OK butt...

Page 83: ...r Manual OPEX Corporation Figure 4 18 Repairing invalid batches 4 12 2 Closing a Batch When scanning is finished press the Stop button and then press the Exit button for pop up display to Close Batch...

Page 84: ...ecting Pause on the run screen the Rescan Feeder slot will flash blue This alerts the operator that it may be used to insert single or multiple items into the rescan feeder To use the Rescan Feeder wi...

Page 85: ...2 Using the Rescan Feeder in Reject Condition In the occurrence of a reject condition the run screen will display the condition Figure 4 21 and the Rescan Feeder slot will flash blue The operator can...

Page 86: ...o feeder To use the Rescan Feeder with multi feed detection with a reject condition 1 When the Rescan Feeder slot is flashing press and hold the Rescan Feeder button until the Rescan Feeder slot begin...

Page 87: ...eder drop slot Figure 4 22 Pre Feed MFD Override button 4 14 1 Disabling MFD While Scanning 1 Before scanning a multi thickness item press the MFD override button to disable the ultrasonic multi feed...

Page 88: ...abled 4 Press the Resume button on the run screen 5 The item will scan and the LED will go off to resume scanning 4 14 3 Using MFD Feeder Path in Reject Condition 1 In a reject condition an error disp...

Page 89: ...onveyor after triggering ID Assist 4 15 1 Using ID Assist To trigger ID Assist swipe the item left to right in front of the ID Assist verify and ID Assist 1 sensors Figure 4 24 and release the item on...

Page 90: ...fully swipe left to right and do not release the item or if you grab the item from the conveyor after releasing it the sensors will time out and the ID Assist feature will not apply Figure 4 24 ID Ass...

Page 91: ...in a Job ID Assist is disabled Figure 4 25 Multi Slot ID Assist Tower The Multi slot ID Assist Tower has three slots each offering three different function selections Each function has a correspondin...

Page 92: ...oration Multi slot Assist instructions display in the information window for the operator while scanning A graphical image shows the colors and direction to swipe the item Figure 4 26 Figure 4 26 Exam...

Page 93: ...pe There are two mapping schemes Mapping Scheme 1 The original Key Assist scheme supports eight Page Types and does not support a New Group key function Mapping Scheme 2 Uses double key combinations t...

Page 94: ...wing to the open position Figure 4 28 Figure 4 28 Access Scanner 2 Clear any jammed paper or debris in this area 3 To close the scanner cover hold onto the latch and gently pull the cover closed 4 Whe...

Page 95: ...r away from the scanner Figure 4 29 2 Clear any paper or debris that is caught in the transport area Figure 4 29 Opening the Transport Cover 3 To close the transport cover hold onto the latch and gent...

Page 96: ...30 The bins have been designed to allow access to the smallest of pages in the bins and to keep items from falling out of the bins Pressing the green release buttons one for each bin will lift the kn...

Page 97: ...Removing Replacing the Graphic Printer 101 5 4 Attaching the Bin and Stacker Fingers 105 5 4 1 Lower Stacker Fingers 105 5 4 2 Upper Stacker Fingers 106 5 4 3 Attaching the Stacker Finger 107 5 5 Bin...

Page 98: ...l touchscreen and is calibrated for its touch sensitivity before it leaves OPEX To Calibrate the Monitor 1 Access the Tablet PC Settings window In the search field type Tablet PC Settings and hit Ente...

Page 99: ...ate of the new cartridge to ensure not expired The printer cartridges in sealed containers have a shelf life of two years from the date of manufacture Access the Printers 1 Open the stacker door by di...

Page 100: ...ear of the printer cartridge and rotate outward see Figure 5 3 Figure 5 3 Printer Cartridge 2 Insert the new cartridge by tipping the front end of the cartridge in first and then pushing in the rear o...

Page 101: ...n the stacker door by disengaging the latch handle 2 Loosen the thumbscrew shown in Figure 5 4 Figure 5 4 Loosen graphic printer thumbscrew 3 Swing open the paper guide to expose the graphics printer...

Page 102: ...Loosen the thumbscrew on the IMTECH Graphics printer assembly shown in Figure 5 6 Figure 5 6 Loosen thumbscrew 5 Pivot the printer assembly towards you 6 Push the cartridge release lever out of the wa...

Page 103: ...rtridge in the direction shown in Figure 5 8 9 Flip the release lever up to hold the cartridge in place 10 Pivot the assembly back into the stacker cover and tighten the thumbscrew The IMTECH printer...

Page 104: ...s ink through the holes in the paper guide A thumb screw holds the printer in the detents If you do not position the printer in a detent the thumb screw sticks out preventing you from closing the pape...

Page 105: ...t in place Load them into the slots at the bottom of each bin base Figure 5 11 Keep the end of the stacker finger centered in the slot and push down the bottom of it so the finger s pin can slide unde...

Page 106: ...reattach the two components Load the finger assembly into the snap in pivot at an angle The finger assembly has small tabs alongside its axle which should point up Rotate the finger assembly so the a...

Page 107: ...To ensure correct alignment wedge an object underneath the button to prevent it from moving and keep the stacker finger held in the raised position when attaching it When correctly installed the stack...

Page 108: ...nto the notches in the back of the stacker bin base Figure 5 14 Attaching Stacker Fingers Rotate the assembly up into place while lightly squeezing the front tabs These will snap into place Figure 5 1...

Page 109: ...stacker bins see Figure 5 16 The stacker bin positions are Top Side justifiers on top and bottom Middle three Side justifiers on bottom only Bottom No side justifiers Figure 5 16 Stacker Bins Top Just...

Page 110: ...6 1 Conveyor and Transport Assemblies 1 Stop all Jobs and power down the scanner 2 Check the transport area once a shift Open the scanner cover and clear the area of paper debris dust envelope flaps e...

Page 111: ...as needed When noticing lines appearing on the run screen image preview it is likely there is something toner white out paper glue etc attached to the CIS glass Wipe the CIS glass clean with a lint f...

Page 112: ...the tab on the feed assembly to clean the retard pad underneath Figure 5 18 Also clean the feed rollers that lead up to the feeder Use a cleaner such as Formula 409 to clean the feed mechanism on a we...

Page 113: ...alcon Statistics 114 6 1 1 Creating Statistic Reports 114 6 1 2 General Information 116 6 1 3 Overall System Performance Measures 117 6 1 4 Performance Details 118 6 1 5 Reject Terms 119 6 1 6 Jams 12...

Page 114: ...defined in the Statistics Reports Criteria window These two types of reports both have the following sections General Information Overall System Performance Measures Performance Details 6 1 1 Creating...

Page 115: ...ny jobs have been run that match the criteria selected above If N A appears to the right of the button there are no jobs to report that match the criteria listed Change your search criteria If a numbe...

Page 116: ...eld Run Type Type of run determined by setting the Default Batch Type Batch parameter Can be Singles Multis Stub Only Check Only Multis With Pages Unstructured Transactions Page Only Structured Transa...

Page 117: ...The formula for the Jam Rate is Rejects Number of pieces rejected Feed Rate Number of pieces per hour the Falcon is currently feeding The formula for the Feed Rate is Output Rate Number of pieces per...

Page 118: ...e formula for the Reference Output Rate is Reference Jam Clear Time Estimated time it takes to clear a jam This number is fixed at 20 seconds Table 6 2 Overall System Performance Measures terms contin...

Page 119: ...defined maximum allowable thickness Unable to Capture Image Results when the imager fails to capture the image within the period of time that it is expected to Unable to Process Image Results when an...

Page 120: ...sactionNot Complete Results when the current transaction does not fit the defined transaction criteria and a piece is identified as a page type that defines a new transaction Current Transaction Alrea...

Page 121: ...Response Missing Results when the software does not receive a response from the magnetic MICR when it is expecting one Cannot Process Printer Data Results when there is an error in sending the audit...

Page 122: ...nsor but it has not within the time period that we are expecting it Stacker Entry Sensor Missing Results when the controller is expecting to see a piece pass by the stacker entry sensor but it has not...

Page 123: ...sensor runout is greater than the maximum runout defined in the machine parameters Missing Piece at Straight Through Path Results when the piece was supposed to go to the stacker bypass bin but didn t...

Page 124: ...amage Exceeded Sensor is blocked Out Of Bounds Sensor Blocked The Out Of Bounds Sensor is blocked Out of Bounds Detected A piece is too tall for the imager Justification Sensor Blocked The Justificati...

Page 125: ...t thermal warning or thermal shutdown is detected by the stepper controller Stacker Motor Fault Detected This event can occur during a job activation of the stacker motor and a stall over current unde...

Page 126: ...X IO link port is unplugged and when the IO stepper board is powered off If either of those conditions are true and the scanner is running the controller will issue the IO Link Down Detected jam and C...

Page 127: ...Its intent is to alert the technician when Falcon believes the TMD needs servicing The need for servicing is determined when the automatic setting of the TMD DAC has been found to differ three or mor...

Page 128: ...tect sensor is blocked by something when the system is attempting to start up Lower Skew Detect Sensor Blocked Results when the lower skew detect sensor is blocked by something when the system is atte...

Page 129: ...m is attempting to start up Transport Door Open Results when the transport door is detected to be open during a run or when the system is attempting to start up ScanLink Plug in Requested a Stoppage R...

Page 130: ...ion ODI OXI and OII support the following states Final odi oxi oii Suspended Scanning odi_scan oxi_scan oii_scan These extensions appear based on the following Batch Parameter settings Require Image a...

Page 131: ...ness challenges for both today and tomorrow Our scalable Warehouse Document and Mail Automation solutions improve workflow accelerate change and drive efficiencies in infrastructure We are a family ow...

Page 132: ...OPEX Corporation 305 Commerce Drive Moorestown NJ 08057 4234 USA http www opex com...

Reviews: