_____________________________________________________________________________
IP POWER PAGE 13 OF 32
System settings with browser
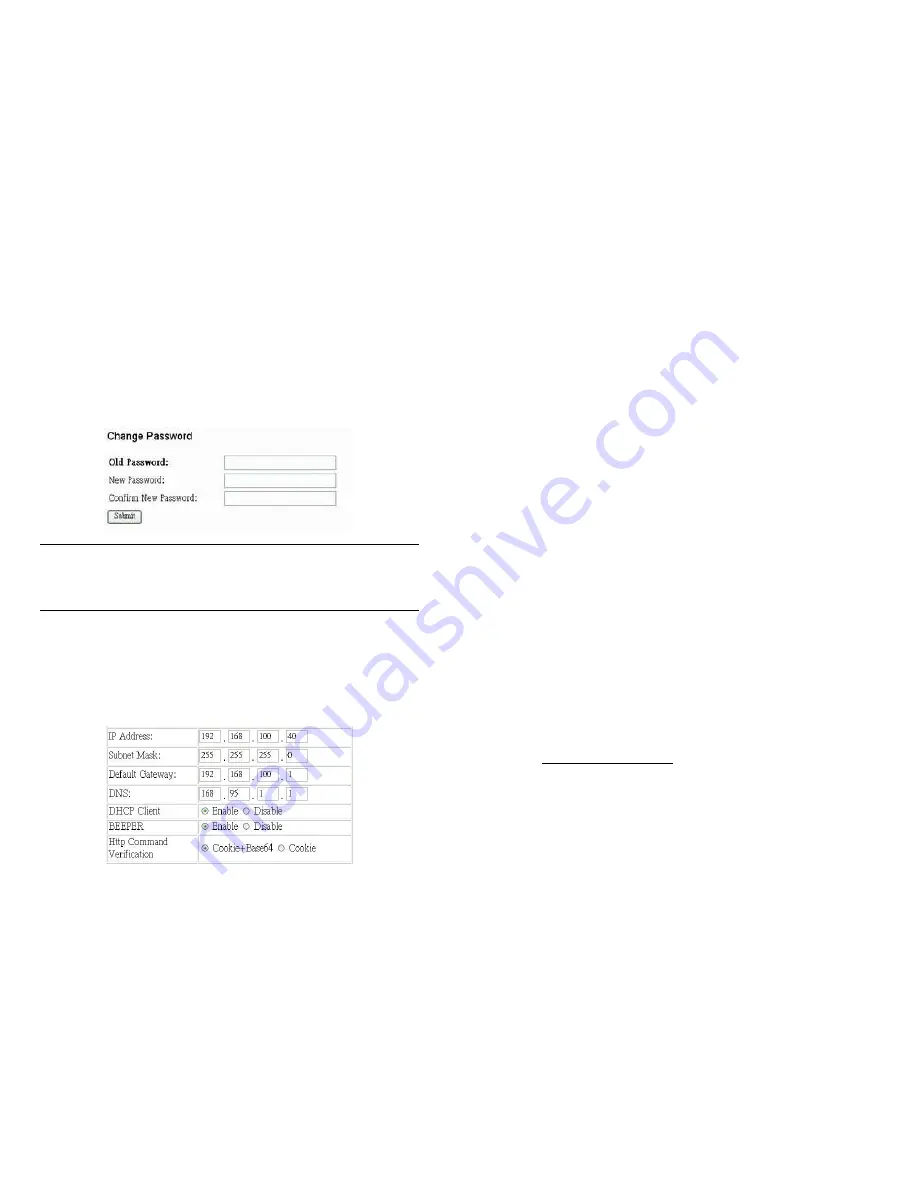
You may set the password, IP address, e-mail address, timer setting, perform an
online firmware update, and set the time of the IP Power through the IP Power
control web pages
Setting the password for IP Power
Select
Change password
from the left hand menu. The default password
12345678
.
You may change it to a password of your choosing (no longer than 8 characters).
Click
Apply
to save the change.
NOTE
If you lose or forget the admin password, enter the username
super user
at the log in webpage
and then click OK. Then turn the power off for a few seconds before turning the power back on.
The IP Power will to be reset to using the default password of
12345678
.
Note:
There is space
between
super
and
user
.
Setting the IP Power’s IP address
Select
Setup
from the left hand menu. Fill in the new IP Address, Subnet Mask,
Default Gateway, and DNS server address. If your network has a DHCP server
automatically allocating network settings, you may choose to enable the IP Power’s
DHP Client. The Beeper sound may also be enabled or disabled on this page.
_____________________________________________________________________________
IP POWER PAGE 14 OF 32
•
If the IP Power is connected to your Local Area Network (LAN):
You may set a fixed IP address or have it automatically assigned by a DHCP
server. It is suggested that you use a fixed IP address so that it is always
known.
After changing the IP Power’s IP address, type the new address in the address
field of your web browser. You can also use the
ipEdit.exe
tool to locate the IP
Power.
•
If the IP Power is connected to the Internet (WAN):
IP Address: Enter the IP address provided by your ISP. If IP Power is
working with a router, please refer to the network settings of the router.
The IP address format is: xxx.xxx.xxx.xxx: yyyyy, where yyyyy means
the port number ranging from 1 to 32767.
Subnet Mask: Enter the Subnet Mask provided by your ISP. If the IP Power
is working with a router, please refer to the network settings of the router.
Subnet Mask: from 0 to 254 ( xxx.xxx.xxx.0 ~ xxx.xxx.xxx.254)
Default gateway: Enter the Default Gateway provided by your ISP. If the IP
Power is working with a router, please refer to the network settings of the
router.
DNS Server: Enter the IP address of the DNS server provided by your ISP.
DHCP Client: Automatically obtain network settings from your ISP
If DHCP is disabled, you must set the TCP port and default gateway. If
DHCP is enabled, then the TCP port is preset to 80 (xxx.xxx.xxx.xxx:80)
and the default gateway will be assigned by the DHCP server.
If you specify a TCP port other than 80, enter it after the IP address of
the IP Power when accessing the IP Power control web pages, e.g.
http://xxx.xxx.xxx.xxx:yyyyy
•
Beeper Setting: Enable – activate the beeper sounds. Disable – turn off beep
sounds. When controlling the IP Power through the web pages, the beeper, if
enabled, beeps once to indicate an action has been successful
•
HTTP Command Verification specifies the HTTP authentication for the IP Power
to use:


