background image

_____________________________________________________________________________ 

  IP POWER                                                                                              PAGE 19 OF 32


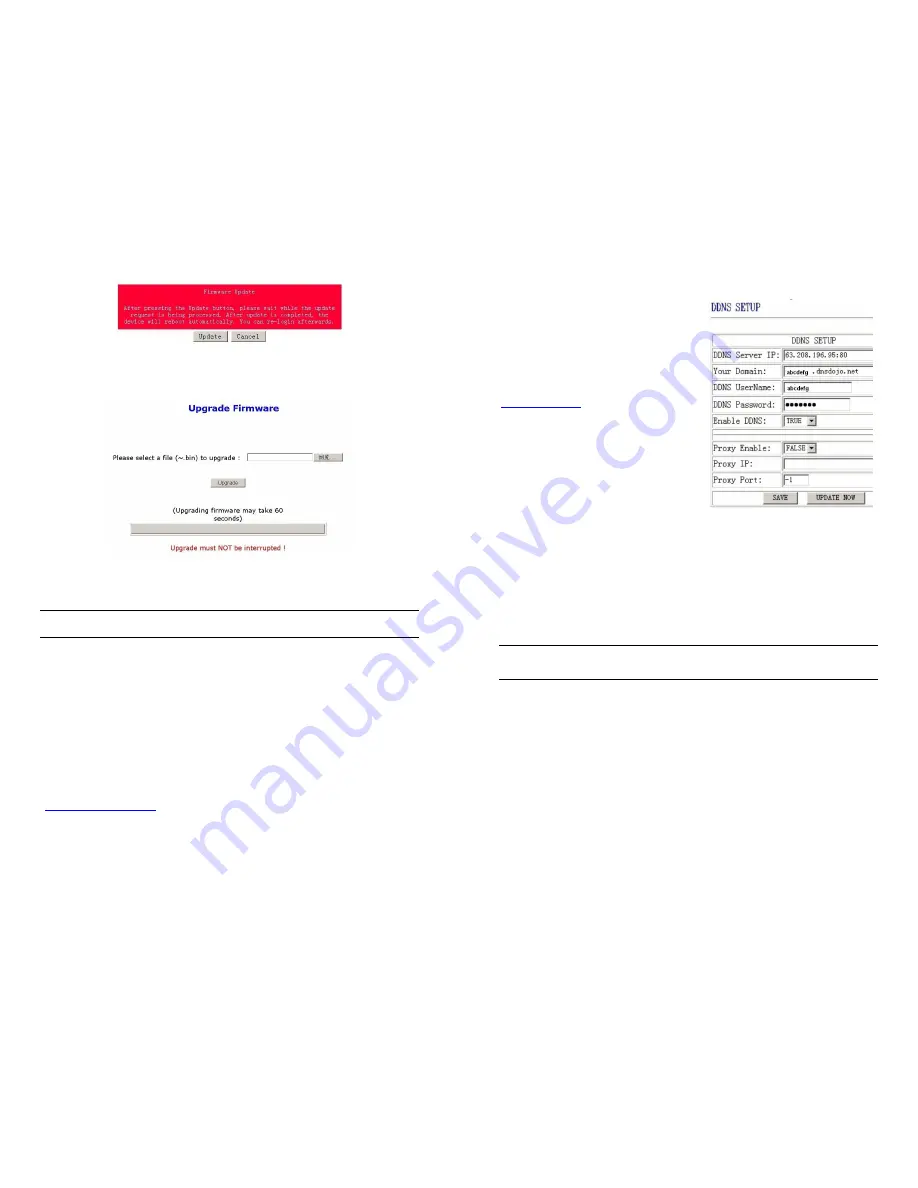
Warning: Do not click Update if you do not have a firmware update file.


Click 

Update

, the following window is displayed: 


Click

 Browse

 and locate the firmware update file.  Click 

Update 

to begin the 

update 

Note 

When the update is complete, you must 

wait at least one minute

 before you restart the IP Power 


7. DDNS Settings


When connecting to the Internet, the IP address you gain from ISP may be 
dynamically allocated, so it may change each time the Internet connection 
reconnects.  This may result in the IP Power becoming uncontactable to remote 
clients, as the new address is unknown. 
 
Dynamic DNS addresses this issue by updating DNS records whenever the IP address 
changes.  The IP Power can utilize the free service provided by DynDNS 
(

http://www.dyndns.com

) for this purpose.  The IP Power will always be contactable 

using its DynDNS address (e.g. ippower.dyndns.org), regardless of its IP address. 
 

_____________________________________________________________________________ 

  IP POWER                                                                                              PAGE 20 OF 32


First, create a DynDNS account and create an account.  Create a dynamic DNS host 
for the IP Power, e.g. ippower.dyndns.org. 
 
On the IP Power, select 

DDNS 

from the left 

hand menu.  Enter the IP address and port 
of the DynDNS server.  You can find this out 
on your PC by selecting 

Start 

 Run


then 

type in

 cmd 


and typing 

ping 

www.dyndns.com

.  Enter the number in 

brackets (e.g. 

63.208.196.66

) followed by  

:80 

to denote the port. 

 
In 

Your Domain

, enter the IP Power’s 

DynDNS address, e.g. 

ippower.dyndns.org

.  

Enter the 

Username 

and 

Password

 for the 

DynDNS account you created.  Ensure 

Enable DDNS 

is set to 

TRUE.

  Click 

Save

 
Now, each time the IP Power is powered on or 

Update Now 

is clicked, the DynDNS 

address will be updated to the IP Power’s current IP address.  Note that the change 
may take several minutes to propagate to your local DNS server. 
 
If the IP Power cannot reach the DynDNS server without going through a proxy 
server, select 

TRUE 

next to 

Proxy Enable

. Enter the IP address of the proxy server in 

Proxy IP 

and the port in 

Proxy Port

.


NOTE 

The first time you configure DDNS, click 

Update Now

 to set the DynDNS address. 


8. Control Using Telnet, HTTP & SNMP Commands 


The IP Power is a principally a browser controlled unit, with power control effected 
over the LAN using HTTP commands or a browser. However it also provides 
alternate methods for directly setting and getting the status of the power outlets 
through Telnet commands and HTTP commands (which may be useful for 
controlling the IP Power’s outlets using an automated script) and through SMNP.   
 

Power outlet status and control using HTTP commands


The format of the HTTP command is: 

Summary of Contents for IP Power 9258

Page 1: ...5A current rating and use power OUT cables with 10A rating for each power outlet For the European Australian model IEC320 C13 220 250V outlets the individual max output current per outlet is 6A and th...

Page 2: ...ion Update details Feb 2007 1 1 Covers 1 38 firmware features July 2009 1 2 Added Telnet and SNMP firmware 1 5 2 and serial command line details firmware 1 5 3 WARNING Any changes to this equipment wi...

Page 3: ...OF 32 1 Introduction The IP power 9258 is a web browser controlled power switch that can be used easily for industrial or commercial power control With the remote network control technology a user co...

Page 4: ...20V use the 15A power cable Hardware installation Connect the IP Power to the hub using a Cat5 network cable for remote control you may then connect the hub or router to the Internet Connect the AC IN...

Page 5: ...s IP address to be on the same subnet as the IP Power by default 192 168 0 50 in Control Panel Network Connections Local Area Connection Properties Internet Protocol TCP IP Properties The default user...

Page 6: ...ol Using Browser To access the IP Power control web pages simply type the IP address of the IP Power into your web browser s address field _____________________________________________________________...

Page 7: ...ed IP address so that it is always known After changing the IP Power s IP address type the new address in the address field of your web browser You can also use the ipEdit exe tool to locate the IP Po...

Page 8: ...b pages Each receiver may be no more than 50 characters Subject The subject of the mail no more than 50 characters Mail Body Type the content of the mail here It must not be left blank _______________...

Page 9: ...onnected to the motherboard or the network port must be integrated into the motherboard After setting up the motherboard and network card use the WOL function by following two steps Go to Network Wake...

Page 10: ...nd menu Enter the IP address and port of the DynDNS server You can find this out on your PC by selecting Start Run then type in cmd and typing ping www dyndns com Enter the number in brackets e g 63 2...

Page 11: ...In the above example all outlets are off Example 2 The HTTP command http admin 12345678 192 168 0 50 Set cmd CMD SetPower P60 1 P61 0 P 62 0 P63 1 ____________________________________________________...

Page 12: ...mand syntax is case sensitive so be selective when using upper and lower case in command format The free tool wget is useful for sending these HTTP commands For example to send the command in Example...

Page 13: ...ans power OFF _____________________________________________________________________________ IP POWER PAGE 26 OF 32 Control outlet command snmpset v 1 c public 192 168 1 55 1 3 6 1 4 1 92 58 2 1 0 inte...

Page 14: ...for a full 5 seconds or until a sustained beep noise is heard this enables manual control mode which can be identified by the flashing outlet lights The outlet light that is not flashing is the one c...

Page 15: ...CONSOLE RS232 port to one of the console server serial ports for CM4001 2 this interconnection will use a standard UTP Cat 5 cable with a 319000 adapter at each end and all other console servers will...

Page 16: ...be a30 3 1c 7f 15 4 0 1 0 11 13 1a 0 12 f 17 16 0 0 0 0 0 0 0 0 0 0 0 0 0 0 0 0 port Enable serial command mode ipp_chat 0 ADEBUG9258 Z IP9258 DEBUG ON dev null Get current status status_nibble ipp_ch...

Reviews: