Onkyo CR-255DAB Instruction Manual Download Page 24

24

Listening to the Radio

—Continued


With the Preset Write function, you can manually preset 
individual DAB and FM radio stations. Presets make it 
easy to select your favorite stations and eliminate the 
need to tune the radio manually each time you want to 
change stations.

FM stations can also be preset automatically (see 
page 23).

About Presets

You can store up to 40 DAB and 40 FM stations as 
presets.

1

Tune into the station that you want to store 
as a preset (see page 22).

2

Press and hold down the [PRESET 
MEMORY] button till the preset number 
flashes (about 3 seconds).

When the preset has been stored, the preset number 
will change from blinking to steadily lit.
Preset numbers are automatically stored starting 
with the lowest unused number.
If all 40 DAB or 40 FM presets have been set, the 
display will indicate “Preset FULL,” and no further 
presets can be stored. You’ll need to erase an 
existing preset before storing another one.

You must store some presets before you can select them 
(see pages 23 to 24).

1

Press the [TUNER] button repeatedly to 
select “DAB” or “FM”.

Alternatively, you can use the CD receiver’s 
[INPUT] button.
The preset you selected the last time you listened to 
the radio will be selected.

2

Use the [

e

PRESET]/[PRESET

r

] buttons to 

select a preset.

Press the [

e

PRESET] button to select the previous 

preset. Press the [PRESET

r

] button to select the 

next preset.

Tip:

• If you press the remote controller’s [TUNER] button 

while the CD receiver is on Standby, it will turn on 
automatically and the station that you listened to last 
time will be heard.

1

Select the preset you want to erase.

2

Press and hold down the [CLEAR] button to 
erase the preset (about 3 seconds).

When the preset has been erased, presets following 
the erased preset will be renumbered forward and 
redisplayed.

1

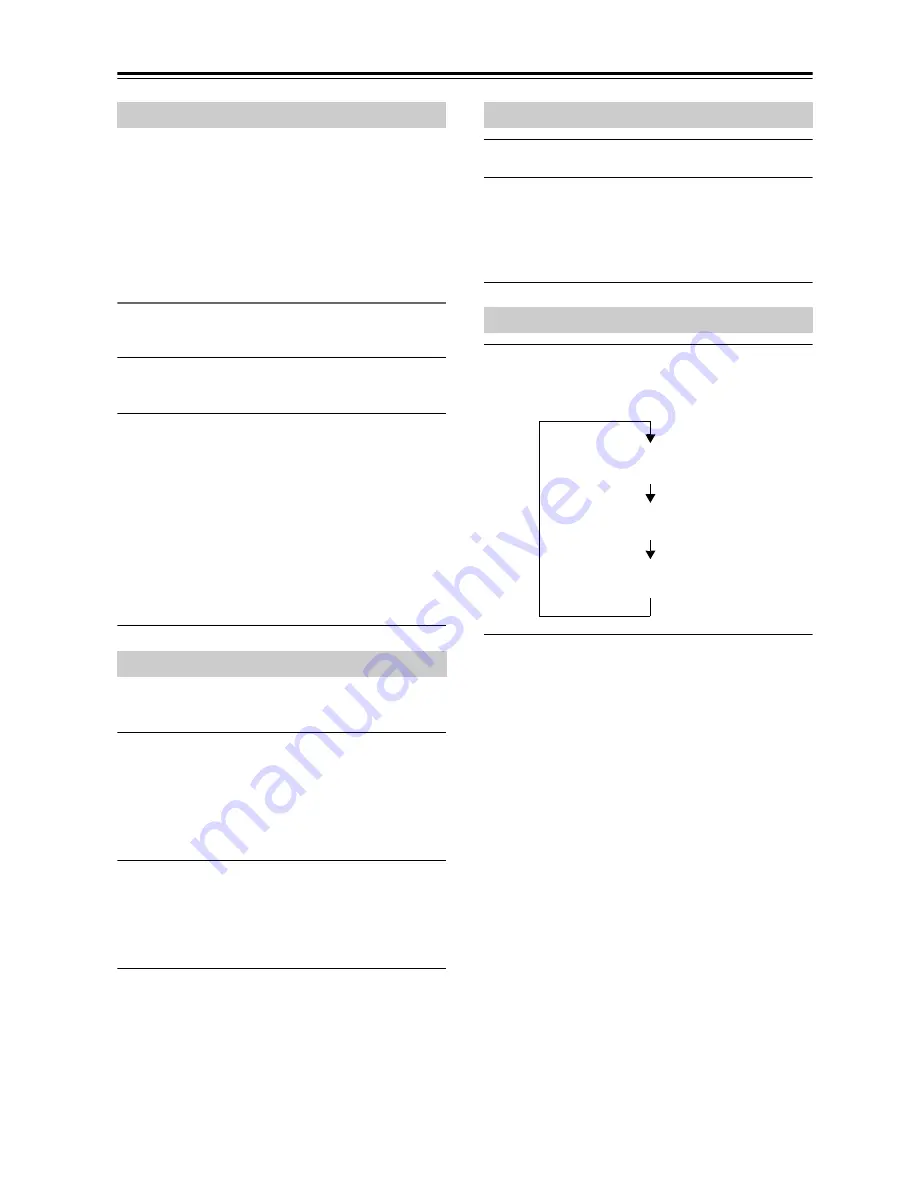
Press the [DISPLAY] button repeatedly to 
display the following RDS information.

RDS can be viewed on this unit only in areas where RDS 
broadcasts are available.

What is RDS?

RDS stands for Radio Data System and is a method of 
transmitting data in FM radio signals. It was developed 
within the European Broadcasting Union (EBU) and 
many European FM radio stations use it these days.

The unit supports and displays Program Service Name 
(PS) and Radio Text (RT) RDS data.

The RDS indicator appears on the display when the unit 
is tuned to an FM station that supports RDS.

Note:

• If the signal from an RDS station is weak, RDS data 

may be displayed intermittently or not at all.

• The message “Waiting” may appear while the PS/RT 

data is being received.

Presetting DAB/FM Stations Manually

Selecting Preset Stations

Erasing Presets

Receiving RDS

Frequency and preset number

Program Service Name

Radio Text (if available)

Summary of Contents for CR-255DAB

Page 1: ...s and plugging it in Following the instructions in this manual will enable you to obtain optimum performance and listening enjoyment from your new CD Receiver System Please retain this manual for futu...

Page 2: ...aratus does not operate normally by following the operating instructions Adjust only those controls that are covered by the operating instructions as an improper adjustment of other controls may resul...

Page 3: ...astic items on this unit for a long time because they may leave marks on the case This unit s top and rear panels may get warm after prolonged use This is normal If you do not use this unit for a long...

Page 4: ...e needs to be replaced the replacement fuse must approved by ASTA or BSI to BS1362 and have the same ampere rating as that indicated on the plug Check for the ASTA mark or the BSI mark on the body of...

Page 5: ...sconnecting cables 7 Microphone feedback The speakers contain powerful magnets Do not put metal items such as screwdrivers close to the speakers as they may be attracted toward the magnet causing inju...

Page 6: ...controller for a long time remove the batteries to prevent damage from leakage or corrosion Expired batteries should be removed as soon as possible to prevent damage from leakage or corrosion Caution...

Page 7: ...l tracks USB Flash Drive MP3 playback from USB flash drives Timer and Clock Programmable timer Sleep timer The alarm play function of the iPod iPhone can power on the CD receiver and switch the input...

Page 8: ...6 Playing CDs Playing CDs 17 Playing CDs 17 Displaying CD Information 17 Selecting MP3 Files 18 Displaying MP3 Information 19 Random Playback 19 Repeat Playback 19 Playing Your iPod iPhone Playing You...

Page 9: ...ious 7 e PRESET button 17 21 24 d Next 6 PRESET r button 17 21 24 e Stop 2 button 17 21 28 f Play Pause 1 3 button 17 18 19 20 21 25 g VOLUME buttons 16 21 h Headphones jack 16 i USB port 20 25 j Disp...

Page 10: ...or g MUTING indicator h Playback mode indicators i TIMER indicators j Tuning indicators k RDS indicator l FILE indicator m TRACK indicator n Message area o DISC TOTAL and REMAIN indicators a DAB FM AN...

Page 11: ...Gr 17 21 22 buttons f VOLUME buttons 16 21 g MENU button 18 21 22 23 h Arrow q w e r buttons and ENTER button 16 18 21 22 23 25 26 27 i MODE button 18 22 23 j DIMMER button 16 k SHUFFLE button 19 21 l...

Page 12: ...um of 299 folders can be recognized on a single CD A maximum of 648 files can be recognized in a single folder Playback from USB Flash Drives MP3 files recorded on a USB flash drive can be played with...

Page 13: ...as benzine or paint thinner as they can impregnate the disc surface Connecting Speakers Connect the right speaker to the CD receiver s right R SPEAKERS terminals Connect the left speaker to the left L...

Page 14: ...a commercially available outdoor FM antenna instead Note Outdoor FM antennas work best outside but usable results can sometimes be obtained when installed in an attic or loft For best results install...

Page 15: ...ct the included power cord to any other device Doing so may cause malfunctions or accidents Do not unplug the power cord from the AC INLET while the other end of the cord is still connected to an AC o...

Page 16: ...is set to standby You can connect a pair of stereo headphones 3 5 mm phone plug to the CD receiver s headphones jack for private listening Note Always turn down the volume before connecting your head...

Page 17: ...st forward or the Fast Reverse 5 button to fast reverse To remove the CD Press the CD receiver s 0 button to open the disc tray Information Displayed When Playback is Stopped Selecting Tracks To retur...

Page 18: ...an press the ENTER button to return to the upper level folder 3 Use the arrow q w buttons to select the MP3 files within the folder The name of the MP3 file inside the folder is displayed To select a...

Page 19: ...f MP3 files the same song might be played Random playback can be set when the input source is set to CD or USB 1 Press the SHUFFLE button until the RANDOM indicator appears 2 To start random playback...

Page 20: ...the display of the CD receiver If your iPod iPhone is not connected properly No Device appears Note To prevent damage to the Lightning connector do not twist or force your iPod iPhone into the dock a...

Page 21: ...the Next 6 button repeatedly to select subsequent tracks Fast Forward or Fast Reverse During playback press and hold the Fast Forward 4 button to fast forward or the Fast Reverse 5 button to fast rev...

Page 22: ...ons available in your area Once the scanning process is complete the first station that was detected is selected Using the Scan Function Manually If a new DAB station is introduced or you move to a ne...

Page 23: ...your favorite stations and eliminate the need to tune the radio manually each time you want to change stations As an alternative to this Auto Preset function there s also a Manual Preset function that...

Page 24: ...to select a preset Press the ePRESET button to select the previous preset Press the PRESETr button to select the next preset Tip If you press the remote controller s TUNER button while the CD receiver...

Page 25: ...is shipped from the factory the time display format is set to 24 hour time Set the current hour as it would appear in 24 hour time If you want to set the current hour as 12 hour time press the DISPLAY...

Page 26: ...lled and the previous display will reappear 3 Use the arrow q w buttons to select the source and then press ENTER You can select the following sources DAB FM CD iPod USB LINE In the display TIMER and...

Page 27: ...ents Canceling the Sleep Timer To cancel the sleep timer press the SLEEP button repeatedly until Sleep Off appears Note If the timer turns the power on the SLEEP indication will light If you perform a...

Page 28: ...ng plugs are pushed in all the way see page 15 The sound quality can be affected by strong magnetic fields such as that from a TV Try moving any such devices away from the CD receiver If you have any...

Page 29: ...ed to the iPod dock will be selected as a priority and the iPod iPhone connected to the USB port with the USB cable cannot be played Make sure your iPod iPhone is properly seated in the CD receiver s...

Page 30: ...age 14 Move the CD receiver away from a nearby TV or computer Cars or airplanes can cause noisy interference The radio signal will be weakened if it has to pass through a concrete wall before reaching...

Page 31: ...e display indicates when you press the CLOCK CALL button A power failure has occurred and the clock has stopped Set the clock again see page 25 Standby power consumption Charging will begin when you c...

Page 32: ...8 00 MHz DAB DAB BAND III 5A 13F Preset channel FM 40 DAB 40 Playable media CD and CD R CD RW music CDs and MP3 CDs Playable media USB Flash Drive MP3 Power supply AC 220 240 V 50 60 Hz Power consumpt...

Page 33: ...33 Memo...

Page 34: ...34 Memo...

Page 35: ...35 Memo...

Page 36: ...Unit 1033 10 F Star House No 3 Salisbury Road Tsim Sha Tsui Kowloon Hong Kong Tel 852 2429 3118 Fax 852 2428 9039 http www hk onkyo com 1301 555 Tower No 555 West NanJing Road Jing an District Shangh...

Reviews: