7. Connection Procedure
10
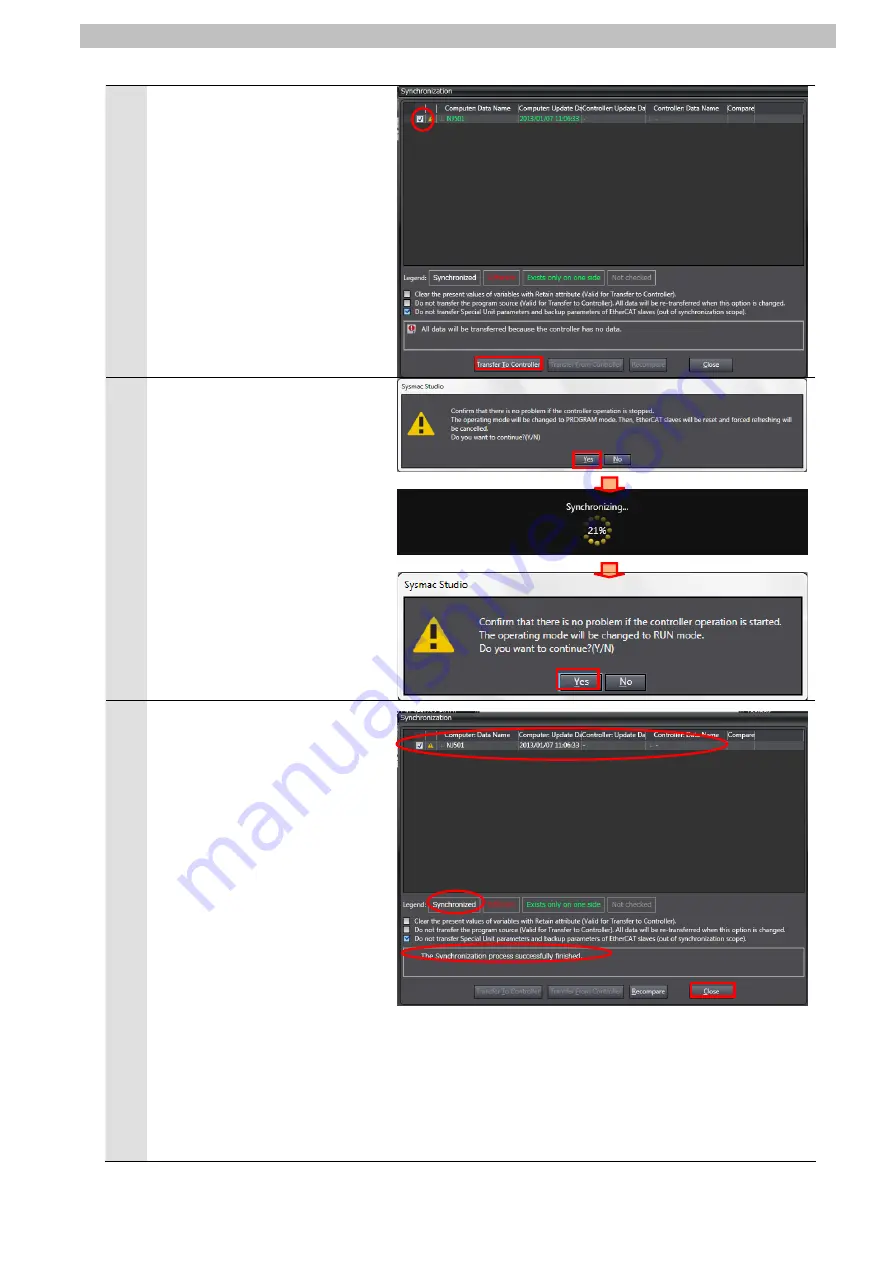
The Synchronization Dialog Box
is displayed.
Confirm that the data to transfer
(NJ501 in the right figure) is
selected. Then, click the
Transfer to Controller
Button.
*After executing the
Transfer to
Controller
, the Sysmac Studio
project data is transferred to the
Controller and the data are
compared.
11
A confirmation dialog is
displayed. Click the
Yes
Button.
A screen stating "Synchronizing"
is displayed.
A confirmation dialog box is
displayed. Click the
Yes
Button.
12
Confirm that the synchronized
data is displayed with the color
specified by “Synchronized” and
that a message is displayed
stating "The synchronization
process successfully finished".
If there is no problem, click the
Close
Button.
*A message stating "The
synchronization process
successfully finished" means
that the project data of Sysmac
Studio and that of the Controller
match.
*If the synchronization fails,
check the wiring and repeat the
procedure described in this
section.
24
Summary of Contents for V750 series
Page 51: ...9 Program 2 Initialization processing 48...
Page 52: ...9 Program 49...
Page 53: ...9 Program 3 Connect processing 50...
Page 54: ...9 Program 4 Send processing 51...
Page 55: ...9 Program 5 Receive processing 52...
Page 56: ...9 Program 53...
Page 57: ...9 Program 6 Close processing 54...
Page 58: ...9 Program 7 Processing number error process 55...
Page 60: ...9 Program Program 57...
Page 62: ...9 Program Program 59...
Page 64: ...9 Program Program 61...
Page 78: ...2013 0911 P543 E1 01...


