background image

49

Setting Editing Screens

Section 4-2

2.

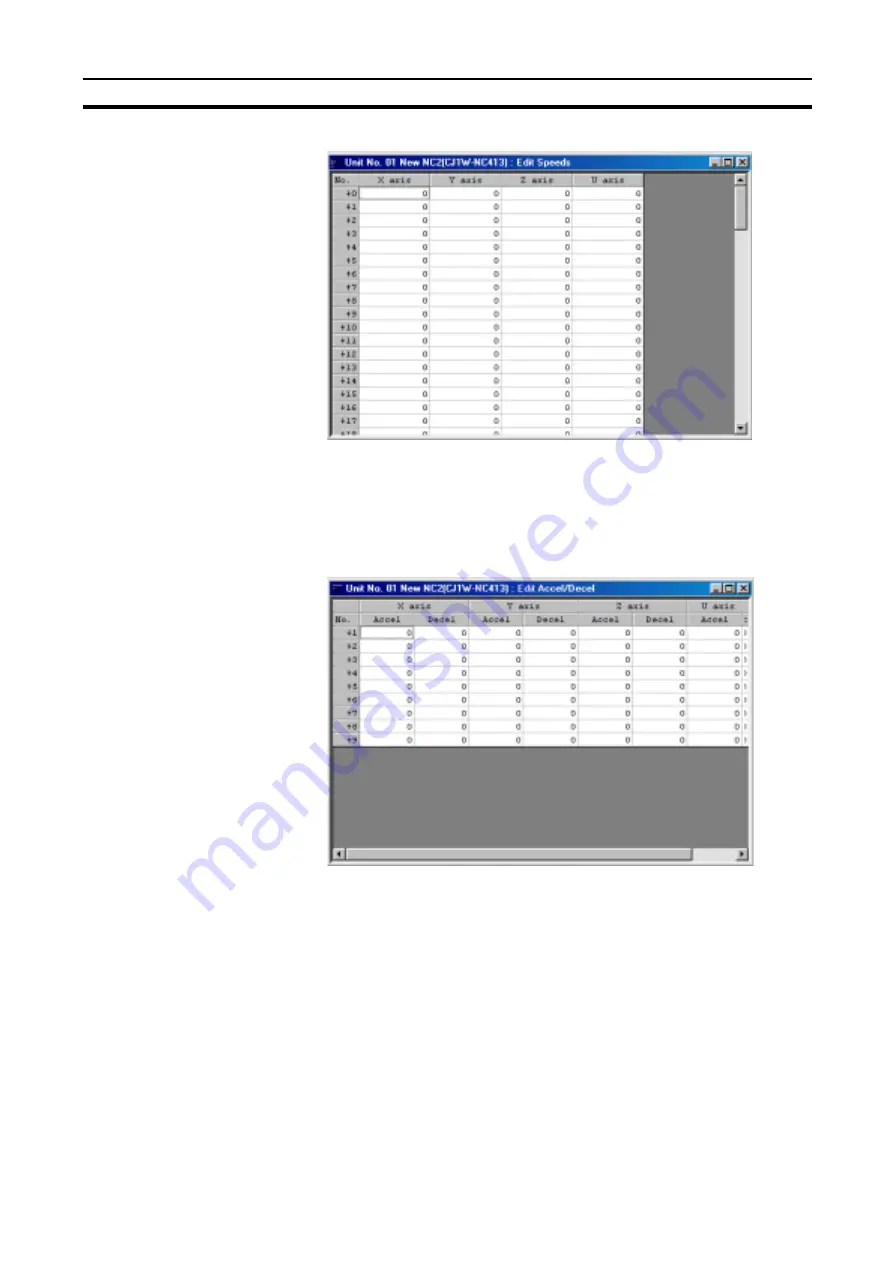
The following screen will be displayed.

To Display the 
Acceleration/Deceleration 
Editing Screen

1,2,3...

1.

Under the NC on the project tree, either double-click Edit Accel/Decel, or
select it and press the Enter Key

2.

The following screen will be displayed.

To Display the Dwell Time 
Editing Screen

1,2,3...

1.

Under the NC on the project tree, either double-click Edit Dwell Time, or
select it and press the Enter Key

Summary of Contents for SYSMAC W398-E1-1

Page 1: ...23 5 7 21 0 18 Cat No W398 E1 1 SYSMAC WS02 NCTC1 E CX Position...

Page 2: ......

Page 3: ...WS02 NCTC1 E CX Position Operation Manual Produced July 2001...

Page 4: ...iv...

Page 5: ...d it is not used as the abbreviation for any thing else Visual Aids The following headings appear in the left column of the manual to help you locate different types of information Note Indicates info...

Page 6: ...ssumed with respect to the use of the information contained herein Moreover because OMRON is con stantly striving to improve its high quality products the information contained in this manual is subje...

Page 7: ...up and Basic Procedures 9 2 1 Installation 10 2 2 Connecting to a PC 13 2 3 Basic Operations 18 SECTION 3 Creating New Projects 37 3 1 Creating New Projects 38 3 2 Adding and Deleting PCs 39 3 3 Addin...

Page 8: ...N 7 Transferring and Verifying Data 73 7 1 Downloading Data 74 7 2 Uploading Data 75 7 3 Verifying Data 77 7 4 Writing Data to Flash Memory 78 SECTION 8 Monitoring NCs 81 8 1 Monitoring NCs 82 8 2 Mul...

Page 9: ...cting online Section 7 provides information on data transfer and verification operations between the CX Position and NC Units and about operations for writing data transferred to NC Units into the NC...

Page 10: ......

Page 11: ...on is important for the safe and reliable application of CX Position You must read this section and understand the information contained before attempting to set up or operate the CX Position 1 Intend...

Page 12: ...before attempting to use CX Position and keep this manual close at hand for reference during operation WARNING It is extremely important that CX Position and related devices be used for the specified...

Page 13: ...pe Origin proximity input signal type Origin input signal type Emergency stop input function No origin specification Operating mode selection Origin search operation Origin detection method Origin sea...

Page 14: ...o condensation as the result of severe changes in tem perature Locations subject to corrosive or flammable gases Locations subject to dust especially iron dust or salts Locations subject to exposure t...

Page 15: ...is used 1 1 Introduction 2 1 1 1 What Is CX Position 2 1 1 2 Applicable NC Units 2 1 1 3 Features 2 1 1 4 Applicable Computers 3 1 1 5 CX Position Data 3 1 1 6 Software Structure 3 1 1 7 Checking the...

Page 16: ...ting in Project Units The CX Position enables data for several NC Units 96 NC Units max per PC on several PCs 1 000 max to be handled as 1 project Data is displayed in tree format with parameter data...

Page 17: ...he CS1W NC or CJS1W NC 1 1 4 Applicable Computers The CX Position can be used on computers that satisfy the following condi tions 1 1 5 CX Position Data The CX Position is used to make project files w...

Page 18: ...firm that the contents of the package are as described below Model Number Confirm that the following details are correct CX Position Package The CX Position software package consists of the following...

Page 19: ...7 28 29 30 31 32 33 34 35 36 37 38 39 0 1 2 3 4 5 6 7 8 9 10 11 12 13 14 15 16 17 18 19 20 21 22 23 24 25 26 27 28 29 30 31 32 33 34 35 36 37 38 39 NC Unit CS1W NC413 433 CPU Unit CS1 Series Power Sup...

Page 20: ...r present position I O sta tus and error code for an NC Unit page 82 Monitor Units Used to display the sequence numbers present positions I O sta tuses and error codes for 4 NC Units page 82 Automatic...

Page 21: ...using an RS 232C cable Connected to the peripheral port on the CPU Unit using a peripheral cable or via Ethernet Connected to the RS 232C port on the CPU Unit using an RS 232C cable Networks for con n...

Page 22: ...guration and Startup Refer to 7 1 Downloading Data Refer to SECTION 8 Monitoring NCs Refer to 7 4 Writing Data to Flash Memory Save the project Initialize the NC Units and CPU Unit Make communications...

Page 23: ...2 2 Connecting to a PC 13 2 2 1 Connecting via Host Link SYSWAY CV 14 2 2 2 Connecting via Ethernet 18 2 3 Basic Operations 18 2 3 1 Starting 18 2 3 2 Quitting 19 2 3 3 Basic Window 20 2 3 4 Displayin...

Page 24: ...eway Version 2 4 For details on preparation required before installing FinsGateway refer to the FinsGateway User s Manual PDF data 2 1 1 Installing CX Position and FinsGateway Use the following proced...

Page 25: ...elect the desired drive and folder 5 Click Next The Program Folder Dialog Box will be displayed Select the desired program folder The default program folder is CX Position 6 Click Next The CX Position...

Page 26: ...m Files OMRON FinsServer95 No changes are required to install in the folder that is displayed To install in a different folder click Browse and select the desired drive and folder 13 Click Next The Pr...

Page 27: ...peration may not be completed successfully 2 2 Connecting to a PC Note If OMRON Support Software that communicates using CX Server e g CX Programmer CX Protocol or CX Motion or an application that use...

Page 28: ...ipheral port or RS 232C port Connection Method Note Use the CS1W CN118 to connect to the peripheral port of the CPU Unit using one of the RS 232C cables shown on the right XW2Z in the way shown below...

Page 29: ...mmunica tions mode Model number Length Remarks CPU Unit Built in peripheral port IBM PC AT or compatible D SUB 9 pin male Serial Unit SYSWAY CV CS1W CN226 2 0 m CS1W CN626 6 0 m Built in RS 232C port...

Page 30: ...t on Unit Computer Port on computer FinsGateway communica tions driver Protocol serial communica tions mode Model number Length Remarks CPU Unit Built in RS 232C port D SUB 9 pin female IBM PC AT or c...

Page 31: ...DR RS CS CI 1 2 3 4 5 6 7 8 9 FG SD RD RS CS 5V DR ER SG CS CJ series CPU Unit IBM PC AT or compatible computer Signal Pin No Pin No Signal RS 232C interface RS 232C interface D SUB 9 pin Cable conne...

Page 32: ...Version 3 is not installed Ethernet Units Use one of the following Ethernet Units 2 3 Basic Operations Descriptions of CX Position s basic operations is given below 2 3 1 Starting 1 2 3 1 Click Start...

Page 33: ...er of the win dow After editing a project if the project has not been saved the following dialog box will be displayed 2 Click Yes to save the changes made Click No if it is not necessary to save the...

Page 34: ...created and when online operations are performed The menus that can be used with CX Position are displayed on the menu bar The functions that can be used with CX Position are displayed as icons on th...

Page 35: ...the cursor is at a Plus Icon the corresponding sub hierarchy will be displayed If the Left Key is pressed when the cursor is at a Minus Icon the cursor will move to the next level up in the hierarchy...

Page 36: ...he N Key i e the underlined letter 2 3 5 Moving and Copying NC Unit Data NC Unit data such as parameters sequences and speeds can be moved to other NC Units in the same project in units of NC Units ei...

Page 37: ...g box below will be displayed Set a new unit number i e a unit number that is not used at that PC Changing this setting will change the unit number of the NC Unit itself The dialog box below indicates...

Page 38: ...e scroll bar and to switch between decimal and hexadecimal display of NC Unit data Alt V Tool Used to make optional settings font number of files displayed on the recently used file list default displ...

Page 39: ...Unit for a PC Remove Removes a specified PC or NC Unit from a project Del Undo Undoes the previous operation Ctrl Z Cut Used to move a specified NC Unit in the project tree to another PC Used to move...

Page 40: ...l data from a specified NC Unit to a project Verify Compares editing data with the data of a specified NC Unit Write Flash Mem ory Writes NC Unit data to flash memory Monitor Monitors NC Unit operatin...

Page 41: ...arranged hori zontally Tile Vertically Displays editing windows arranged verti cally Arrange Icons Aligns editing windows represented as icons Close All Closes all open editing windows Project Moves...

Page 42: ...New NC or Select a PC Right click New NC 3 3 1 Displaying the prop erties for a project PC or NC Unit Select a PC or NC Unit File Properties or Select a PC Right click Properties 3 1 Removing a PC or...

Page 43: ...lect Edit NC Parameters in a project and press Enter 4 3 2 Editing sequence data Select Edit Sequence in a project and double click Select Edit Sequence in a project and press Enter 4 4 Editing speed...

Page 44: ...onitoring an NC Unit Online Monitor 8 1 Monitor Units Online Monitor Units F 8 2 Automatic setting of project Online Automatic NC Search 7 2 2 Monitoring operating memory area Online Monitor NC Operat...

Page 45: ...ber Function Number Function 1 Creates a new project 11 Inserts the clipboard con tents at the insertion point 2 Opens an existing project 12 Download 3 Saves the active project 13 Upload 4 Print 14 V...

Page 46: ...Recently Used Files List 1 2 3 1 Click Tool Option The Option Dialog Box will be displayed 2 Under Numbers of recent used files either enter a number directly or se lect a number from the drop down li...

Page 47: ...e display format can also be changed by right clicking in the editing win dow and selecting either Decimal or Hexadecimal from the pop up menu 2 Hexadecimal cannot be used if the unit setting is eithe...

Page 48: ...rst few letters of the word to be searched for and press Enter If a matching word is found it is displayed in reverse video Click Display or double click to display the information for that word It is...

Page 49: ...35 Basic Operations Section 2 3 Displaying Unit Errors Use the following procedure to display help for NC Unit errors 1 2 3 1 Click Help Unit Error The Error Code Help Dialog Box will be displayed...

Page 50: ...Section 2 3 2 Click the relevant error code Information about that error code will be dis played Displaying CX Position Version Information 1 2 3 1 Click Help Version The CX Position version informati...

Page 51: ...for adding and deleting Programmable Controllers PCs and Position Control Units NC Units 3 1 Creating New Projects 38 3 2 Adding and Deleting PCs 39 3 2 1 Adding a PC 39 3 2 2 Deleting a PC 40 3 3 Add...

Page 52: ...New press the Ctrl N Keys or select the New Project Icon from the toolbar 2 To change the project name highlight the project and either select File Properties or right click and select Properties from...

Page 53: ...pe settings to the FinsGateway set tings Use the following settings when connecting using Host Link SYSWAY CV and the default FinsGateway Serial Unit driver settings Network Address 0 Node Address 240...

Page 54: ...ve DEL from the pop up menu 2 A dialog box will be displayed asking Do you want to delete Click the OK Button The Node Address in the Network Type field must be set to this value default setting for N...

Page 55: ...1 2 etc is the default name 4 Set the NC Type by clicking on the NC Type drop down list and selecting 5 Select the Unit No allocated to the NC Unit as a Special I O Unit 6 Enter a comment if required...

Page 56: ...1 Create a PC by either select Edit New PC or right click and select New PC from the pop up menu 2 Select the PC from the project tree and then select Online Automatic NC Search The Automatic NC Sear...

Page 57: ...Editing Parameter Settings 55 4 3 1 Parameter Setting Editing Screen 55 4 3 2 Editing Parameter Settings 55 4 4 Editing Sequence Settings 56 4 4 1 Sequence Editing Screen 56 4 4 2 Editing Sequence Se...

Page 58: ...n Reverse mode 1 Reverse mode 2 or Single direction mode Reverse mode 1 Ori search method Method 0 Method 1 Method 2 or Method 3 Method 0 Ori search dir origin search direction Clockwise CW or counter...

Page 59: ...c imal format by setting the display format 2 Ranges given in the table are for when the displayed value s unit is set to Pulse When the set unit is millimeters or inches and the pulse rate is set to...

Page 60: ...nly the X and Y axis settings are used for the CS1W NC213 233 and CJ1W NC213 233 Settings can be entered and displayed in either hexadecimal or decimal format depending on the setting of the display f...

Page 61: ...llowing screen will be displayed after creating a new project 4 2 1 Displaying Setting Editing Screens Use the following procedures to display individual Setting Editing Screens in project window To D...

Page 62: ...ng Screen 1 2 3 1 Under the NC on the project tree either double click Edit Sequence or se lect it and press the Enter Key 2 The following screen will be displayed To Display the Speed Editing Screen...

Page 63: ...iting Screen 1 2 3 1 Under the NC on the project tree either double click Edit Accel Decel or select it and press the Enter Key 2 The following screen will be displayed To Display the Dwell Time Editi...

Page 64: ...on 4 2 2 The following screen will be displayed To Display the Zone Editing Screen 1 2 3 1 Under the NC on the project tree either double click Edit Zone or select it and press the Enter Key 2 The fol...

Page 65: ...ys minimize and close screens and arrange their contents Screens can also be displayed and minimized by clicking directly on the upper right screen buttons Click a minimized screen or on the left side...

Page 66: ...ttings Entering Settings Using List Numbers 1 2 3 1 In the Setting Editing Screen enter the desired settings directly 2 Press the Enter Key or use the Up or Down Keys to set the setting Note 1 Setting...

Page 67: ...splay Format on Startup Set the display format when starting up CX Position by selecting Tools Options Default Display Format Decimal is the default display format To switch to hexadecimal display sel...

Page 68: ...Axis Settings For 2 axis and 4 axis NC Units data can be copied from one axis to another axis by selecting the source and destination axes Applicable NC Units 4 axis NCs CS1W NC413 NC433 and CJ1W NC4...

Page 69: ...tree and either double click or press the Enter Key Example The following will be displayed as the 4 axis NC Unit parameter Set ting Editing Screen 4 3 2 Editing Parameter Settings Select a setting or...

Page 70: ...2 5 Copying Axis Settings for details 1 2 3 1 Select Edit Copy Axis 2 Under From and To select the axes to be copied from and to respectively 3 Click the OK Button 4 4 Editing Sequence Settings 4 4 1...

Page 71: ...opy Axes For 2 axis and 4 axis NC Units data can be copied from one axis to another axis by selecting the source and destination axes Refer to 4 2 5 Copying Axis Settings for details 1 2 3 1 Select Ed...

Page 72: ...ever that the maximum speed of individual axes does not exceed 500 000 pps or the maximum speed set in the parameter settings Example The following will be displayed as the Speed Setting Editing Scree...

Page 73: ...cursor will move to the next setting Example The following will be displayed as the Acceleration Deceleration Time Setting Editing Screen To Clear to Default Settings Use the following procedure to c...

Page 74: ...ayed as the Dwell Time Setting Editing Screen To Clear to Default Settings Use the following procedure to clear specific settings to their default values Refer to 4 2 4 Clearing Settings for details 1...

Page 75: ...ing Editing Screen hexadecimal display shown To Clear to Default Settings Use the following procedure to clear specific setting to their default values Refer to 4 2 4 Clearing Settings for details 1 2...

Page 76: ......

Page 77: ...Reading Projects This section provides information about saving and reading files 5 1 Saving Projects 64 5 1 1 Saving a Project 64 5 2 Reading Projects 65 5 2 1 Reading a Project 65 5 2 2 Importing C...

Page 78: ...ting project under a new name To Save a Project Under a New Name 1 2 3 1 Select File Save Project As to display the Save As Window 2 Enter the folder to be saved in or select one by clicking on the ar...

Page 79: ...t name or select one from the file list Set the Files of type field to nci 4 Click the Open Button 5 2 2 Importing C200HW NC NC Settings C200HW NC data created using the SYSMAC NCT can be imported as...

Page 80: ......

Page 81: ...ue Quit online connection for the OMRON Support Software that communicates using CX Server e g CX Programmer CX Protocol or CX Motion or the application that uses a special serial driver and then re a...

Page 82: ...set Pro gramming Console address 144 to the 0000 Hex default if not already set to it If using an RS 232C port turn OFF pin 5 and set the PC Setup set Programming Console address 160 to the 0000 Hex...

Page 83: ...n an online connection is attempted 2 The node number setting on the FinsGateway Nodes Tab Page must match the node number set when the PC was added to the project If not a dialog box will be displaye...

Page 84: ...Set the node to 240 shown in reverse video 3 Click the Property Button 4 Set the following configurations in the Add Edit Serial Node Window The node number must match the node number used under Netw...

Page 85: ...default settings with the network number 0 and disabled are Local node number 31 Communications unit number 24 For Host Link use the default values as they are Note 1 Network number is the FINS networ...

Page 86: ...such as data transfers comparisons and NC monitoring are executed from the CX Position The following operations can be done later as and when needed from the Service Manager Icon 1 2 3 1 FinsGateway s...

Page 87: ...are that communicates using CX Server e g CX Programmer CX Protocol or CX Motion or an application that uses a special serial driver is connected online it is not possible to perform online operations...

Page 88: ...Unit to be downloaded to 2 Select Online L Download D 3 Select the data to be downloaded under Data Type To download all data select All Data To designate specific data to be downloaded select Setting...

Page 89: ...Uploading Data Use the following procedure to upload NC Unit data to the CX Position com puter 1 2 3 1 On the project tree select the NC Unit to be uploaded from 2 Select Online L Upload U 3 Select th...

Page 90: ...online All of the data on all the specified PC s NC Units can also be uploaded to the project 1 2 3 1 Select Edit New PC or right click and select New PC from the pop up menu to create a PC 2 Select t...

Page 91: ...r and NC Unit data 1 2 3 1 On the project tree select the NC Unit for verification 2 Select Online L Verify V 3 Under Data Type select the data to be verified To verify all data select All Data To des...

Page 92: ...ng Data to Flash Memory Use the following procedure to write all or specified data in the NC Unit to flash memory Caution Back up the data to flash memory after transferring parameters or other data t...

Page 93: ...79 Writing Data to Flash Memory Section 7 4 1 2 3 1 On the project tree select the NC Unit for flash memory writing 2 Select Online L Write Flash Memory R 3 Click the OK Button 4 Click the OK Button...

Page 94: ......

Page 95: ...nit Refer to 2 2 Connecting to a PC and 6 2 FinsGateway Configuration and Startup If OMRON Support Software that communicates using CX Server e g CX Programmer CX Protocol or CX Motion or an applicati...

Page 96: ...he present position of each axis is shown under Present Position the er ror code number and description are shown under Error Code and the se quence number and I O status of each axis are shown under...

Page 97: ...e following procedure to monitor the operating memory area Special I O Unit words allocated in the CIO Area allocated to the PC 1 2 3 1 On the project tree select the NC Unit for operating memory area...

Page 98: ...Unit words allocated in the DM Area or custom DM EM Area allocated to the PC 1 2 3 1 On the project tree select the NC Unit for operating data area monitoring 2 Select Online L Online Monitor NC Oper...

Page 99: ...Y axis X axis Y axis Z axis U axis Positions l 8 l 8 l 20 l 8 l 20 l 32 l 44 l 9 l 9 l 21 l 9 l 21 l 33 l 45 Speeds l 10 l 10 l 22 l 10 l 22 l 34 l 46 l 11 l 11 l 23 l 11 l 23 l 35 l 47 Acceleration...

Page 100: ......

Page 101: ...87 SECTION 9 Printing Data This section provides information about printing data 9 1 Printing Data 88...

Page 102: ...e X axis and Y axis will be shown for a 1 axis Unit just the X axis will be shown After selecting the NC Unit select Print to display the screen with all the checkboxes selected After selecting the da...

Page 103: ...6000 14000 1200 400 1600 0 5 5000 10000 18000 16000 1500 500 2000 0 6 6000 12000 20000 18000 1800 600 2400 0 7 7000 14000 22000 20000 2100 700 2800 0 8 8000 16000 24000 22000 2400 800 3200 0 9 9000 18...

Page 104: ......

Page 105: ...ection provides information about NC Unit error log displays and troubleshooting 10 1 NC Unit Error Logs 92 10 1 1 Overview 92 10 1 2 To Display NC Unit Error Logs 92 10 1 3 Troubleshooting 92 10 1 4...

Page 106: ...ject tree select the NC Unit whose error log is to be displayed and select Online L View NC Error Log Click on the Clear Button to clear the error log Note Error codes 0350 to 0354 are NC Unit errors...

Page 107: ...NC Unit s power supply was interrupted there was noise or there was an error in flash memory When this error occurs operation can be continued by performing error reset Execute the next oper ation af...

Page 108: ...ioning monitor time error 1332 The axis parameters positioning monitor time setting is outside the settable range 0 to 9999 ms Origin search Origin compensation error 1600 The axis parameters origin c...

Page 109: ...set ting Software limits CW software limit error 1800 The axis parameters CW software limit setting is outside the settable range 1 073 741 823 to 1 073 741 823 CCW software limit error 1801 The axis...

Page 110: ...e axis parameters origin search deceleration time setting is outside the settable range 0 to 250 s Deceleration time error 1321 to 1329 A deceleration time setting 1 to 9 is outside the settable range...

Page 111: ...ed setting exceeds the maxi mum speed setting Software lim its CW software limit error 1800 The axis parameters CW software limit setting is outside the settable range 1 073 741 823 to 1 073 741 823 C...

Page 112: ...nit The Z or U axis was specified for a 2 axis NC Unit More than one axis is specified for inter rupt feeding or speed control or all axis designation settings are set to 0 The last two digits of the...

Page 113: ...d so posi tioning cannot be started ABSOLUTE MOVEMENT RELATIVE MOVEMENT or PRESENT POSITION PRE SET Positioning commands used in memory operation absolute or relative designation The software limit wa...

Page 114: ...6200 The Unit is set for a proximity input signal but no origin proximity input signal was received during the origin search Perform the origin search again after checking the origin proximity input s...

Page 115: ...input in both directions Perform the origin search again after checking the wiring and signal type in the axis parameters I O settings N C or N O for both directions If the signal type is changed res...

Page 116: ...h with limit input reversal not using the origin proximity input signal Perform the origin search again after checking the signal types in the axis parameters I O set tings N C or N O and positions fo...

Page 117: ...speed designation of interrupt feeding is 0 or exceeds the axis parameters maximum speed Interrupt feed ing accelera tion time error 7202 The acceleration time designation of interrupt feeding is out...

Page 118: ...s ORIGIN SEARCH ORIGIN RETURN PRESENT POSITION PRESET JOG TEACH RELEASE PROHIBIT ERROR RESET ABSOLUTE MOVE MENT RELATIVE MOVEMENT or INTERRUPT FEEDING Correct the ladder pro gram so that a com mand is...

Page 119: ...r was outside the settable range 00 to 99 Execute the command again after checking the sequence number The current START command will not be executed but other operating axes will not be affected The...

Page 120: ...ble range Read trans fer destina tion word error 8322 The read destination word or the read destination area was outside the settable range Error counter reset Origin adjustment output Error counter r...

Page 121: ...he NC Unit s address was out side the settable range The parameters for the origin search high speed and the origin search proximity speed were not sent together Flash memory Flash mem ory error 9300...

Page 122: ...to the PC turned ON Create the I O tables from either the CX Programmer or from a Programming Console Start FinsGateway set the communications settings and start the FinsGateway SerialUnit service See...

Page 123: ...default Unit address 0 FinsGateway communications settings when connecting via Host Link Protocol SYSWAY CV Node number Must be the same as the node number set for the CX Position default 240 Unit num...

Page 124: ......

Page 125: ...he catalog number on the front cover of the manual The following table outlines the changes made to the manual during each revision Page numbers refer to the previous version Revision code Date Revise...

Page 126: ......

Page 127: ...Cat No W398 E1 1 Note Specifications subject to change without notice 0675163 0A Printed in Japan 0701 3M...

Reviews: