


3 Getting Started with AutoVISION
3-6
MicroHAWK F320-F / F330-F / F420-F / F430-F Smart Camera User Manual
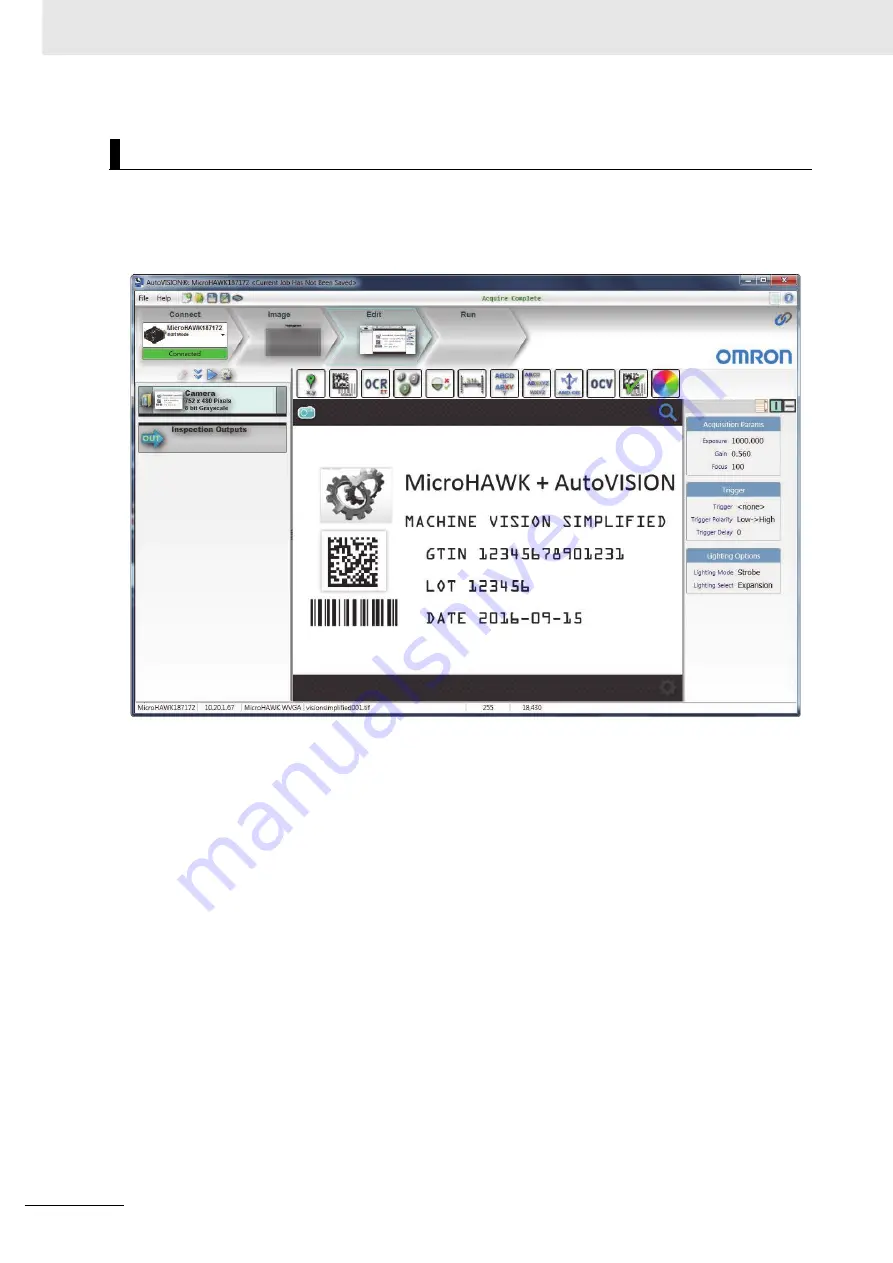
After you have created a new job, loaded a job from your PC, or uploaded a job from the camera, you
will proceed to the
Edit
view to refine your machine vision job. The Camera parameters below the
captured image allow you to set Gain, Exposure, Focus, Trigger, and Lighting. Inspection Outputs
options allow you to connect your job to the outside world. This is also the view where you can add
multiple tools to the job. The tool icons are located above the main view area.
3. Edit the Job in AutoVISION
Summary of Contents for MicroHAWK F320-F
Page 1: ...Z433 E 02 84 9000402 02 User Manual MicroHAWK F320 F F330 F F420 F F430 F Smart Camera...
Page 35: ...1 Introduction 1 20 MicroHAWK F320 F F330 F F420 F F430 F Smart Camera User Manual...
Page 65: ...2 System Components 2 30 MicroHAWK F320 F F330 F F420 F F430 F Smart Camera User Manual PNP...
Page 71: ...2 System Components 2 36 MicroHAWK F320 F F330 F F420 F F430 F Smart Camera User Manual...
Page 91: ...4 Optics and Lighting 4 12 MicroHAWK F320 F F330 F F420 F F430 F Smart Camera User Manual...
Page 143: ...Appendices E 4 MicroHAWK F320 F F330 F F420 F F430 F Smart Camera User Manual...


