3-5
3 Getting Started with AutoVISION
MicroHAWK F320-F / F330-F / F420-F / F430-F Smart Camera User Manual
3-1 Set
tin
g Up
a Jo
b in
Aut
o
VISION
3
Note:
If you are using a MicroHAWK F420-F with a USB cable, the driver has already configured your PC
address. If you are using a MicroHAWK F430-F, you must set the PC to the same IP range as the default IP
address. Default IP address:
192.168.188.2
. Set the PC to the same IP range (example:
192.168.188.100
).
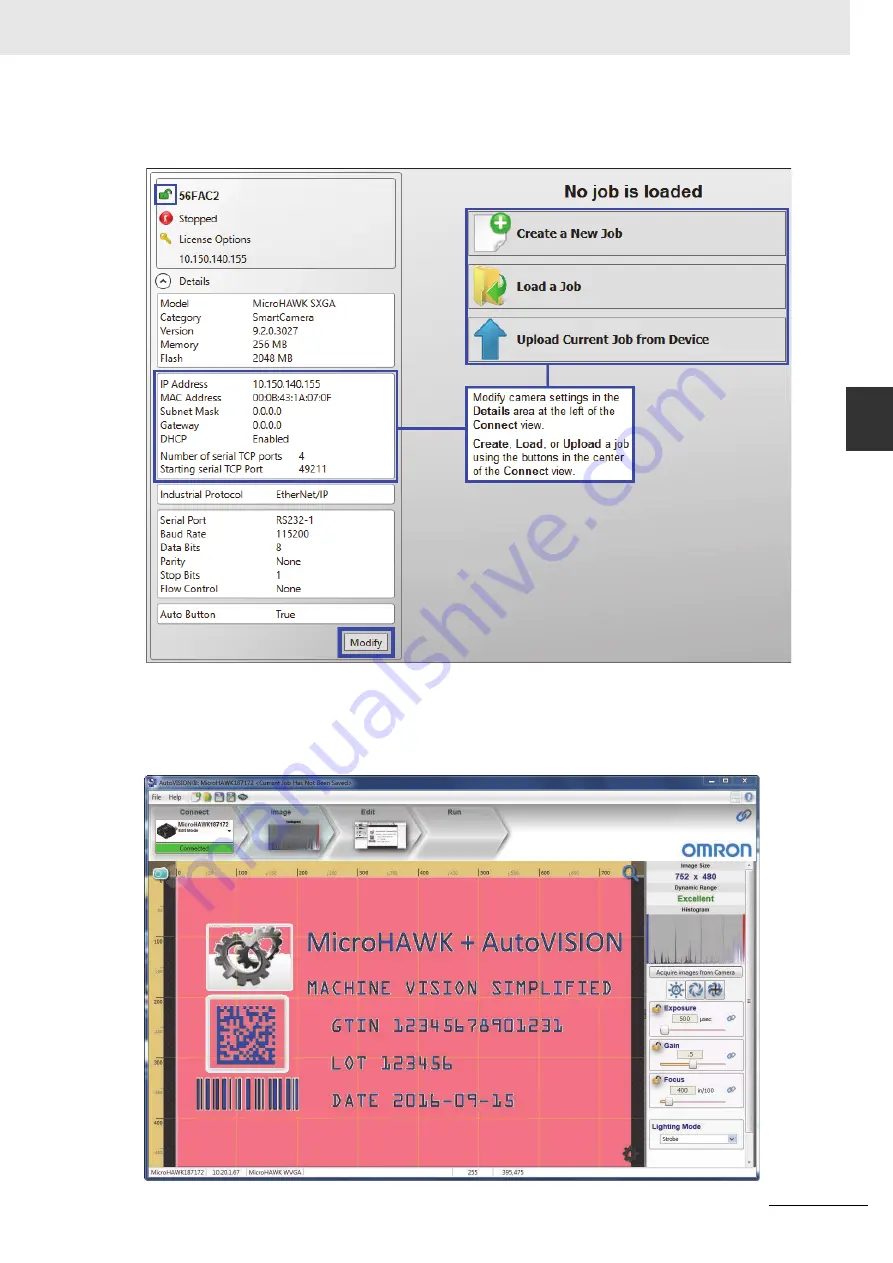
Important:
When modifying camera settings, you will need to enter a username and password for the
camera if a password has been defined.
Once you have selected your camera, adjusted its settings, and created a new job, you will move to the
Image
view. This view allows you to
Auto Calibrate
the camera, and to manually adjust the camera's
Exposure, Gain, and Focus, and also to set the Lighting Mode (On, Off, or Strobe).
Summary of Contents for MicroHAWK F320-F
Page 1: ...Z433 E 02 84 9000402 02 User Manual MicroHAWK F320 F F330 F F420 F F430 F Smart Camera...
Page 35: ...1 Introduction 1 20 MicroHAWK F320 F F330 F F420 F F430 F Smart Camera User Manual...
Page 65: ...2 System Components 2 30 MicroHAWK F320 F F330 F F420 F F430 F Smart Camera User Manual PNP...
Page 71: ...2 System Components 2 36 MicroHAWK F320 F F330 F F420 F F430 F Smart Camera User Manual...
Page 91: ...4 Optics and Lighting 4 12 MicroHAWK F320 F F330 F F420 F F430 F Smart Camera User Manual...
Page 143: ...Appendices E 4 MicroHAWK F320 F F330 F F420 F F430 F Smart Camera User Manual...