710.1760.00.04-05
22/05/2014
29
MODEL:
CHW 682 – CHW 3652; CHG 225 – CHG 365 (Controller Type “C”, see 6.4)
Via stand-by mode:
1)
Stop the system by pressing the
key (LED goes out) and waiting until the compressor has
switched off. The chiller is fitted with a turn-off delay to protect the components. The system does
not switch off immediately.
2)
Move the main switch of the chiller to position “0”.
Via the main switch:
Move the main switch to position “0”. The system switches off immediately. This procedure should
only be used in an emergency.
Caution: Turn the main switch off. All the safety devices set by the electronic controller as well
as the antifreeze heating and compressor heating are switched off!
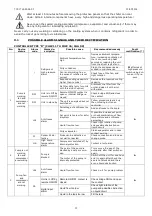
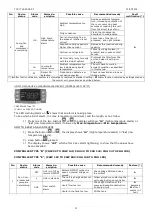
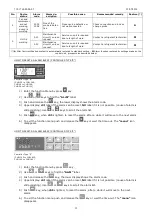
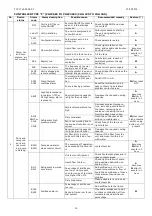
The modalities for programming and error message encoding vary according to which type of operating
thermostat is being used.
To avoid damage to the components, you should avoid operating the chiller without cooling
medium at all costs, even for a short period of time! Neither may it be operated when the liq-
uid level displayed by the level indicator in the tank falls below the minimum limit. Otherwise
the operating cycle of the circulation pumps will stop!
If the display shows lower or higher temperatures than the standard values during operation, switch off
the chiller immediately. Check the operating conditions before you contact the supplier or manufacturer.
TEMPORARY DECOMMISSIONING
All work on the chiller must be carried out by specialist per-
sonnel!
Follow this procedure if you need to shut down the chiller:
- Stop the chiller and permanently isolate it from the electricity mains.
- Once you have properly isolated the chiller from the mains, you can disconnect the power cable.
- Open the bypass valves (if present) for the cooling medium circuit and isolate the chiller from the circuit
by closing the stop valves for the feed and return lines at the inlet and outlet as necessary.
- Disconnect the machine from the cooling medium lines.
- Empty the tank and the internal cooling medium circuits.
Never open the cooling medium circuit, which is closed to the atmosphere, (compressor,
evaporator and condenser) if there may be any refrigerant or lubricating oil present.
See Section 5.2.1 for reinstalling the chiller.
DECOMMISSIONING FOR TRANSPORT PURPOSES
All work on the chiller may only be conducted by specialist personnel!
Follow this procedure if you need to shut down the chiller:
- Stop the chiller and permanently disconnect it from the electricity mains.
- Once you have properly isolated the chiller from the mains, you can disconnect the power cable.
- Open the bypass valves (if present) for the cooling medium circuit and isolate the chiller from the circuit
by closing the stop valves for the feed and return lines at the inlet and outlet as necessary.
- Disconnect the machine from the cooling medium lines.
- Empty the tank and the internal cooling medium circuits.
- If the chiller has to be dispatched, use the original or a similar packaging and keep the chiller in an up-
right position.
- Remove the residual cooling medium from the chiller, taking due account of its characteristics and in
compliance with the relevant legislation in force.
Before dismantling any electrical components, make sure that the chiller is isolated from
the electricity mains and affix a warning sign to prevent the chiller being accidentally re-
connected to the mains!
To ensure that the chiller operates properly and is suitably located, adhere to the safety pre-
cautions described in the relevant sections!
Never open the cooling medium circuit, which is closed to the atmosphere, (compressor,
evaporator and condenser) if there may be any refrigerant or lubricating oil present.
Summary of Contents for CHG 08
Page 40: ...710 1760 00 04 05 22 05 2014 40 CHW 20 25 CHO 10 cST CHG 20 25 5 EN 60204 EN 378 2...
Page 41: ...710 1760 00 04 05 22 05 2014 41 HFC CE 842 2006 3 3 1 3 2 C CND EVA HP LP...
Page 42: ...710 1760 00 04 05 22 05 2014 42 MHP MLP PV R V a 2 5 b VE 2 5 MOP IAF 3 3 MF P...
Page 43: ...710 1760 00 04 05 22 05 2014 43 BP BPM CAA EV 1 1 VNR FL LVE RA TD VNR EV 1 2 3...
Page 44: ...710 1760 00 04 05 22 05 2014 44 1 2 3 4 5 6 7 3 4 ALR...
Page 65: ...710 1760 00 04 05 22 05 2014 65 CHW 682 CHW 3652 CHG 225 CHG 365 6 4 1 2 0 0 5 2 1...
Page 67: ...710 1760 00 04 05 22 05 2014 67 5 6 8 9 10 3 20 15...


