8 |
M 5 7 9 0
4 Layer N Gateway First-Time Setup
Refer to the LED color status table below and follow these instructions to power on the GW-001 unit:
LED Color
Status Description
Amber/Orange (solid)
Gateway is powered on; no network connection
Green (blinking repeatedly) Gateway is in Pairing Mode or Firmware Upgrade was successful
Amber/Orange (bl
Reboot)
Gateway firmware automatic update
Red (blinking)
Gateway is powering on or Firmware Upgrade in progress
Amber/Orange (blinking 3
times and a 3 second pause) Enterprise Mode enabled
Green (solid)
IP Address successfully obtained or network connection successful
No Light
Unit is off or in Sleep Mode
Important:
For setups that will use Layer N Cloud, do not power on the Layer N Gateway or Layer N Smart Sensor
before the Gateway has been registered to a Layer N Cloud account. Refer to section
Step 1:
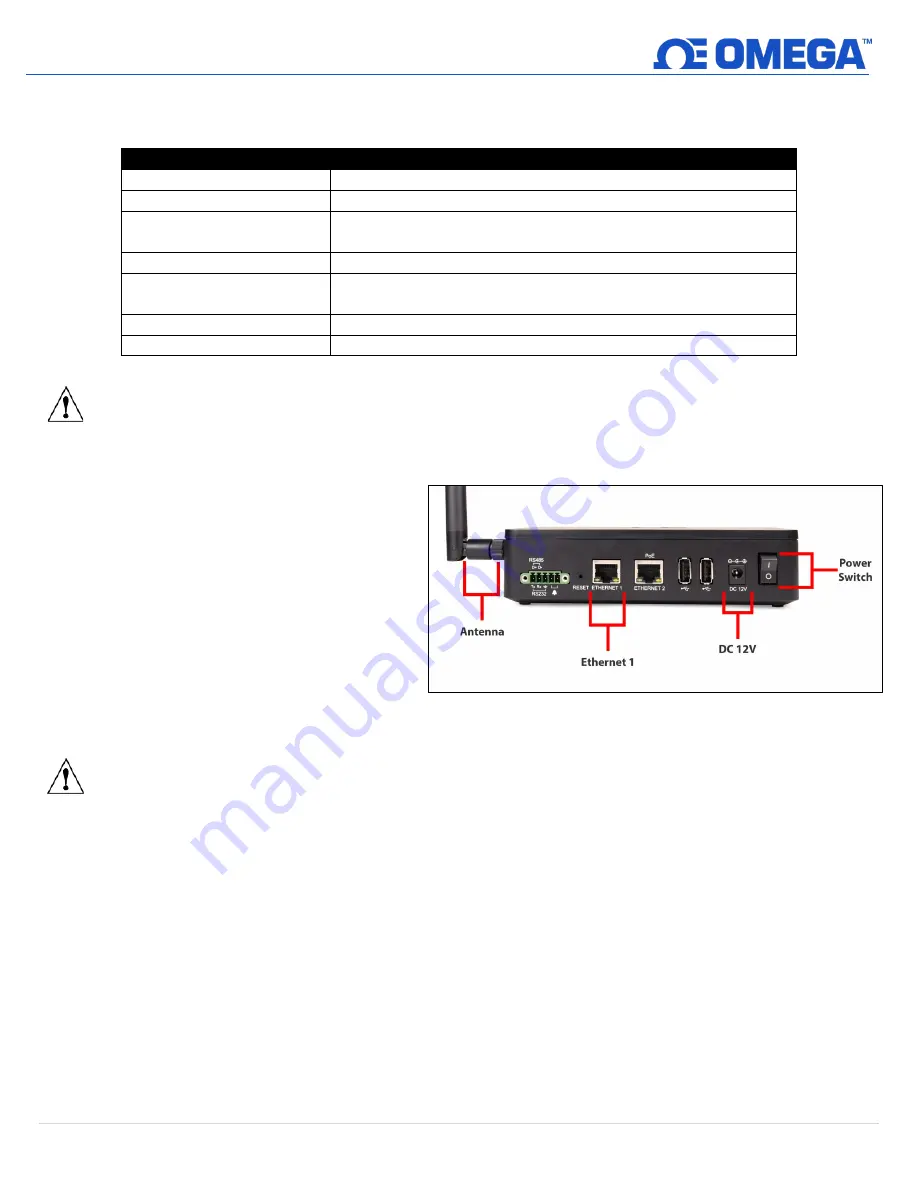
Connect the antenna included
with the gateway to the side of
the device housing.
Step 2:
Connect the DC 12 V adapter to
the back of the gateway.
Step 3:
Connect an RJ45 Ethernet cable
to the port labeled
Ethernet 1
on
the gateway.
Step 4:
Connect the other end of the
Ethernet cable to a DHCP-
enabled router with Internet
access for first-time setup.
Important:
The GW-001 must be connected to a router with internet access when setup for the first time to ensure
the latest firmware is automatically downloaded onto the device.
Step 5:
Turn the power switch on the gateway to the ON position.
Step 6:
The LED light on the Pairing Button will blink red to indicate that the device is booting up and updating
firmware.
Once the gateway is connected to the Internet, the Layer N Gateway unit will automatically download the latest
firmware available and the LED status indicator will stay a solid green when the update is complete.
Figure 4: GW-001 connector overview


