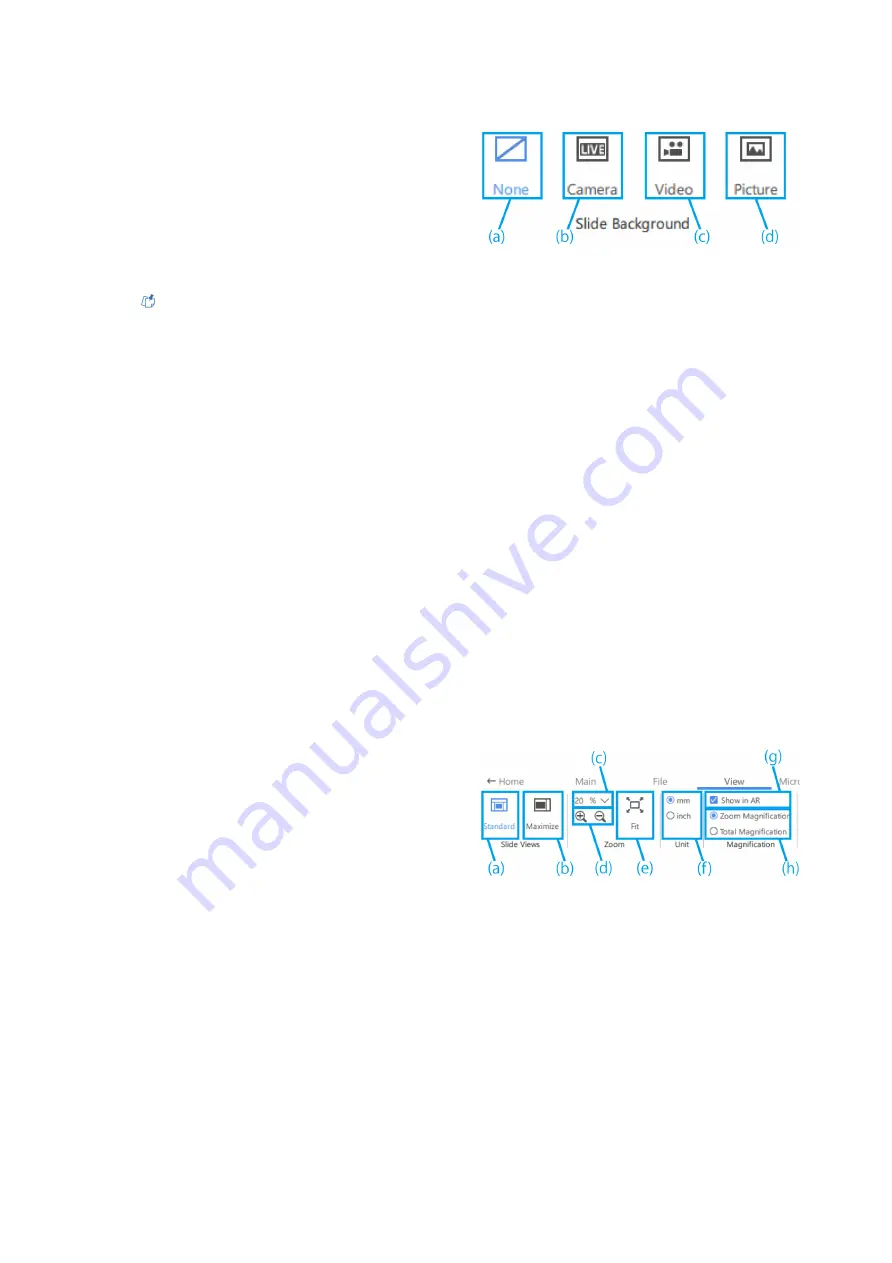
(a) To turn off the screen display, click [None].
(b) To display the live screen of the microscope camera,
click [Camera].
(c) If you want to view a video, click [Video] and choose
from .avi, .mp4, or .mov files.
(d) If you want to view a picture, click [Picture] and
choose from .bmp, .jpeg(jpg), or .png files.
Reference
・
The following slide will be selected in the default
setting.
If there is no camera connection at startup:
"None"
If there is a camera connection at startup:
"Camera".
・
After adding a video/picture, you can adjust the
size and placement of the video/picture. If you
want to adjust the size and placement again,
right-click on the drawing area and select [Resize
Background]. Right-click on the video/picture
again to finalize the size and placement.
・
The background can also be changed by
right-clicking on the drawing area and selecting
[Change slide background].
(a) Click [Standard] to display with thumbnails.
(b) Click [Maximize] to display without thumbnails.
(c) Select the magnification ratio from [20%], [50%],
[80%], [100%], [200%], and [400%].
(d) These buttons allow you to zoom in and out in 10%
increments. The adjustment range is from 20% to 400%.
(e) Click [Fit] to display the image at the maximum
magnification that will fit in the window.
(f)
Used these buttons to switch the display unit of
[Gauge] and [Reticle] in the application.
(g) Select whether or not to show the magnification on
the AR display.
(h) Select the magnification to be shown on the AR
display.
■
Slide background
■
Screen display settings
1
Operation procedure of the software
9


