12
Part I: Fast Track to Super Snaps
Cables for making the USB/AV connec-
tions ship with the camera. To make an
HD connection, you must purchase an HD
cable. (Chapter 4 has details about con-
necting to a television; Chapter 5 explains
how to connect the camera to a com-
puter for picture download.)
✓
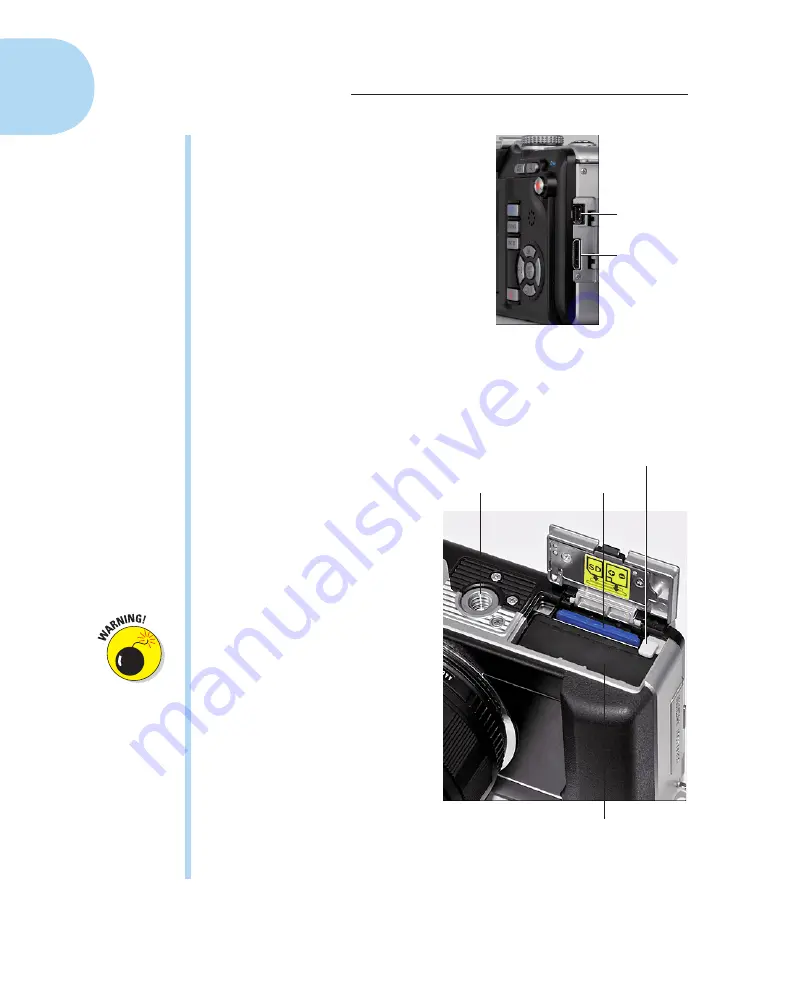
Battery/memory card chamber:
Open
the cover on the bottom of the camera to
access the chamber that holds both the
battery and the memory card, as shown
in Figure 1-4. The upcoming section
“Working with Memory Cards” details
installing and using memory cards.
To find out how to monitor the battery
level, see the upcoming section “Monitor
Matters: Customizing the Shooting
Display.” And see Chapter 10 for
a menu option that controls how
depleted you want the battery to
become before the camera warns
you that you’re soon to be run-
ning on empty.
✓
Tripod mount:
The little screw
hole just next to the battery
chamber is provided for mount-
ing the camera on a tripod.
When the camera is mounted on
a tripod, you can’t access the
battery chamber. Double-check
that your battery is charged and
your memory card is inserted
before you connect the camera
to the tripod.
✓
Lens-release button:
Last but
not least is the little silver button
on the front of the camera, next
to the lens. Press the button to
disengage the lens from the lens
mount before removing the lens.
The following section discusses
this and other lens-related
information.
USB/AV port
HDMI port
Figure 1-3:
Open the cover on the
right side of the camera to reveal
ports for connecting the camera to
a computer or TV.
Tripod mount
Memory card
Battery release
Battery
Figure 1-4:
The battery and memory card
share an apartment next to the tripod mount.
05_879504-ch01.indd 12
05_879504-ch01.indd 12
6/28/10 1:31 PM
6/28/10 1:31 PM


