21
Chapter 1: Getting the Lay of the Land
Ordering from Camera Menus
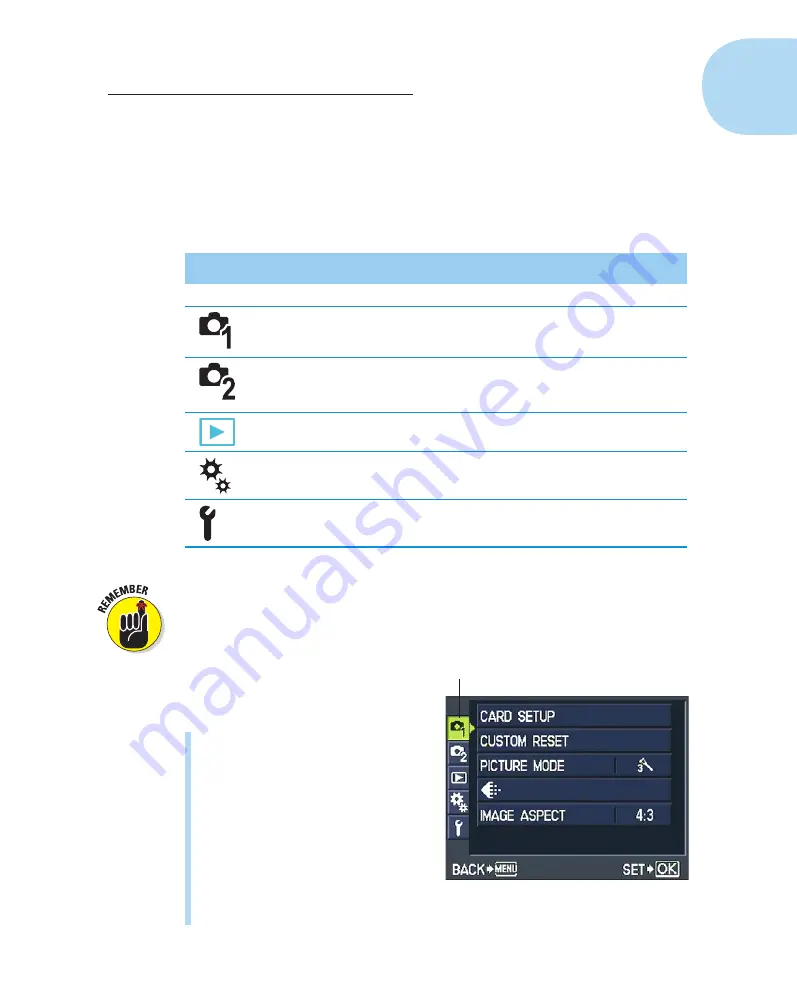
You access many of your camera’s features via internal menus, which, con-
veniently enough, appear when you press the Menu button. Features are
grouped into five menus, described briefly in Table 1-1.
Table 1-1
Menus
Symbol
Open This Menu . . .
. . . To Access These Functions
Shooting 1
Memory card setup, picture quality, and
a few other basic photography settings
Shooting 2
Shutter-release mode, image stabiliza-
tion, and additional photography
settings
Playback
Picture playback and editing features
Custom
Advanced photography and setup
options
Setup
Basic camera customization options
One menu, the Custom menu, is hidden by default. That menu contains a
slew of advanced photography and camera customization options that aren’t
of much interest to casual photographers, so Olympus chose to simplify the
experience for those users. But you, of course, want to explore all your cam-
era’s features, so the upcoming list,
which details the basics of working
with menus, uses the task of turning
on the Custom menu as an example.
✓
Display menus:
Press the Menu
button. The monitor displays a
screen similar to the one you see
in Figure 1-14. Along the left side
of the screen, you see icons rep-
resenting the menus. (Again, the
fourth icon, for the Custom menu,
is hidden by default.) The high-
lighted menu is the active menu;
options on that menu appear to
the right. In the figure, Shooting
Menu 1 is active, for example.
Menu icons
Figure 1-14:
The fourth menu (Custom menu)
is hidden by default.
05_879504-ch01.indd 21
05_879504-ch01.indd 21
6/28/10 1:31 PM
6/28/10 1:31 PM


