37
Chapter 1: Getting the Lay of the Land
✓
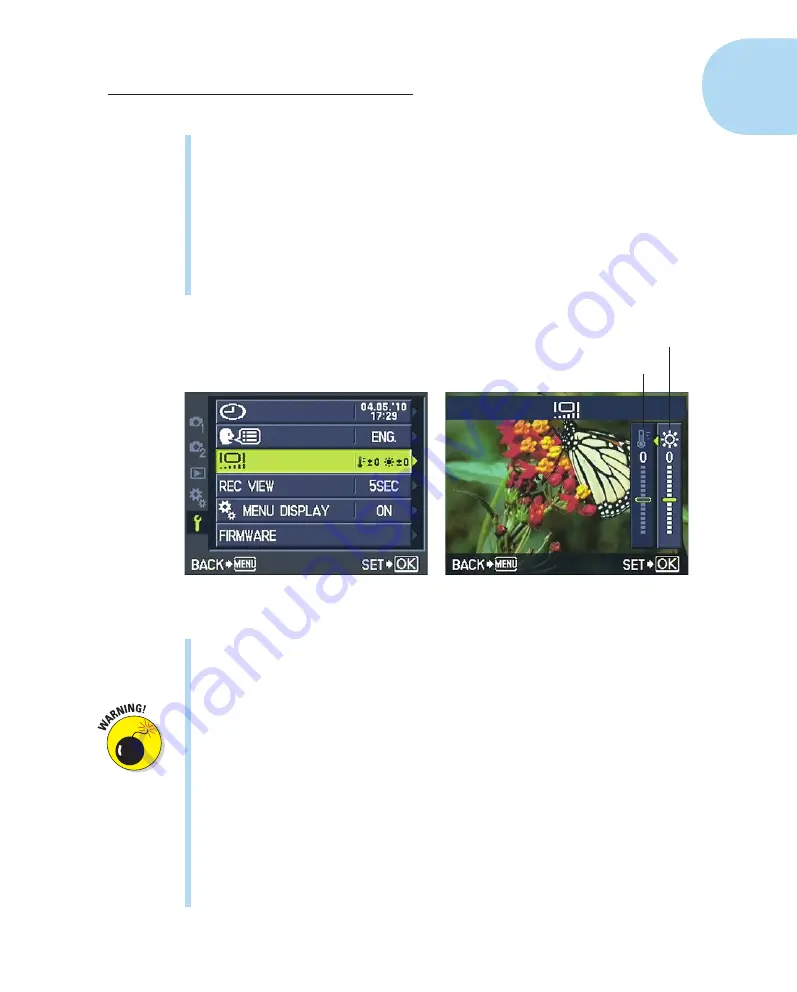
LCD Brightness and Color Temperature:
Choosing this option displays
the screen shown on the left in Figure 1-33. As with most digital cameras,
you can adjust the monitor brightness to suit the ambient light in which
you’re working. But you also can affect the monitor
color temperature.
Chapter 7 explains this term fully, but the short story is that you can
set the monitor to make the colors appear warmer (more red) or cooler
(more blue). This adjustment affects
only
how the monitor displays pic-
ture colors during playback, however. It’s provided mainly so that when
you connect the camera to a TV for playback, you have a way to tweak
the display.
Color temperature
Brightness
Figure 1-33:
Adjustments to the monitor color temperature affect picture playback only.
To adjust the monitor, press the right- or left-arrow key to highlight the
brightness scale or the color temperature scale, labeled in Figure 1-33.
Press the up- or down-arrow key to set the level of adjustment and then
press OK to return to the Setup menu.
I caution you against making either adjustment to your monitor on a
regular basis, however, because it may influence your judgment of
whether your picture’s exposure or colors are off.
✓
Rec View:
After you take a picture, the camera displays it for five sec-
onds on the monitor. You can adjust this instant review period or dis-
able it entirely; Chapter 4 discusses this and other playback options.
The Rec View setting affects still photography only, so the menu option
is disabled when the Mode dial is set to Movie.
✓
Custom Menu Display:
Enabling this option brings the Custom menu
out of hiding. See the earlier section “Ordering from Camera Menus”
for details.
05_879504-ch01.indd 37
05_879504-ch01.indd 37
6/28/10 1:31 PM
6/28/10 1:31 PM


