


266 EN
Connecting the Camera to External Devices
5
8
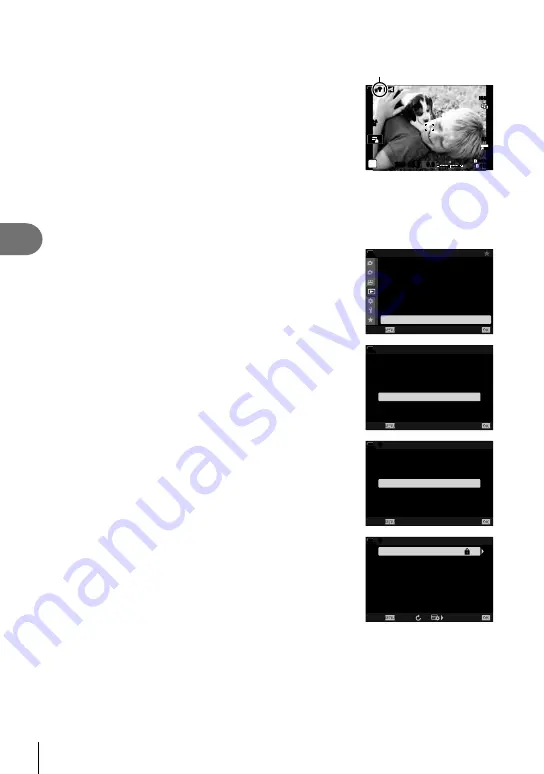
Press the
Q
button to exit to the shooting display.
• Standard shooting indicators will be displayed. A
w
icon will appear in the monitor.
w
icon
ISO-A
200
1023
1:02:03
P
S-IS AUTO
S-IS AUTO
250 F5.6 0.0
30p
30p
4K
Y
F
Y
F
w
w
100
%
Choosing a Network from a List (Connect from Access Point List)
The camera will search for available networks and display them in a list from which you
can choose the network to which you wish to connect.
1
Press the
MENU
button on the camera to display the camera menus.
2
Highlight [
T
Wi-Fi Connect] in the
q
playback
menu and press
I
on the arrow pad.
• [
T
Wi-Fi Connect] options will be displayed.
• This item is only available when [On] is selected for
[Wi-Fi/Bluetooth Settings] > [Availability] in the camera
e
setup menu.
1
2
On
100
%
Playback Menu
Reset Protect
Print Order
Edit
R
Reset share Order
Copy All
T
Wi-Fi Connect
Back
Set
3
Highlight [Access Point Connection] using the
FG
buttons and press the
Q
button.
• [Access Point Connection] options will be displayed.
100
%
T
Wi-Fi Connect
Device Connection
Access Point Connection
Back
Set
4
Highlight [Connect from Access Point List] using the
FG
buttons and press the
Q
button.
• A list of available networks will be displayed.
100
%
w
w
Access Point Connection
Connect from Access Point List
Connect by WPS
Connect manually
Back
Set
5
Highlight the desired network using the
FG
buttons and press the
Q
button.
• If the network is password-protected, you will be
prompted to enter a password. Enter the password and
press the
Q
button.
• Press the
I
button to display [Detail Settings] for the
highlighted network. You can enter an IP address and
adjust other settings manually.
• Press the
R
button to repeat the search and update the
network list.
SSID_001
100
%
w
w
w
Connect from Access Point List
R
/
Connect
Back
Summary of Contents for E-M1 Mark III
Page 29: ...29 EN Preparation 1 5 Remove the front lens cap 2 1 1 1 1 2...
Page 332: ......
Page 333: ...WD656900 date of issue 2020 02...


