Toll Free 1-888-658-1658 www.outdoorlivingtoday.com [email protected]
Page 19
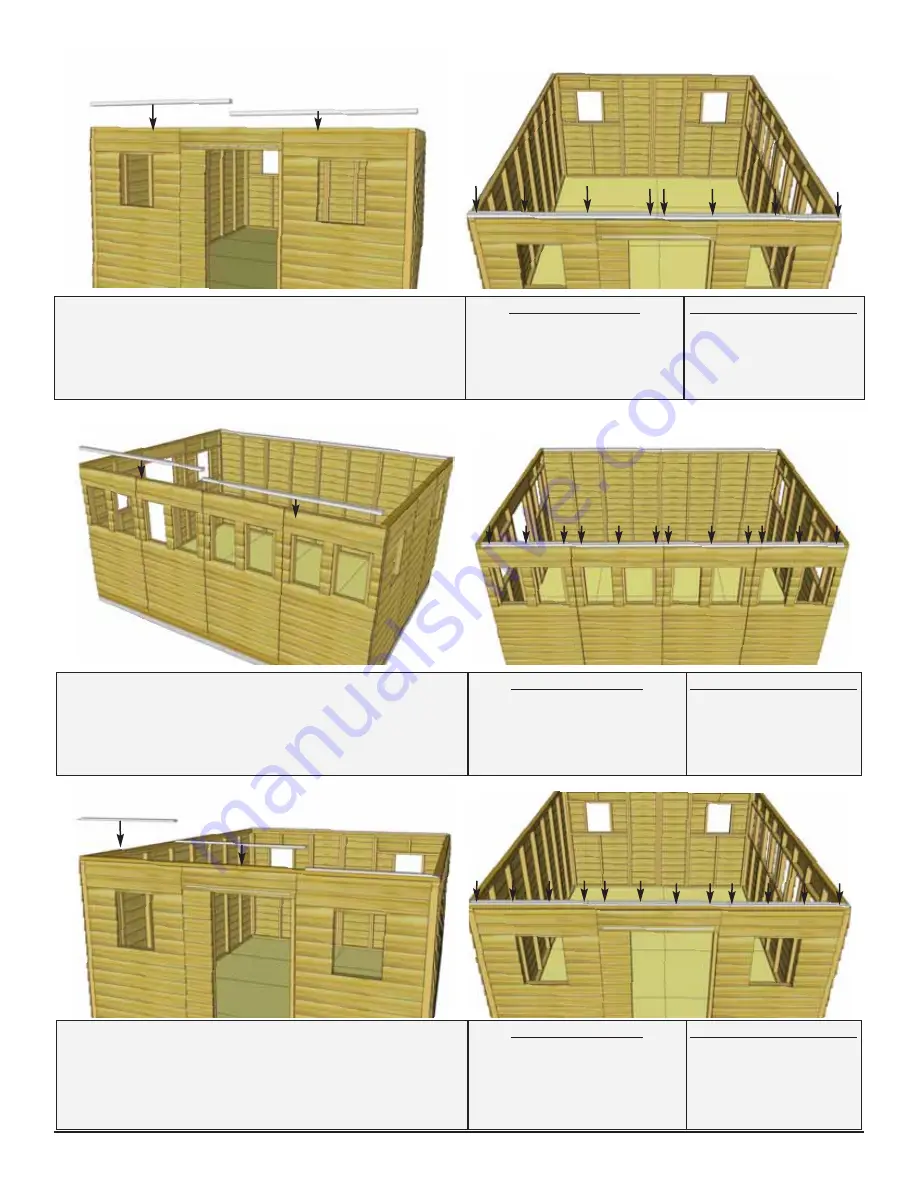
27.
Position and attach
F & R Riser Plates
on
top of Front and Rear
Wall Frames
. attach with
4 - 2 1/2” screws
each. Complete both front and
rear of shed.
Parts (Steps 27)
F&R Riser Plates
(1 1/2” x 2 1/2” x 70 3/4”)
x 4
Hardware (Steps 27)
S1
- 2 1/2” Screws
x 16
total
28.
Position and attach
Side Riser Plates
with
6 - 2” screws
per piece. Complete both sides of
shed.
Parts (Steps 28)
SIde Riser Plates
(1 1/2” x 2 1/2” x 88 1/2”)
x 4
Hardware (Steps 28)
S3
- 2” Screws
x 24
total
29.
Position and attach
Front & Rear Top
Plates
.There are two pieces with angle cut ends
and one straight piece per side. Attach with
4 - 1
1/4” screws
per piece. Complete Front and Rear
Parts (Steps 29)
F&R Top Plates Angle
(3/4” x 2 1/2” x 45”)
x 4
F&R Top Plates Straight
(3/4” x 2 1/2” x 51 1/2”)
x 2
Hardware (Steps 29)
S2
- 1 1/4” Screws
x 24
total


