Olivetti d-COPIA 3500MF Operation Manual Download Page 427

Management 

10-25

10

 [Total] selected for 

Copy/Printer Count

Applying Restriction

Restriction can be applied in two modes as follows: 

*

Select [Off], [Use Port 1 Only] or [Use Port 2 Only] as the 

FAX Port Restriction

 setting.

Use the procedure below to select a restriction method.

1

Follow steps 1 to 4 of 

Adding an Account 

(Accounting List) on page 10-22

2

Press [Change] for the item to be restricted.

3

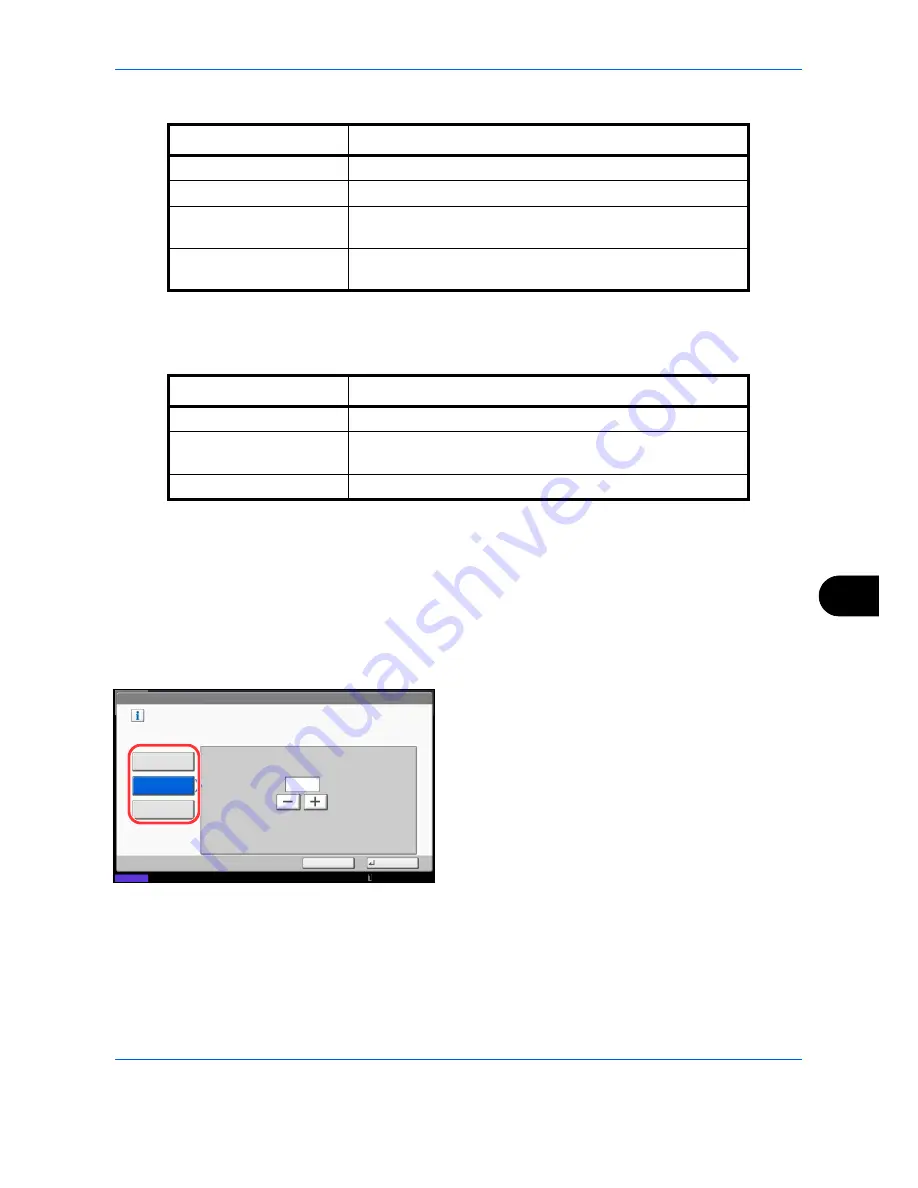
Select the restriction mode.

If [Counter Limit] is selected, press [+],[-] or 
numeric keys to select the number of pages.

4

Press [OK]. 

5

Repeat steps 2 to 4 for other accounts to be 
restricted. 

6

Press [Save]. The restricted account is added.

Item

Detail

Print Restriction (Total)

Limits the total number of sheets used for copying and printing.

Scan Restriction (Others)

Limits the number of sheets scanned (excludes copying).

FAX TX Restriction

Limits the number of sheets sent by fax. This is displayed 
when the optional fax kit is installed.

FAX Port Restriction

Restricts the ports used for faxing. This is displayed when two 
optional FAX kits are installed.

Item

Description

Off

No restriction given

Counter Limit

Restricts the print counter in one-page increments up to 
9,999,999 copies.

Reject Usage 

Restriction is applied.

Account: - Copy Restriction (Total)

Restrict use of the functions.

Counter Limit

Off

Limit

(1 - 9999999)

99999

page(s)

Cancel

OK

Status

Reject Usage

10/10/2010  10:10

Summary of Contents for d-COPIA 3500MF

Page 1: ...OPERATION GUIDE GB d COPIA3500MF 4500MF 5500MF Code 566005en...

Page 2: ...which could compromise the conformity attested to above as well as the characteristics of the product incorrect electrical power supply incorrect installation incorrect or improper use or use not in...

Page 3: ...m model respectively Included Guides The following guides are supplied with the machine Refer to them as necessary Quick Guide Describes the procedures for frequently used operations Safety Guide Prov...

Page 4: ......

Page 5: ...equired action are indicated inside the symbol Please contact your service representative to order a replacement if the safety warnings in this Operation Guide are illegible or if the guide itself is...

Page 6: ...the Language for Display Language 2 11 Setting Date and Time 2 12 Network Setup LAN Cable Connection 2 13 Installing Software 2 16 Embedded Web Server RX Settings for E mail 2 24 Loading Paper 2 27 Lo...

Page 7: ...Rotation 4 38 Negative Image 4 38 Mirror Image 4 39 Job Finish Notice 4 40 File Name Entry 4 42 Priority Override 4 42 Repeat Copy 4 43 DP Read Action 4 44 5 Printing Printing Printing from Applicatio...

Page 8: ...king Job Status 8 2 Checking Job History 8 9 Pause and Resumption of Jobs 8 11 Canceling of Jobs 8 11 Priority Override for Waiting Jobs 8 12 Reordering Print Jobs 8 12 Checking the Remaining Amount o...

Page 9: ...ular Maintenance 11 2 Cleaning 11 15 12 Troubleshooting Solving Malfunctions 12 2 Responding when Error Messages 12 7 Clearing Paper Jams 12 21 Appendix Optional Equipment Appendix 2 Character Entry M...

Page 10: ...re to read Legal and Safety Information before using this machine Administrator tasks It copies It prints Copying with specific settings Printing Documents Stored in Removable USB Memory Print via a n...

Page 11: ...destination computer Plug in the USB memory 1 If the destination is not stored in the address book you can send by entering the address directly Setup Send as E mail Send to Folder SMB Saving Documen...

Page 12: ...Telephone Line Inch version only Network Setup LAN Cable Connection Install the Network FAX Driver on your computer 1 1 For more information refer to the Network FAX Driver Operation Guide 2 If the de...

Page 13: ...nch Staple page 3 18 Punch page 3 20 Paper Output page 4 13 Image Quality Density page 3 8 Original Image page 3 9 EcoPrint page 4 33 Sharpness page 4 34 Background Density Adj page 4 35 Prevent Bleed...

Page 14: ...Fax Operation Guide i FAX Addr Entry refer to Fax Operation Guide WSD Scan page 6 30 Org Sending Data Format Original Size page 6 2 Mixed Size Originals page 6 8 2 sided Book Original page 6 11 Origin...

Page 15: ...RX refer to Fax Operation Guide Send and Print page 6 36 Send and Store page 6 36 FTP Encrypted TX page 6 37 Text Stamp page 6 38 Bates Stamp page 6 39 Program page 3 55 Custom Box Store File Functio...

Page 16: ...entering page 4 16 Booklet page 4 20 Duplex page 3 12 Cover page 4 22 Form Overlay page 7 9 Page page 4 24 Job Finish Notice page 4 40 File Name Entry page 4 42 Delete after Printed page 7 2 Priority...

Page 17: ...refer to Fax Operation Guide FTP Encrypted TX page 6 37 Delete after Transmitted page 7 8 Zoom page 6 6 File Separation page 6 15 Text Stamp page 6 38 Bates Stamp page 6 39 Color Image Quality Densit...

Page 18: ...19 Original Image page 6 18 Scan Resolution page 6 20 Color Selection page 6 23 Sharpness page 6 21 Background Density Adj page 6 22 Zoom page 6 6 Centering page 6 7 Border Erase page 6 26 Continuous...

Page 19: ...Default Screen page 9 3 Sound Buzzer page 9 4 FAX Speaker Volume refer to Fax Operation Guide FAX Monitor Volume refer to Fax Operation Guide Keyboard Layout page Appendix 9 Original Paper Settings C...

Page 20: ...e Copy page 9 17 Org Image Send Store page 9 17 Scan Resolution page 9 18 FAX TX Resolution refer to Fax Operation Guide Color Selection page 9 18 File Format page 9 18 File Separation page 9 19 Backg...

Page 21: ...ction page 9 40 Auto Paper Selection page 9 41 Auto Priority page 9 41 Reserve Next Priority page 9 42 Preset Limit page 9 42 Quick Setup Registration page 9 42 Send Quick Setup Registration page 9 43...

Page 22: ...page 9 59 Job Name page 9 59 User Name page 9 60 Paper Feed Mode page 9 60 KIR page 9 60 System Network Host Name page 9 90 TCP IP Setting TCP IP page 9 90 IPv4 page 9 91 IPv6 page 9 92 Protocol Detai...

Page 23: ...ument Guard page 9 103 Data Security page 9 105 Optional Function page 9 107 Date Timer Date Time page 9 72 Date Format page 9 72 Time Zone page 9 73 Auto Panel Reset page 9 73 Auto Sleep page 9 74 Au...

Page 24: ...nd Result Report page 9 62 FAX RX Result Report refer to Fax Operation Guide Job Finish Notice Setting refer to Fax Operation Guide Sending Log History Auto Sending page 9 63 Send Log History page 9 6...

Page 25: ...b Accounting Setting Job Accounting page 10 20 Print Accounting Report page 10 32 Total Job Accounting page 10 29 Each Job Accounting page 10 29 Accounting List page 10 22 Default Setting Apply Limit...

Page 26: ...perature Adjust the room temperature or Warning for low temperature Adjust the room temperature To use the machine under optimum conditions adjust the temperature and the humidity of your room if the...

Page 27: ...ing tenderness contact a physician If toner does happen to get on your skin wash with soap and water Do not attempt to force open or destroy the toner container or the waste toner box Other precaution...

Page 28: ...n of the product by user no radiation can leak from the machine This machine is classified as Class 1 laser product under IEC EN 60825 1 2007 Caution Performance of procedures other than those specifi...

Page 29: ...ul interference to radio or television reception which can be determined by turning the equipment off and on the user is encouraged to try to correct the interference by one or more of the following m...

Page 30: ...note Securities Stamp Passport Certificate Local laws and regulations may prohibit or restrict copying scanning of other items not mentioned above EN ISO 7779 Maschinenl rminformations Verordnung 3 G...

Page 31: ...hine This chapter provides information on the following topics Legal Information xxx Regarding Trade Names xxx Energy Saving Control Function xxxvii Automatic 2 Sided Copy Function xxxvii Paper Recycl...

Page 32: ...TypeBankG B TypeBankM M and Typebank OCR are trademarks of TypeBank All European language fonts installed in this machine are used under licensing agreement with Monotype Imaging Inc Helvetica Palatin...

Page 33: ...and OpenSSL Project must not be used to endorse or promote products derived from this software without prior written permission For written permission please contact openssl core openssl org 5 Produc...

Page 34: ...e following disclaimer in the documentation and or other materials provided with the distribution 3 All advertising materials mentioning features or use of this software must display the following ack...

Page 35: ...all copies of the Software and Typefaces and documentation as requested 6 You agree that you will not modify alter disassemble decrypt reverse engineer or decompile the Software 7 Monotype Imaging wa...

Page 36: ...VER CAUSED AND ON ANY THEORY OF LIABILITY WHETHER IN CONTRACT STRICT LIABILITY OR TORT INCLUDING NEGLIGENCE OR OTHERWISE ARISING IN ANY WAY OUT OF THE USE OF THIS SOFTWARE EVEN IF ADVISED OF THE POSSI...

Page 37: ...perpetual worldwide non exclusive no charge royalty free irrevocable except as stated in this section patent license to make have made use offer to sell sell import and otherwise transfer the Work wh...

Page 38: ...luding any direct indirect special incidental or consequential damages of any character arising as a result of this License or out of the use or inability to use the Work including but not limited to...

Page 39: ...es for the 35 ppm model or 60 minutes for the 45 ppm or 55 ppm model have passed since the device was last used The amount of time of no activity that must pass before Sleep is activated may be length...

Page 40: ...rovides a basic guide to using document boxes Chapter 8 Status Job Cancel Explains how to check the job status and job history and how to cancel jobs being printed or waiting to print Also explains ho...

Page 41: ...el Ready to copy is displayed Used to emphasize a key word phrase or references to additional information For more information refer to Sleep and Auto Sleep on page 2 9 Note Indicates supplemental inf...

Page 42: ...icate originals and paper placement directions on the touch panel Placement direction Indicated size The size of the original paper that can be used depends on the function and source tray For further...

Page 43: ...1 1 1 Part Names This chapter identifies the machine parts and operation panel keys Operation Panel 1 2 Machine 1 4...

Page 44: ...screen Blinks during printing fax sending and receiving scan send and print data receiving Displays help guidance Displays the Status Job Cancel screen Displays the FAX screen Blinks while the machin...

Page 45: ...n Pauses the printing job in progress Starts copying and scanning operations and processing for setting operations Finalizes numeric key entry and finalizes screen during setting of functions Operates...

Page 46: ...2 Mailbox Option 3 Front Cover 4 Document Finisher Option 5 Cassette 1 to 5 Cassette 3 to 5 are Options 5 a Cassette 1 5 b Cassette 2 5 c Cassette 3 5 d Cassette 4 5 e Cassette 5 5 f Cassette 3 5 g Ca...

Page 47: ...USB Interface Connector B1 9 Option Interface 10 Original Size Indicator Plates 11 Slit Glass 12 Toner Container Black 13 Document Processor Option 14 Platen 15 Clip Holder 16 Operation Panel 17 Handl...

Page 48: ...1 Lever 28 Right Cover 1 29 Main Power Switch 30 Paper Width Adjusting Tab 31 Handle 32 Right Cover 2 Lever 33 Right Cover 2 34 Paper Width Guide 35 Support Tray Section of the Multi Purpose Tray 36...

Page 49: ...ection Method and Preparing Cables 2 3 Connecting Cables 2 5 Power On Off 2 7 Low Power Mode and Auto Low Power Mode 2 9 Sleep and Auto Sleep 2 10 Adjusting the Operation Panel Angle 2 10 Switching th...

Page 50: ...Included DVD The following documents are contained in the included DVD Product Library Refer to them as necessary Documents Operation Guide This Guide FAX Operation Guide Card Authentication Kit B Op...

Page 51: ...tion Send FTP Sends the scanned image as a data file on the FTP Send E mail Sends the image data of scanned originals to the desired recipient as a file attached to an E mail message Send SMB Saves th...

Page 52: ...rface you use Available Standard Interfaces Function Interface Necessary Cable Printer Scanner Network FAX Function available when using optional fax kit For details on Network FAX refer to the Fax Sy...

Page 53: ...t the Power indicator the processing indicator and the memory indicator are off After this turn off the main power switch 2 Connect the LAN cable to the network interface connector located on left sid...

Page 54: ...d the memory indicator are off After this turn off the main power switch 2 Connect the USB cable to the USB interface connector B1 located on the left side of the body 3 Connect the other end of the c...

Page 55: ...er and turn the main power switch on NOTE If the optional Data Security Kit is installed a message might display indicating the security function is being activated and time may be taken to start up w...

Page 56: ...t or blinking Turning off the main power switch while the hard disk is operating may cause damage In case of not using the machine for an extended period of time CAUTION If this machine will be left u...

Page 57: ...a arrives while the machine is in Low Power Mode when using the optional fax the machine automatically wakes up and starts printing To resume perform one of the following actions The machine will be r...

Page 58: ...a is printed out while the operation panel also remains unlit To resume press the Power key The machine will be ready within 23 seconds Note that ambient environmental conditions such as ventilation m...

Page 59: ...anguage 1 Press the System Menu key 2 Press Common Settings and then Change of Language 3 Press the key for the language you want to use 4 Press OK The touch panel language will be changed Common Sett...

Page 60: ...time difference before setting the date and time If you change Date Time setting trial functions will be unavailable For details refer to Optional Function on page 9 107 1 Press the System Menu key 2...

Page 61: ...P IP IPv4 Setup by Entering IP Addresses Set up TCP IP IPv4 to connect to the Windows network Set the IP addresses subnet masks and gateway addresses The default settings are TCP IP Protocol On DHCP O...

Page 62: ...procedure below 1 Press the System Menu key 2 Press System Next of Network and then Next of TCP IP Setting 3 Press Change of TCP IP 4 Press On and then press OK 5 Press Change of IPv4 6 Press DHCP 7...

Page 63: ...P 4 Press On and then press OK 5 Press Change of IPv4 6 Press Auto IP 7 Press On or Off of Auto IP and then press OK 8 After changing the setting restart the network from the system menu or turn the m...

Page 64: ...use of fax functionality The WIA driver cannot be installed on Windows XP If you are connecting this machine to a Windows PC follow the next steps to install the software The example shows you how to...

Page 65: ...lick Install Software 4 Click Express Mode 5 Select the print system to be installed and click Next NOTE If the print system detection window appears and the installer fails to detect the machine veri...

Page 66: ...has been installed successfully Click Finish This completes the printer driver installation procedure Follow the on screen instructions to restart the system if required The TWAIN driver and WIA driv...

Page 67: ...e 9 54 If connecting by Bonjour enable Bonjour in the machine s network settings For details refer to Bonjour Settings on page 2 14 In the Authenticate screen enter the name and password used to log i...

Page 68: ...connected 5 Open System Preferences and click Print Fax 6 Click the plus symbol 7 Click the IP icon for an IP connection or the AppleTalk icon for an AppleTalk connection and then enter the IP address...

Page 69: ...Preparation before Use 2 21 2 8 Select the options available for the machine and click Continue 9 The selected machine is added...

Page 70: ...e with Box 5 Enter the machine s IP address or host name in the Scanner Address NOTE When the machine s IP address is unknown contact the Administrator 6 When using SSL select the checkbox beside SSL...

Page 71: ...nd Cameras screen appears 2 Select the same name as this machine from WIA Drivers and click Properties 3 Enter the machine name or the host name 4 When using SSL select the checkbox beside SSL 5 When...

Page 72: ...f the machine The default factory settings are set as shown below Login User Name Admin Login Password Admin The procedure for accessing Embedded Web Server RX is explained below 1 Launch your Web bro...

Page 73: ...l attachments check the following The network environment used to connect this machine to the mail server A full time connection via a LAN is recommended SMTP Settings Use Embedded Web Server RX to re...

Page 74: ...ion The maximum length of the login password is 64 characters SMTP Security Enables or disables the SMTP Security When this protocol is enabled either SSL TLS or STARTTLS must be selected To enable SM...

Page 75: ...CAUTION If you copy onto used paper paper already used for copying do not use paper that is stapled or clipped together This may damage the machine or cause poor image quality Avoid exposing opened p...

Page 76: ...Refer to Specifying Paper Size and Media Type for the Cassettes on page 2 39 Media Type Setting on page 9 8 The cassettes can hold paper with weights up to 220 g m2 If you are using a paper weight bet...

Page 77: ...he paper length and width guides rest securely against the paper If there is a gap readjust the guides to fit the paper IMPORTANT Before loading the paper be sure that it is not curled or folded Paper...

Page 78: ...d the sheet in half and use with the side you want to display as the front side 7 Gently push the cassette back in NOTE If the machine will not be used for a prolonged period protect all paper from hu...

Page 79: ...Type Setting on page 9 8 The cassettes can hold paper with weights up to 256 g m2 If you are using a paper weight between 106 and 256 g m2 set the media type to Thick and set the weight of the paper y...

Page 80: ...Size Guide B into the slot marked A4 on the bottom of the cassette and lock the hook it will make a click sound Gently try moving the Paper Size Guide B to verify that it is fixed B5 Open the Paper S...

Page 81: ...oading the paper keep the print side facing up 7 Insert the indication on the sheet so as to match the size and type of paper to be placed The indication is printed on both sides of the sheet NOTE Fol...

Page 82: ...e cassette After loading paper gently push the cassette back in NOTE The default paper size setting is A4 If you need the paper size changed to B5 or Letter contact your service representative IMPORTA...

Page 83: ...u are using The capacity of the multi purpose tray is as follows A4 or smaller plain paper 80 g m2 recycled paper or color paper 150 sheets 64 g m2 plain paper 165 sheets B4 or larger plain paper 80 g...

Page 84: ...s curled When loading paper into the multi purpose tray check that there is no paper left over in the tray from a previous job before loading the paper If there is just a small amount of paper left ov...

Page 85: ...pen the multi purpose tray 2 Adjust the paper width guides to the width of the envelope Acceptable Envelope Size Monarch 3 7 8 7 1 2 Envelope 10 Commercial 10 4 1 8 9 1 2 Envelope 9 Commercial 9 3 7 8...

Page 86: ...When you load envelopes in the multi purpose tray select the envelope type by referring to Specifying Paper Size and Media Type for the Multi Purpose Tray MP Tray Setting on page 2 41 When you load en...

Page 87: ...to Paper size is automatically detected and selected Select whether the paper is in Metric size or in Inch size Standard Sizes 1 Only A4 Letter and B5 can be specified when the optional Large Capacity...

Page 88: ...ect the paper size 5 Press OK The previous screen reappears 6 Press Change of Media Type and select the media type Then press OK NOTE If the output paper curls or curling causes paper over in the Inne...

Page 89: ...zes are as follows Inch models A3 B4 A4 A4 R B5 B5 R A5 R B6 R A6 R Folio 8K 16K 16K R Metric models Ledger Legal Letter Letter R Statement R 12 18 Oficio II Executive 8K 16K 16K R Others Select from...

Page 90: ...5 Press Change of Media Type and select the media type Then press OK Common Settings Paper Size Set the multi purpose tray paper size Standard Sizes 1 Auto Standard Sizes 2 Others Size Entry A3 A4 A4...

Page 91: ...riginal eject table Originals left on the original table or on the original eject table may fall off when the document processor is opened When placing books or magazines on the machine do so with the...

Page 92: ...lose the platen Cover or the optional document processor IMPORTANT Do not push the platen cover forcefully when you close it Excessive pressure may crack the platen glass CAUTION Do not leave the plat...

Page 93: ...t dried Irregularly shaped non rectangular originals Originals with cut out sections Crumpled paper Originals with folds Straighten the folds before loading Failure to do so may cause the originals to...

Page 94: ...s it will go The original placement indicator will be lit NOTE For details on Original Orientation refer to When placing originals on the optional document processor on page 4 9 IMPORTANT Confirm that...

Page 95: ...indicator The original placement indicator is lit or unlit depending on how originals are placed Indications and their status are as follows Green lit Original is placed properly Green blinking Origin...

Page 96: ...Preparation before Use 2 48...

Page 97: ...3 7 Sending 3 22 Confirmation Screen of Destinations 3 28 Preparation for sending a document to a PC 3 29 Specifying Destination 3 39 Using the Document Box 3 42 Canceling Jobs 3 51 Quick Setup Screen...

Page 98: ...own appears during operations press Login User Name Press Keys to enter the login data using the numeric keys 2 Enter the login user name and press OK NOTE Refer to the Character Entry Method on Appen...

Page 99: ...Logout key to return to the login user name login password entry screen Users are automatically logged out in the following circumstances When the machine is put to Sleep by pressing the Power key Whe...

Page 100: ...touch panel The use of the Quick No Search key is explained below using an example in which a speed dial number is specified and used to select a destination For more information on speed dialing ref...

Page 101: ...is grayed out and cannot be selected Cannot be used in combination with a feature that is already selected Use prohibited by user control Preview has been pressed Refer to Original Preview on page 3...

Page 102: ...the new settings NOTE If you scan a multi page original only the first page is previewed 5 If there is no problem with the preview image press the Start key Copying begins Copies Image Quality Org Pap...

Page 103: ...per that matches the size of the original will be selected automatically To change the paper size press Org Paper Finishing Paper Selection and select the desired paper source 4 Use the numeric keys t...

Page 104: ...ce the originals on the platen 3 Set the original on the platen and press Image Quality Density 4 Adjust density pressing 3 Lighter to 3 Darker You can change the density level 3 Lighter to 3 Darker i...

Page 105: ...inally Book Magazine For mixed text and photos printed in a magazine etc Photo Printer Output For photos printed on this machine originally Book Magazine For photos printed in a magazine etc Photo Pap...

Page 106: ...e following magnifications are available Letter R Ledger 129 Statement R 64 A3 141 A5 70 A4 25 400 Model Zoom Level Original Copy Inch Models 100 Auto 400 Max 200 STMT Ledger 154 STMT Legal 129 Letter...

Page 107: ...ess XY Zoom Press or to change the displayed magnifications of X horizontal and Y vertical You can also enter the magnification directly using the numeric keys by pressing Keys Press Original Orientat...

Page 108: ...nd on the top edge facing the same orientation when turning the pages Two sided to One sided Copies each side of a two sided original onto two individual sheets The optional document processor is requ...

Page 109: ...to Two sided mode Original A3 B4 A4 R B5 R A5 R Ledger Letter R and 8K Paper A4 B5 and Letter The procedure for using two sided duplex copying is explained below 1 Press the Copy key 2 Place the orig...

Page 110: ...low Collate Scan multiple originals and deliver complete sets of copies as required according to page number Offset Without Document Finisher If the optional document finisher is not installed when yo...

Page 111: ...the platen 3 Press Org Paper Finishing and then Collate Offset 4 To use collate copying press On of Collate To use offset copying press Each Set of Offset Press OK If Off is selected for Collate pres...

Page 112: ...Off The Copying screen appears on the touch panel during printing 1 Press Reserve Next The default screen for copying appears 2 Place the originals onto the machine for reserving copy and configure t...

Page 113: ...o Interrupt Clear Timer on page 9 76 1 Press the Interrupt key The current print job is temporarily interrupted 2 Place the originals onto the machine for interrupt copy and configure the copy setting...

Page 114: ...tapled refer to 1 000 sheet Finisher Option on page Appendix 26 or 4 000 sheet Finisher Option on page Appendix 27 The following stapling options and orientations are available NOTE B5 R and 16K R one...

Page 115: ...r Top Edge on Left Then press OK 6 Press OK 7 Press the Start key Copying begins Mixed Size Stapling Even with mixed paper sizes if the sizes have the same width or same length as shown in the combina...

Page 116: ...details on paper sizes that can be punched refer to Hole Punch Unit Option on page Appendix 27 The orientations of the original and corresponding punch positions are as follows NOTE The inch model pro...

Page 117: ...OK 6 Press OK 7 Press the Start key If the original is placed on the platen Place the next original and press the Start key Copying begins If all original pages have been scanned press Finish Scan Co...

Page 118: ...the destination folder To set up the PC Folder contact your administrator Create Register a Document Box when a Document Box is selected as the destination Select detailed transmission settings to se...

Page 119: ...es can be specified NOTE When Add to Addr Book is displayed the destinations are registered in the Address Book 6 Press OK The destinations are registered in the destination list 7 Check the destinati...

Page 120: ...der of any PC Stores a scanned original image in a folder of an FTP server NOTE Refer to Creating a Shared Folder on page 3 31 for details on how to share a folder Be sure that SMB Protocol or FTP in...

Page 121: ...in user name and login password name of the destination PC the shared folders appear Select the folder that you want to specify and press Next The address of the selected shared folder is set NOTE Ref...

Page 122: ...the data Up to 64 characters Path Path to the receiving folder such as follows For example User ScanData Up to 128 characters Login User Name User name to access the PC For example abcdnet james smith...

Page 123: ...Destination page 9 44 the confirmation screen appears Enter the same host name and path again and press OK When selecting On for Destination Check before Send page 9 43 the confirmation screen appears...

Page 124: ...ected destination To delete the destination select the destination you want to delete and press Delete Press Yes in the confirmation screen The destination is deleted To add the destination press Canc...

Page 125: ...perties Check the computer name in the window that appears In Windows XP right click My Computer and select Properties The System Properties dialog box appears Click the Computer Name tab in the windo...

Page 126: ...er name for logging onto Windows 1 From the Start menu select All Programs or Programs Accessories and then Command Prompt The Command Prompt window appears 2 At the Command Prompt enter net config wo...

Page 127: ...View tab and remove the checkmark from Use Sharing Wizard Recommended in Advanced settings In Windows XP click the View tab and remove the checkmark from Use Simple File Sharing Recommended in Advance...

Page 128: ...In Windows XP select Share this folder and click the Permissions button 4 Click the Add button 5 Enter the user name in the text box and click the OK button Click the location button and select the l...

Page 129: ...en security it is recommended that you select Everyone and remove the Read permission checkmark 7 Click the OK button in the Advanced Sharing screen to close the screen 8 Click the Security tab and th...

Page 130: ...n click Search 2 Click pc4050 scannerdata that appears in the search results In Windows XP double click the computer pc4050 that appears in the search results 3 Click pc4050 scannerdata that appears i...

Page 131: ...Log on to Windows with administrator privileges Checking file and printer sharing 1 From the Start menu select Control Panel System and Security and Allow a program through Windows Firewall NOTE If t...

Page 132: ...ration 3 36 Adding a port 1 From the Start menu select Control Panel System and Security and Check firewall status 2 Click Advanced settings 3 Click Inbound Rules 4 Click New Rule 5 Select Port and cl...

Page 133: ...Basic Operation 3 37 3 6 Select TCP select Specific local ports enter 139 and click Next 7 Select Allow the connection and click Next 8 Make sure all checkboxes are selected and click Next...

Page 134: ...ecurity Center and then Check Firewall Status or Windows Firewall If the User Account Control dialog box appears click the Continue button 2 Click the Exceptions tab and then the Add port button 3 Spe...

Page 135: ...ations are listed by selecting Name or No from the Sort pull down menu NOTE To cancel the selection press the check box and remove the checkmark For details on the external address book refer to Embed...

Page 136: ...pe Name Detail Folder Detail Address Book Sort Addr Book 0001 0002 0005 0004 0003 ABCD abcd efg com TUVW tuvw xyz com Group1 Group2 Group3 Name Register Edit Address Book 1 2 i FAX FAX ABC DEF JKL MNO...

Page 137: ...Up to 100 Folders SMP FTP Total of 10 SMB and FTP FAX Up to 500 i FAX Up to 100 Also depending on the settings you can send and print at the same time Procedures are the same as used in specifying the...

Page 138: ...to Deletion of Job Retention on page 7 19 Private Print Stored Job Box page 7 14 In Private Printing you can specify that a job is not printed until you release the job at the operation panel When se...

Page 139: ...en power is turned off the original data will be deleted NOTE Repeat Copy function is not available when the optional Data Security Kit is installed Form for Form Overlay Box page 7 20 Image Overlay f...

Page 140: ...gistering boxes refer to Creating a New Custom Box Add Edit Box on page 7 2 You cannot access boxes if you forget your password In this event access the machine using administrator privileges and over...

Page 141: ...m Box Job Box Removable Memory Status FAX Box Search No Search Name Program 10 10 2010 10 10 Listing the boxes by number in ascending descending order Listing the boxes by name in alphabetical order R...

Page 142: ...Name 10 10 2010 10 10 Selecting more than one document at a time Listing the documents by time of update in ascending descending order Listing the documents by size in ascending descending order Listi...

Page 143: ...press OK 4 If you have changed the details press Save and then press Yes in the confirmation screen If you did not change the details press No 5 Press Close The display returns to the default Documen...

Page 144: ...the document details The operations available in the preview screen are shown below 3 When you have finished previewing documents or checking document details press Close Close Preview No 1 6 20070404...

Page 145: ...te all boxes User A user can gain access and manipulate his her own boxes and the shared boxes Access level Accessibility Administrator User Operation Creating a box Yes No Changing box owner Yes No D...

Page 146: ...e permission Press Change of Permission and select either Private or Shared Then press OK NOTE For information on specifying other settings refer to Creating a New Custom Box Add Edit Box on page 7 2...

Page 147: ...select Cancel and then press Yes in the confirmation screen NOTE If Reserve Next Priority refer to page 9 42 is set to Off The Copying screen appears in the touch panel during printing 1 Press the St...

Page 148: ...he functions available for registration are as follows For details on Quick Setup Screen for FAX refer to the Fax System V Operation Guide Function Default Registration Functions Available for Registr...

Page 149: ...Background Density Adj Sending From Box 1 File Format 2 Delete after Transmitted 3 FAX TX Resolution 4 Sending Size File Format Delete after Transmitted FAX TX Resolution Sending Size Printing From B...

Page 150: ...ment location 4 Press OK A confirmation screen appears Press Yes The Original Image Quality function will be newly registered Key 1 Cancel OK Off Key 2 Key 3 Key 4 Key 5 Key 6 Copy Original Image Add...

Page 151: ...register a program The following procedure is an example of registering the copying function 1 Press the Program key while the copy mode is accessed 2 Press Add and press a number 01 to 50 for the pr...

Page 152: ...can change program number and program name or delete program Use the procedure below to edit or delete a program 1 Press the Program key 2 Press Edit and press the key s corresponding to the program...

Page 153: ...y registered the currently registered shortcut can be replaced with a new one 3 Enter the shortcut name and press Save to add the shortcut Editing and Deleting Shortcuts Follow the steps shown below t...

Page 154: ...e application list screen appears 2 Press Internet Browser The Internet browser starts up 3 Use the browser screen to browse web pages For information on how to use the browser screen refer to Using t...

Page 155: ...n The operations available in the Internet browser screen are shown below NOTE Pressing the Reset key while the Internet browser is displayed will exit the browser and return you to the application li...

Page 156: ...me on page 2 12 Setting Weekly Timer 1 Press the Application key The application list screen appears 2 Press Weekly Timer Weekly Timer starts up 3 Press the Enable the Application checkbox so that a c...

Page 157: ...Total FAX Copy 1800 200 600 FAX Others 1000 600 300 100 1000 Printed Pages by Paper Size 10 10 2010 10 10 Try It Select paper source by choosing a Cassette or MP Tray Selecting Paper Source 1 2 End S...

Page 158: ...Basic Operation 3 62...

Page 159: ...entering 4 16 Border Erase 4 18 Booklet 4 20 Cover 4 22 Form Overlay 4 23 Page 4 24 Memo Page 4 26 Image Repeat 4 28 Text Stamp 4 30 Bates Stamp 4 31 EcoPrint 4 33 Sharpness 4 34 Background Density Ad...

Page 160: ...R B5 B5 R A5 A5 R B6 B6 R A6 R Folio 8K 16K 16K R and 216 340mm Metric models Ledger Legal Letter Letter R Statement Statement R Oficio II 11 15 8K 16K and 16K R Others Select from envelope postcard o...

Page 161: ...Guide on page 11 18 Selecting the Cassette Use the procedure below to select the paper supply cassette 1 Press the Copy key 2 Place the originals on the platen 3 Press Org Paper Finishing and then Pa...

Page 162: ...d sizes and custom sizes ISO B5 Envelope 10 Commercial 10 Envelope 9 Commercial 9 Envelope 6 Commercial 6 3 4 Envelope Monarch Envelope DL Envelope C5 Envelope C4 Hagaki Oufuku hagaki Youkei 4 Youkei...

Page 163: ...rt key to start scanning the originals 10 If the specified size of paper is not loaded in the paper source cassette or multi purpose tray a confirmation screen appears When Auto is used and the same s...

Page 164: ...30 originals of different sizes can be placed in the document processor at the same time Supported Combinations of Originals Originals of the Same Width The supported combinations of originals are as...

Page 165: ...hen mixing the original sizes as using the following combination A4 R B5 R and Folio make sure to set the System Menu key Common Settings Original Paper Settings Original Auto Detect to On for Folio F...

Page 166: ...iginals are not aligned in this way they may not be scanned correctly and skewing or original jams may result 3 Press Org Paper Finishing and then Mixed Size Originals 4 Select Mixed Size Copies or Sa...

Page 167: ...Stamp NOTE If On is selected as the Orientation Confirmation on page 9 16 setting in the System Menu the selection screen for original orientation appears when you select any of the above functions W...

Page 168: ...Paper Finishing and then Original Orientation 4 Select Top Edge on Top or Top Edge on Left as the way the original is oriented 5 Press OK 6 Press the Start key to start copying Original Orientation T...

Page 169: ...he folding unit For details on paper sizes and numbers of sheets that can be folded refer to Center Folding Unit Option on page Appendix 28 The following folding options and orientations are available...

Page 170: ...d then Fold 4 Select the fold method NOTE To use saddle stitching press Bi Fold and then Saddle Stitch For more information on saddle stitching refer to Booklet on page 4 20 5 Press OK 6 Press the Sta...

Page 171: ...1 Press the Copy key 2 Place the originals on the platen 3 Press Org Paper Finishing and then Paper Output 4 Select the output destination for finished copies 5 Press OK 6 Press the Start key to start...

Page 172: ...R B5 B5 R A5 R Folio Ledger Legal Oficio II 216 340mm Letter Letter R Statement R 8K 16K and 16K R 2 in 1 Mode For copying two originals onto a single sheet This mode can be used with Duplex mode to...

Page 173: ...one sheet The following 4 in 1 options and output orientations are available NOTE When placing the original on the platen be sure to copy the originals in page order Types of Page Boundary Lines The...

Page 174: ...p bottom side When you copy onto paper different from the original size you can center the original image on the paper The following margin widths are available Margin on the Back Side When duplex cop...

Page 175: ...ress Original Orientation to choose the orientation of the originals either Top Edge on Top or Top Edge on Left Then press OK 6 Press OK 7 Press the Start key to start copying Status Copies Cancel OK...

Page 176: ...ginal such as a thick book You can specify the widths individually to erase the borders around the edges and in the center of the book Individual Border Erase Specify border erase widths individually...

Page 177: ...ight Press Keys to use the numeric keys for entry Press Original Orientation to select the original orientation from either Top Edge on Top or Top Edge on Left Then press OK For 2 sided originals pres...

Page 178: ...th staples in the center This is limited to the A3 B4 A4 R Ledger Legal Letter R 8K The supported original and paper sizes are as follows For binding on the left side The folded copies can be read fro...

Page 179: ...f the optional 4 000 sheet document finisher and folding unit are installed the Staple Fold option is displayed To fold finished copies in half press Staple Fold and then press Fold Only To use saddle...

Page 180: ...Cover 4 Press Front Cover or Front and Back Covers 5 Press OK 6 Press the Start key Copying begins If the originals are placed on the platen consecutively replace each original after pressing the Star...

Page 181: ...the forms already registered press Select Stored Form Press Select Form to display the document boxes that store documents which can be used as a form Select the desired form from the list and press...

Page 182: ...Copy key 2 Place the originals in the document processor or on the platen 3 Press Layout Edit and then Page Item Detail Font Size Set the font size of the printed page number Registered font sizes ar...

Page 183: ...numbered a negative number of pages counting backwards from the last page Then press OK You can set a value up to 10 You can also enter the number with the numeric keys after pressing Keys 10 The tota...

Page 184: ...e for the copy paper sizes of A3 B4 A4 A4 R B5 B5 R A5 R Ledger Legal Oficio II 216 340mm Letter Letter R Statement R Folio 8K 16K and 16K R Layout A Reduces images of each original page for printing...

Page 185: ...Border Line to select the page boundary line Press OK 6 Press Original Orientation to select orientation of the originals either Top Edge on Top or Top Edge on Left Press OK 7 Press OK 8 Press the Sta...

Page 186: ...in half to make 2 copies that are identical to the original Follow the steps shown below to use Image Repeat 1 Press the Copy key 2 Place the originals on the platen 3 Press Layout Edit and then press...

Page 187: ...an enter the border width directly using the numeric keys after pressing Keys Y1 Length from top left of platen to top edge of repeat area X1 Length from Height from top left of platen to left edge of...

Page 188: ...tamp Item Detail Stamp Method Each Print Page Stamp on each printed page Each Original Page Stamp each page of the document Position Selectable positions are Top Left Top Middle Top Right Middle Left...

Page 189: ...the procedure below to specify the Bates Stamp settings 1 Press the Copy key 2 Place the originals on the platen 3 Press Layout Edit and then press Bates Stamp Item Detail Position Selectable positio...

Page 190: ...starting sequence number 1 to 9999999 6 Press Position and select the position of the bates stamp 7 Press Font and select font and display settings for the bates stamp 8 Press Original Orientation to...

Page 191: ...opies using EcoPrint is explained below 1 Press the Copy key 2 Place the originals on the platen 3 Press Image Quality and then EcoPrint 4 Press On 5 Press 1 to 5 Low High to adjust the Toner Save Lev...

Page 192: ...below to adjust sharpness 1 Press the Copy key 2 Place the originals on the platen 3 Press Image Quality and then Press Sharpness 4 Press All or Text Fine Line 5 When All is selected press 3 to 3 Blu...

Page 193: ...ollow the steps below to use background density adjust 1 Press the Copy key 2 Place the originals on the platen 3 Press Image Quality and then press Background Density Adj 4 Press Auto or Manual 5 Whe...

Page 194: ...ess the Copy key 2 Place the originals on the platen 3 Press Image Quality and then press Prevent Bleed thru 4 Press On Prevent Bleed thru is selected 5 Press OK 6 Press the Start key Copying begins P...

Page 195: ...ss Sheet Insertion to insert a blank paper Press Next Copy On Back in duplex copying to print the next page on back page 6 Place the next original and press the Start key Repeat these steps to scan th...

Page 196: ...sing Auto Image Rotation is explained below 1 Press the Copy key 2 Place the originals on the platen 3 Press Advanced Setup and then Auto Image Rotation 4 Press On to select Auto Image Rotation 5 Pres...

Page 197: ...mage of the original Use the procedure below to make mirror image copies 1 Press the Copy key 2 Place the originals on the platen 3 Press Advanced Setup and then Mirror Image 4 Press On to select Mirr...

Page 198: ...aten 3 Press Advanced Setup and then Job Finish Notice 4 To select the destination from the address book press Address Book on the left of the screen and then press Address Book in the next screen Sel...

Page 199: ...ail Address enter the address and press OK 5 Press OK 6 Press the Start key to start copying Upon completion of the job an E mail notice is sent to the selected destination Status Copies Cancel OK Job...

Page 200: ...de Suspends a current job and gives the selected job priority for copying The suspended job resumes after Priority Override copying is finished NOTE The current job that is selected as Priority Overri...

Page 201: ...ault setting Refer to Repeat Copy on page 9 28 Giving a file name to a copy job will facilitate identification of the data when copying refer to File Name Entry on page 4 42 Selecting Repeat Copy Use...

Page 202: ...on 5 Press OK DP Read Action Set the operation when a document is scanned from the document processor The table below shows the available settings NOTE The optional document processor is required Cann...

Page 203: ...5 Printing This chapter explains the functions available for printing For details on Using the Document Box refer to the Chapter 7 Document Box Printing Printing from Applications 5 2 Using a Job Box...

Page 204: ...f the page numbers 5 Click the Properties button The Properties dialog box appears 6 Select the Basic tab and click the Page Size button to select the paper size To print on the special paper such as...

Page 205: ...settings related to finishing of printed media including binding and stapling Imaging This tab lets you configure settings related to the quality of the print results Publishing This tab lets you cre...

Page 206: ...print settings open the printer driver print settings screen and display Help as explained below 1 Click the button in the upper right corner of the screen and then click the item you want to know abo...

Page 207: ...y changes to a tray that can be used To print on paper that is 164 g m2 or heavier register the paper as a custom media type in the system menu and select that type in Media Type in the printer driver...

Page 208: ...r to send data as a Proof and Hold Print job The Proof and Hold feature produces only a single proof print of multiple print job and holds printing of the remaining copies Printing a multiple print jo...

Page 209: ...Job storage is useful for jobs that need to be available for printing at any time even if the printing system has been turned off and turned on again If desired you can attach a four digit access code...

Page 210: ...Printing 5 8...

Page 211: ...on Functions 6 16 Original Image 6 18 Density 6 19 Scan Resolution 6 20 Sharpness 6 21 Background Density Adj 6 22 Color Selection 6 23 Continuous Scan 6 24 Prevent Bleed thru 6 25 Border Erase 6 26 F...

Page 212: ...ept Standard Sizes 1 Inch models A3 B4 A4 A4 R B5 B5 R A5 A5 R B6 B6 R A6 R Folio 8K 16 K 16K R 216 340mm Metric models Ledger Legal Letter Letter R Statement Statement R Oficio II 11 15 8K 16K 16K R...

Page 213: ...horizontal and Y vertical By pressing Keys you can use the numeric keys 5 Press OK 6 Specify the destination and press the Start key to start sending Standard Sizes 2 Standard Sizes 1 Auto Others Siz...

Page 214: ...Select from Same as Original Size or Standard Size Inch models Same as Original Size Ledger Legal Letter Statement Oficio II 11 15 Metric models Same as Original Size A3 B4 A4 B5 A5 B6 A6 Folio 216 34...

Page 215: ...ta Format and then Sending Size 4 Press Standard Sizes 1 Standard Sizes 2 or Others to select the sending size 5 Press OK 6 Specify the destination and press the Start key to start sending Same as Ori...

Page 216: ...on page 6 7 Use the procedure below to enlarge or reduce the original to match the transmission size 1 Press the Send key 2 Place the originals on the platen 3 Select the transmission size 4 Press Ad...

Page 217: ...er By using the centering the image is placed with a margin equally created at each of the page Top Bottom and Left Right Use the procedure below to center the image when sending a scanned image 1 Pre...

Page 218: ...iginals of different sizes can be placed in the document processor at the same time Originals of the Same Width When the original widths are the same the combinations of originals that can be placed a...

Page 219: ...TE When mixing the original sizes as using the following combination A4 R B5 R and Folio make sure to set the System Menu key Common Settings Original Paper Settings Original Auto Detect to On for Fol...

Page 220: ...y may not be scanned correctly and skewing or original jams may result 3 Press Org Sending Data Format and then Mixed Size Originals 4 Select the combination of originals from Same Width and Different...

Page 221: ...irection and press Original Orientation to select the direction in which the original is set on the platen When selecting Book select the binding direction 6 Press OK 7 Specify the destination and pre...

Page 222: ...s set on the platen 2 sided Book Original Border Erase NOTE If On is selected as the Orientation Confirmation page 9 16 setting in the System Menu the selection screen for original orientation appears...

Page 223: ...g Data Format and then Original Orientation 4 Select original orientation from Top Edge on Top and Top Edge on Left 5 Press OK 6 Specify the destination and press the Start key to start sending Select...

Page 224: ...ow Comp Auto Color Color Grayscale Auto Color Color Black and White Full Color Grayscale Black and White TIFF 1 Low Quality High Comp to 5 High Quality Low Comp Auto Color Color Grayscale Auto Color C...

Page 225: ...s below to split scanned original data into separate files when sending scanned originals 1 Press the Send key 2 Place the originals on the platen 3 Press Org Sending Data Format and then File Separat...

Page 226: ...ethod on page Appendix 9 for details on entering characters 7 Press Confirmation and enter the password again for confirmation Then press OK 8 When you enter the password to edit the PDF file select O...

Page 227: ...Images Others Disable Enable Status Cancel OK 10 10 2010 10 10 Item Detail Not Allowed Make the printing of PDF file impossible Allowed Low Resolution only Only displayed when Acrobat 5 0 and later i...

Page 228: ...l Image 4 Select the original image 5 Press OK 6 Specify the destination and press the Start key to start sending Item Detail Disable Prohibit the copying of text and objects on the PDF file Enable Ca...

Page 229: ...elow 1 Press the Send key 2 Place the originals on the platen 3 Press Color Image Quality and then Density 4 Press 3 to 3 Lighter Darker to adjust density 5 Press OK 6 Specify the destination and pres...

Page 230: ...pi The procedures for adjusting the scanning resolution when sending a scanned image is explained below 1 Press the Send key 2 Place the originals on the platen 3 Press Color Image Quality and then Sc...

Page 231: ...hen Text Fine Line is selected press 0 to 3 Normal Sharpen to adjust the sharpness 6 Press OK 7 Specify the destination and press the Start key to start sending Item Detail All Sharpen Emphasize the i...

Page 232: ...o set the background density when sending scanned images 1 Press the Send key 2 Place the originals on the platen 3 Press Color Image Quality and then Background Density Adj 4 Press Auto or Manual 5 W...

Page 233: ...ce the originals on the platen 3 Press Color Image Quality and then Color Selection 4 Select the color mode to be used for scanning 5 Press OK 6 Specify the destination and press the Start key to star...

Page 234: ...on Guide The procedure for using continuous scanning when sending scanned images is explained below 1 Press the Send key 2 Press Advanced Setup and then Continuous Scan 3 Press On Continuous Scan is s...

Page 235: ...key 2 Place the originals on the platen 3 Press Color Image Quality and then press Prevent Bleed thru 4 Press On Prevent Bleed thru is selected 5 Press OK 6 Specify the destination and press the Start...

Page 236: ...Erases black borders around the edges and in the middle of the original such as a thick book You can specify the widths individually to erase the borders around the edges and in the center of the boo...

Page 237: ...ion to select the original orientation from either Top Edge on Top or Top Edge on Left and press OK For 2 sided originals press Back Page and then press Same as Front Page or Do Not Erase 5 Press OK 6...

Page 238: ...ss Advanced Setup and then File Name Entry 4 Press File Name 5 Enter the document name and press OK NOTE Up to 32 characters can be entered for the document name 6 Press Job No to enter the job No and...

Page 239: ...ss OK NOTE Up to 60 characters can be entered for the subject 6 Press Body 7 Enter the body and press OK NOTE Up to 500 characters can be entered for the body 8 You can press Body 1 Body 2 or Body 3 t...

Page 240: ...lick the machine s icon Olivetti XXX XXX and then click Install NOTE If the User Account Control window appears click Continue If the Found New Hardware window appears click Cancel 3 During the instal...

Page 241: ...rom Your Computer 1 Press the Send Key The send screen appears NOTE Depending on the settings the address book screen may appear In this event press Cancel to display the screen for sending 2 Place th...

Page 242: ...selecting the machine see the Operation Guide or Help for each application software 3 Select scanning settings in the TWAIN dialog box that opens The settings that appear in the TWAIN dialog box are...

Page 243: ...n software 3 Select the Custom Box containing the document file to be scanned from the Box List If a password has been set for the box the password entry screen appears Enter the password and click th...

Page 244: ...button to display the selected document data When the document data includes multiple pages select the checkbox beside the pages you want to scan The selected pages will be scanned NOTE In this case t...

Page 245: ...then press Address Book in the next screen Select the destination to be notified then press OK You can view information on the notification destination by pressing Detail 5 Specify the destination to...

Page 246: ...sent in a Custom Box The procedure for using Send and Store is explained below 1 Press the Send key 2 Place the originals on the platen 3 Press Advanced Setup and then Send and Store 4 Press On 5 Sele...

Page 247: ...processor or on the platen 3 Press Advanced Setup and then FTP Encrypted TX 4 Press On 5 Press OK NOTE You can only change the settings by logging in with administrator privileges Refer to Adding a Us...

Page 248: ...n of the text stamp Item Detail Position Selectable positions are Top Left Top Middle Top Right Middle Left Center Middle Right Bottom Left Bottom Middle and Bottom Right Font Size Set the font size o...

Page 249: ...as follows Item Detail Position Selectable positions are Top Left Top Middle Top Right Middle Left Center Middle Right Bottom Left Bottom Middle and Bottom Right Font Size Set the font size of the pri...

Page 250: ...mat If you selected Numbering press Numbering Default and set the starting sequence number 1 to 9999999 6 Press Position and select the position of the text stamp 7 Press Font and select font and disp...

Page 251: ...r every TWAIN WIA compliant software Use the color profile after carefully reading the manual included with your TWAIN WIA complaint software Selecting a color profile compatible with this device 1 Se...

Page 252: ...r computer and configure settings for the multifunction machine to be used scanning conditions and the file save location To install File Management Utility refer to Installing Software on page 2 16 F...

Page 253: ...pter explains the typical procedure for utilizing Document Box Using a Custom Box 7 2 Job Box 7 14 Printing Documents Stored in Removable USB Memory 7 22 Saving Documents to USB Memory Scan to USB 7 2...

Page 254: ...he box number by pressing or number keys The box number can be from 0001 to 1000 A Custom Box should have a unique number If you enter 0000 the smallest number available will be automatically assigned...

Page 255: ...numeric keys 4 Press OK The time for document deletion is set Auto File Deletion Automatically deletes stored documents after a set period of time Press On to enable automatic deletion and then use an...

Page 256: ...image to be stored No Name Owner Used Add Edit Box 1 1 0001 SALES Anonymous Store File Detail Open Custom Box Job Box Removable Memory Status FAX Box Search No Search Name Program 10 10 2010 10 10 Ori...

Page 257: ...cted the print settings selection screen appears To use the settings used at the time of printing when the document was saved press Print As Is Press Start Print to start printing To change the print...

Page 258: ...age 3 18 Page page 4 24 Bates Stamp page 4 31 Punch page 3 20 Job Finish Notice page 4 40 Density page 3 8 Paper Output page 4 13 File Name Entry page 4 42 Original Image page 3 9 Combine page 4 14 De...

Page 259: ...he checkmark 4 Press Send The screen for sending appears NOTE Depending on the settings the address book screen may appear 5 Set the destination NOTE For more information on selecting destinations ref...

Page 260: ...page 6 14 FTP Encrypted TX page 6 37 Resolution page 6 18 FAX TX Resolution refer to Fax Operation Guide Delete after Transmitted page 7 8 Color Selection page 6 23 Centering page 6 7 Zoom page 6 6 Sh...

Page 261: ...5 Press Functions Form Overlay Select Stored Form and then Select Form NOTE You can select the form density setting through 4 levels from 10 20 30 or 100 Press the or buttons in Density 6 In Form Over...

Page 262: ...ct the document in the list that you want to move or copy by pressing the checkbox The document is marked with a checkmark NOTE To deselect press the checkbox again and remove the checkmark 4 Press Mo...

Page 263: ...ox select the box containing the documents you want to join and press Open NOTE If a custom box is protected by a password enter the correct password 3 Select the documents in the list that you wish t...

Page 264: ...K NOTE Enter up to 64 characters as the file name 8 Press Join and then press Yes in the confirmation screen The documents are joined NOTE After joining the original documents are left unchanged Delet...

Page 265: ...te by checking the checkbox The document is marked with a checkmark NOTE Delete is disabled until a document is selected To deselect press the checkbox again and remove the checkmark 4 Press Delete Th...

Page 266: ...ob and press Open 4 Select the creator of the document to print and press Open 5 Select the document and press Print 6 If the document is protected by a password enter the password using the numeric k...

Page 267: ...he print data which is printed by using the printer driver as a Quick Copy or Proof and Hold Print job Refer to the Printer Driver User Guide on how to print a job as Quick Copy or Proof and Hold Prin...

Page 268: ...3 Select Quick Copy Proof and Hold and press Open 4 Select the creator of the document and press Open 5 Select the document to print and press Print Document Box Removable Memory Quick Copy Job Retent...

Page 269: ...creator of the document and press Open 4 Select the document to delete and press Delete The delete confirmation screen appears 5 Press Yes The document is deleted Close 1 2 Open User Name Files Quick...

Page 270: ...documents stored in the Repeat Copy box Use the procedure below to print a document 1 Press the Document Box key 2 Press Job Box 3 Select Repeat Copy box and press Open 4 Select the document to print...

Page 271: ...ess Document Box Removable Memory Next of Job Box then Change of Deletion of Job Retention 3 Select the time for automatic deletion To deactivate automatic deletion press Off 4 Press OK NOTE This func...

Page 272: ...ginal is scanned 7 Press the Start key The original is scanned and stored in the Form for Form Overlay box NOTE For information on using image overlays with a stored form see Form Overlay on page 4 23...

Page 273: ...3 Select Form for Form Overlay and press Open 4 Select the form to delete and press Delete The delete confirmation screen appears 5 Press Yes The form is deleted Form for Form Overlay Name Date and Ti...

Page 274: ...emory printing is error free if a USB hub is used Printing Print Print documents stored in the removable USB memory 1 Plug the USB memory into the USB Port A1 IMPORTANT Use USB memory formatted by thi...

Page 275: ...TIFF files XPS Fit to Page Reduces or enlarges the image size to fit to the selected paper size when printing XPS files Status Detail Delete Memory Information 001 999 Name Date and Time Size Remove M...

Page 276: ...ned below 1 Plug the USB memory into the USB Port A1 IMPORTANT Use only USB memory that has been formatted on this machine If USB memory formatted on another device is used The removable memory is not...

Page 277: ...ment MB 1 Document MB 3 Document MB 4 Document MB 1 Document MB 2 2010 10 10 09 30 2010 10 10 09 40 2010 10 10 09 50 2010 10 10 10 00 2010 10 10 10 05 Removable Memory Store File Open Custom Box Job B...

Page 278: ...is displayed NOTE USB memory can also be removed after checking the status of the device For details refer to Check of Device Status on page 8 14 Status Detail Delete Memory Information 001 999 Name D...

Page 279: ...to check the remaining amount of toner and paper and the status of devices and how to cancel the fax communication Checking Job Status 8 2 Checking Job History 8 9 Pause and Resumption of Jobs 8 11 Ca...

Page 280: ...nding Jobs and then Scheduled Job For an explanation of the screen refer to Details of the Status Screens on page 8 3 Screen Job status to be displayed Printing Jobs Copy Printer FAX reception i FAX r...

Page 281: ...us 1 1 Detail Paper Supplies Device Communication Storing Jobs Sending Jobs Printing Jobs 10 10 09 10 10 10 09 15 000003 10 10 09 20 doc20081010092015 Waiting BBBBB 10 10 2010 10 10 1 2 3 4 5 6 7 8 9...

Page 282: ...10 Priority Override Select the job to be overridden and press this key Refer to Priority Override for Waiting Jobs on page 8 12 11 Move Up In the list select the job that you want to move up the job...

Page 283: ...ending Job Application Sending Job Multiple 4 Destination Destination Either destination name FAX number E mail address or server name 5 User Name User Name for the executed job 6 Status Status of job...

Page 284: ...the job type Storing Job Scan Storing Job Printer Storing Job FAX Storing Job i FAX Join Box Document Copy Box Document 4 Job Name Job name or file name is displayed 5 User Name User Name for the exec...

Page 285: ...tination by pressing Detail in Status Destination Log abc def com 438 14 47 1 1 Status Printing Jobs Sending Jobs Storing Jobs Device Communication Paper Supplies Detail InProcess Status User Name Job...

Page 286: ...he list Press or select a destination and press Detail Information on the selected job is displayed for checking 4 To exit from the detailed information press Close Detail Job No Close Job Type Destin...

Page 287: ...etwork Print Monitor from the computer Available Job History Screens The job histories are displayed separately in three screens Printing Jobs Sending Jobs and Storing Jobs The following job histories...

Page 288: ...l Detailed information of the selected job is displayed NOTE To check the information of the next previous page press or 4 To exit from the detailed information press Close Status Log All Job No End D...

Page 289: ...paused press Resume All Print Jobs Canceling of Jobs For more information on canceling jobs refer to the Canceling Jobs on page 3 51 doc20081010091015 InProcess 000001 doc20081010091510 Waiting 00000...

Page 290: ...higher priority and press Move Up The priority of the selected job is increased by 1 To further raise the job s priority press Move Up again Each time you press Move Up the priority increases by 1 do...

Page 291: ...n check the status of waste toner box Paper You can check the size orientation type and remaining amount of paper in each paper source The remaining amount of paper is shown by 5 levels as 100 75 50 2...

Page 292: ...described below Scanner The status of an original scanning in the document processor optional or the error information paper jam opened cover etc is displayed Printer Error information such as paper j...

Page 293: ...displayed Press Line Off to cancel a fax in sending receiving For details refer to Canceling FAX Communication on page 8 16 in the section afterwards Press Manual RX to start a fax Use this function...

Page 294: ...r FAX Port 2 3 Press Yes in the confirmation screen The line is disconnected and the fax communication is canceled Ready Scanner Ready Printer Not connected Removable Memory Hard Disk Format Remove Li...

Page 295: ...emory 9 52 Printer 9 54 Report 9 61 Adjustment Maintenance 9 65 Date Timer 9 72 Edit Destination Address Book Adding One Touch Keys 9 77 Internet 9 84 Application 9 86 System Initialization 9 89 Resta...

Page 296: ...29 Manual Staple 9 38 Customize Status Display 9 39 Low Toner Alert Level 9 39 NOTE If user login administration is enabled you can only change the settings by logging in with administrator privilege...

Page 297: ...Fax key is pressed appears Status The Status Job Cancel screen the screen shown when the Status Job Cancel key is pressed appears Document Box The Document Box screen the screen shown when the Docume...

Page 298: ...isplayed on the screen to select original size The dimensions available are as follows The table below lists the sizes that can be registered Item Value Description Volume 0 Mute 1 Minimum to 5 Maximu...

Page 299: ...Rough Vellum Labels Recycled Preprinted Bond Cardstock Color Prepunched Letterhead Thick Envelope Coated High Quality Custom 1 8 NOTE Refer to Media Type Setting on page 9 8 for Custom 1 8 for the med...

Page 300: ...er and B5 can be specified when the optional Large Capacity Feeder 1 500 sheet x 2 is used Available options are as follows Inch models Ledger Legal Letter Letter R Statement R 12 18 Oficio II Metric...

Page 301: ...s Inch models Ledger Legal Letter Letter R Statement R 12 18 Oficio II Executive Metric models A3 B4 A4 A4 R B5 B5 R A5 R B6 R A6 R Folio 216 340 mm Standard Sizes 2 Select a standard size except that...

Page 302: ...105 g m2 106g m2 to 135 g m2 136 g m2 to 163 g m2 164 g m2 to 220 g m2 221 g m2 to 256 g m2 257 g m2 to 300 g m2 Trans paren cies Plain N Y default Y Y N N N N N N Rough N Y Y Y default Y Y Y Y Y N V...

Page 303: ...m 1 8 press Next of Custom 1 8 and then Change of Name Enter the name and press OK NOTE Refer to the Character Entry Method on page Appendix 9 for details on entering characters Default Paper Source S...

Page 304: ...i of A6 Hagaki Select Off to disable automatic detection or On to enable automatic detection of Folio and 11x15 respectively 4 Press OK Media for Auto B W Select a default media type for auto paper se...

Page 305: ...n Settings Next of Original Paper Settings and then Change of Paper Source for Cover 3 Select the paper source to load cover paper 4 Press OK Special Paper Action When printing on Prepunched Preprint...

Page 306: ...pes 1 Press the System Menu key 2 Press Common Settings Next of Original Paper Settings and then Change of Special Paper Action 3 Select Adjust Print Direction or Speed Priority 4 Press OK Measurement...

Page 307: ...al 1 000 sheet finisher or 4 000 sheet finisher is installed Finished Pages Exceeded Select what to do when finishing stapling or offsetting capacity is exceeded during printing NOTE This setting is d...

Page 308: ...er or 4 000 sheet finisher is installed Use the procedure below to specify the settings for error handling 1 Press the System Menu key 2 Press Common Settings and then Next of Error Handling 3 Press C...

Page 309: ...and then Next of Paper Output 3 Press Change of Copy Custom Box Printer or FAX Port 1 or FAX Port 2 NOTE FAX Port 1 appears when the optional fax kit is installed If you have 2 optional fax kits inst...

Page 310: ...efaults makes subsequent jobs easier IMPORTANT If you want to enable the changed defaults immediately move to the function screen and press the Reset key Original Orientation Set the original orientat...

Page 311: ...ings Next of Function Defaults and then Change of Org Image Send Store 3 Select Text Photo Photo Text or Text for OCR for the default 4 Press OK Item Description Text Photo Printer For mixed text and...

Page 312: ...color mode 3 Press OK File Format Select the default file type to send the scanned originals The available default settings are shown below Color mode Description Auto Color Color Gray Automatically r...

Page 313: ...gs Next of Function Defaults and then Change of File Separation 3 Select the default for Off or Each Page 4 Press OK Backgrnd Density Copy Set the default Backgrnd Density Copy The available default s...

Page 314: ...eed thru Copy Set the default Prevent Bleed thru Copy Use the procedure below to select the default Prevent Bleed thru Copy 1 Press the System Menu key 2 Press Common Settings Next of Function Default...

Page 315: ...imes and then Change of Zoom 3 Select the default zoom setting 4 Press OK Border Erase Default Set the default width to be erased as a border The table below shows the measurement ranges that can be s...

Page 316: ...s that can be set Use the procedure below to set the default margin width 1 Press the System Menu key 2 Press Common Settings Next of Function Defaults and then Change of Margin Default 3 Use the or t...

Page 317: ...ttings Next of Function Defaults twice and then Change of EcoPrint 3 Select Off or On for the default 4 Press OK Toner SaveLevel EcoPrint Select the default Toner SaveLevel EcoPrint One of five levels...

Page 318: ...ss Common Settings and Next of Function Defaults Press twice and then Change of Color TIFF Compression 3 Select TIFF V6 or TTN2 4 Press OK Image Quality File Format Select the default PDF TIFF JPEG XP...

Page 319: ...elow shows the available settings Use the procedure below to set the default JPEG TIFF Print settings 1 Press the System Menu key 2 Press Common Settings Next of Function Defaults Press twice and Chan...

Page 320: ...s are shown below Refer to page 4 37 for Continuous Scan Use the procedure below to select the default settings for continuous scanning 1 Press the System Menu key 2 Press Common Settings Next of Func...

Page 321: ...the subject and body automatically entered default subject and body when sending the scanned originals by E mail In addition set the template for entering the body text One of three templates can be s...

Page 322: ...e default for Off or On 4 Press OK DP Read Action Set the operation when a document is scanned from the document processor The table below shows the available settings NOTE The optional document proce...

Page 323: ...stamp template during sending Use the procedure below to set a Text Text Stamp 1 Press the System Menu key 2 Press Common Settings Next in System Stamp Next in Basic Add Edit in Text Text Stamp 3 Sel...

Page 324: ...tings for stamps when a document is printed After configuring the setting return to the Copying Functions or Document Box Printing a Document screen from the system menu and press the Reset key Text S...

Page 325: ...Bates Stamp 1 Press the System Menu key 2 Press Common Settings Next in System Stamp Next in Printing Jobs Change in Bates Stamp 3 Select Off or On 4 Press OK NOTE When On is selected the Bates Stamp...

Page 326: ...ss Position and set the position of the printed bates stamp Positions that can be selected are Top Left Top Middle Top Right Middle Left Center Middle Right Bottom Left Bottom Middle and Bottom Right...

Page 327: ...e printed from the displayed templates 4 Press Position and set the position of the printed text stamp Positions that can be selected are Top Left Top Middle Top Right Middle Left Center Middle Right...

Page 328: ...ge in Edit Bates Stamp 3 Set the bates stamp to print Items that can be set are Date User Name Serial Number Numbering Text 1 and Text 2 If you selected Text 1 or Text 2 press Change below and enter a...

Page 329: ...ng Edit Text Stamp Set the default text stamp Use the procedure below to Edit a Text Stamp 1 Press the System Menu key 2 Press Common Settings Next in System Stamp Next in Storing Jobs Change in Edit...

Page 330: ...s Common Settings Next in System Stamp Next in Storing Jobs Change in Bates Stamp 3 Select Off or On 4 Press OK NOTE When On is selected the Bates Stamp settings cannot be changed when storing Item De...

Page 331: ...d set the starting sequence number 1 9999999 6 Press Position and set the position of the printed bates stamp Positions that can be selected are Top Left Top Middle Top Right Middle Left Center Middle...

Page 332: ...3 Select the default setting for Manual Staple 4 If you selected On in 3 set the time until manual stapling mode is automatically cancelled 5 Press OK Staple Position Set the default Staple Position T...

Page 333: ...Off alerts you low toner when the amount of remaining toner becomes 5 The procedure for setting the Low Toner Alert Level is explained below 1 Press the System Menu key 2 Press Common Settings Change...

Page 334: ...ministrator privileges Paper Selection Set the default paper selection The table below shows the available settings Use the procedure below to set the default paper selection 1 Press the System Menu k...

Page 335: ...aper source of different size from the original is selected select whether automatic zoom reduce zoom is performed The table below shows the available settings IMPORTANT If you want to enable the chan...

Page 336: ...ick Setup Registration Select the copying functions to be registered for Quick Setup Six keys of the Quick Setup screen are allocated to typical functions but can be changed as necessary Six items fro...

Page 337: ...s Scan Background Density Adj Use the procedure below to register the Quick Setup functions 1 Press the System Menu key 2 Press Send and Next of Quick Setup Registration 3 Press Change of the function...

Page 338: ...Entry Check for New Dest When adding new destination display the entry check screen to check the entered destination The table below shows the available settings Use the procedure below to set entry c...

Page 339: ...s Forward Set whether or not transmission copies are forwarded The table below shows the available settings Use the procedure below to set the settings for Forward 1 Press the System Menu key 2 Press...

Page 340: ...ion on page 3 39 for Address List Specifying by entering an e mail address Press E mail Address enter the e mail address and press OK NOTE Refer to the Character Entry Method on page Appendix 9 for de...

Page 341: ...o the Character Entry Method on page Appendix 9 for details on entering characters Press Connection Test to check the connection to the server you chose If the connection fails check the entries you m...

Page 342: ...se PDF encryption functions For details refer to the following PDF Encryption Functions File Format Adjustable range of image quality Color Setting PDF The file format can be set to PDF A 1a or PDF A...

Page 343: ...Next of Send and Forward Change of File Format 3 Press PDF or High Comp PDF and Encryption 4 Press of Compatibility select Acrobat 3 0 and later or Acrobat 5 0 and later 5 When you enter the password...

Page 344: ...e being forwarded Item Detail Not Allowed Make the printing of PDF file impossible Allowed Low Resolution only Only displayed when Acrobat 5 0 and later is selected in Compatibility Can print the PDF...

Page 345: ...he default E mail Subject 1 Press the System Menu key 2 Press Send Next of Send and Forward Change of E mail Subject 3 Enter a maximum of 60 characters for the e mail subject and press OK NOTE Refer t...

Page 346: ...a box in the custom box or deletes a box from the custom box For details refer to Using a Custom Box on page 7 2 Default Setting Sets the time at which documents in the custom box are automatically de...

Page 347: ...Background Density Adj Print Quick Setup Paper Selection Collate Offset Staple Punch Duplex Combine Delete after Printed Send Quick Setup Sending Size FAX TX Resolution File Format Delete after Transm...

Page 348: ...trator privileges Emulation Select the emulation for operating this machine by commands oriented to other types of printers Selection of emulation The printer can emulate PCL 6 KPDL and KPDL Auto Use...

Page 349: ...on and then press OK 4 Press OK Setting of KPDL error report When an error has occurred during printing in KPDL emulation mode set whether or not the error report is output The default setting is Off...

Page 350: ...lect the default Toner SaveLevel EcoPrint 1 Press the System Menu key 2 Press Printer and Change of Toner SaveLevel EcoPrint 3 Select from 1 to 5 for the default Toner SaveLevel EcoPrint 4 Press OK Ov...

Page 351: ...s 1 sided 2 sided Bind LongEdge or 2 sided Bind ShortEdge 4 Press OK Copies Set the default number of copies from 1 to 999 Use the procedure below to specify the default number of copies 1 Press the S...

Page 352: ...may sometimes wait if there is no information signaling that the last page does not have any more data to be printed When the preset timeout passes the machine automatically prints the document The op...

Page 353: ...e available settings Use the procedure below to specify a CR action 1 Press the System Menu key 2 Press Printer and Change of CR Action 3 Press CR Only LF and CR or Ignore CR 4 Press OK Job Name Set w...

Page 354: ...ailable settings Use the procedure below to select the paper feed mode 1 Press the System Menu key 2 Press Printer and Change of Paper Feed Mode 3 Press Auto or Fixed 4 Press OK KIR The machine is equ...

Page 355: ...nfigured NOTE If user login administration is enabled you can only print by logging in with administrator privileges Print Report Printable reports are as follows Status Page Check the information inc...

Page 356: ...lly print a report of transmission result when a transmission is complete The table below shows the available settings 1 Press the System Menu key 2 Press Report Next of Result Report Setting Next of...

Page 357: ...s press E mail Address Entry Press E mail Address enter the destination e mail address and then press OK 4 To set an address from the address book press E mail Address Book 5 Press Address Book Select...

Page 358: ...confirmation screen appears press Yes The log history is sent Job Log Subject Set the subject automatically entered when sending log histories by e mail Use the procedure below to set the subject 1 P...

Page 359: ...tration is enabled you can only change the settings by logging in with administrator privileges Density Adjustment The density for all copying and the density for all sending and storing in document b...

Page 360: ...1 Press the System Menu key 2 Press Adjustment Maintenance and then Next of Background Density Adj 3 Press Change of Copy Auto 4 Press 3 3 Lighter Darker to adjust background density 5 Press OK Send...

Page 361: ...tenance and then Change of Correcting Black Line 3 Press Off On Low or On High 4 Press OK System Initialization Initialize the hard disk installed on the machine to return it to the factory defaults R...

Page 362: ...e original is color or black and white in Auto Color Selection Mode Setting a lower value will result in more originals being identified as color while a larger value will tend to increase the number...

Page 363: ...t the number 2 is printed at the bottom of the pattern and repeat steps 4 to 6 to read the pattern 7 Press OK in the adjustment end confirmation screen Drum Refresh1 Refresh the drum when image blur a...

Page 364: ...ed press OK to return to the Adjustment Maintenance screen Calibration Cycle After Auto Clear has been activated or during printing Calibration Remaining 50 seconds may be displayed While this message...

Page 365: ...d then Next of Calibration 3 Press Execute Calibration begins 4 Press OK after Calibration is complete Developer Refresh When the printing is too light or incomplete even though there is enough toner...

Page 366: ...the machine If you perform Send as E mail the date and time set here will be displayed on the header NOTE Be sure to set Time Zone before the Date Time setup Use the procedure below to set the date a...

Page 367: ...press OK NOTE If you select a region that does not utilize summer time the summer time setting screen will not appear Auto Panel Reset If no jobs are run for a certain period of time automatically res...

Page 368: ...Low Power Mode Specify a value from 1 240 minutes 1 minute increments For more information on Low Power Mode refer to the Low Power Mode and Auto Low Power Mode on page 2 9 Use the procedure below to...

Page 369: ...of time elapses For details refer to Responding when Error Messages on page 12 7 Auto Error Clear Select whether to use Auto Error Clear or not Use the procedure below to specify the auto error clear...

Page 370: ...me for the interrupt clear timer 4 Press OK Error Job Skip Set whether a job for which a Add paper in cassette or Add paper in Multi Purpose tray error occurred when the job was started is automatical...

Page 371: ...ystem Menu key 2 Press Edit Destination Add Edit of Address Book Add Contact and then Next 3 To specify the address number press Change in Address Number 4 Press or numeric keys to enter a particular...

Page 372: ...default 21 use the Host name port number format e g FTPhostname 140 To enter the IPv6 address enclose the address in brackets e g 3ae3 9a0 cd05 b1d2 28a 1fc0 a1 10ae 140 NOTE Refer to the Character E...

Page 373: ...d folder is set NOTE Refer to the Character Entry Method on page Appendix 9 for details on entering characters Press Connection Test to check the connection to the computer you chose If the connection...

Page 374: ...roups If you specify an address number that is already in use an error message appears when you press Save and the number cannot be registered If you set 0000 as the address number the address is regi...

Page 375: ...irmation screen to register the changed destination Editing a Group 1 Change Address Number and Name Refer to Group on page 9 80 for the details 2 Press Member 3 To delete any destination from the gro...

Page 376: ...e Touch Key Use the procedure below to edit the One Touch key 1 Press the System Menu key 2 Press Edit Destination and then Add Edit of One Touch Key 3 Select a One Touch Key number 0001 to 1000 for t...

Page 377: ...table below shows the available settings Use the procedure below to specify the Narrow Down settings 1 Press the System Menu key 2 Press Edit Destination Next of Address Book Defaults and then Change...

Page 378: ...Change of Internet Browser 4 Press On or Off 5 Press OK Browser Preferences This specifies Internet browser preferences such as your home page setting and how pages are displayed NOTE This is not dis...

Page 379: ...For this you need to login with administrator privileges Refer to Adding a User Local User List on page 10 5 for the default login user name and password 3 Press Change of Proxy and then press On To s...

Page 380: ...ord and then press Login For this you need to login with administrator privileges Refer to Adding a User Local User List on page 10 5 for the default login user name and password 4 Press Add 5 Select...

Page 381: ...ctivate 4 Enter the license key and press Official Some applications do not require you to enter a license key If the license key entry screen does not appear go to Step 5 To use the application as a...

Page 382: ...n Application NOTE If the user authentication screen appears enter your login user name and password and then press Login For this you need to login with administrator privileges Refer to Adding a Use...

Page 383: ...rator privileges Refer to Adding a User Local User List on page 10 5 for the default login user name and password 3 When the confirmation screen appears press Yes Initialization starts IMPORTANT The F...

Page 384: ...machine Use the procedure below 1 Press the System Menu key 2 Press System Next of Network Check the host name displayed under Host Name TCP IP Select whether or not to use TCP IP The default setting...

Page 385: ...ting 3 Press Change of TCP IP 4 Press On and then press OK 5 Press Change of IPv4 6 Press DHCP 7 Press Off of DHCP and then press OK 8 Press Bonjour 9 Press Off of Bonjour and then press OK 10 Press I...

Page 386: ...he IP address prefix length and gateway address of TCP IP IPv6 The manual setting is available when selecting On for TCP IP IPv6 IMPORTANT After changing the setting restart the network from the syste...

Page 387: ...Press Change of RA Stateless 5 Press On or Off of RA Stateless When selecting On IP Address 1 to 5 Stateless appears 6 Press OK DHCP IPv6 Settings Select whether or not to use the DHCP IPv6 server Th...

Page 388: ...FTP On Y SMB Client Transmission Select whether or not to send documents using SMB When selecting On set the SMB default Port Number Use the SMB default port 139 For Windows Vista use 445 On Port 139...

Page 389: ...for NetWare network from Auto Ethernet II 802 3 802 2 or SNAP The default settings are On Frame Type Auto IMPORTANT After changing the setting restart the network from the system menu or turn the mac...

Page 390: ...stem menu or turn the machine OFF and then ON For detailed information on restarting the network refer to Restart Network on page 9 101 Use the procedure below 1 Press the System Menu key 2 Press Syst...

Page 391: ...After changing the setting restart the network from the system menu or turn the machine OFF and then ON For detailed information on restarting the network refer to Restart Network on page 9 101 The f...

Page 392: ...ork Next of Secure Protocol and then Change of IPP Security 3 Press IPP over SSL Only or IPP or IPP over SSL 4 Press OK HTTP Security Select the HTTP security level This setup is available when SSL is...

Page 393: ...that can be used on the SMTP port This setup is available when SSL is On The default setting is Off NOTE SMTP must be set to On in Protocol Detail on page 9 94 Use the procedure below 1 Press the Sys...

Page 394: ...at can be used on the POP3 port This setup is available when SSL is On The default setting is Off For the procedure for selecting the POP3 Security User 3 Setting see POP3 Security User 1 IPSec Sets u...

Page 395: ...restarting the network refer to Restart Network on page 9 101 Use the procedure below 1 Press the System Menu key 2 Press System Next of Network and then Change of LAN Interface 3 Select Auto 10BASE...

Page 396: ...en press Login For this you need to login with administrator privileges Refer to Adding a User Local User List on page 10 5 for the default login user name and password 3 Press Block 4 Press OK USB De...

Page 397: ...st you confirm how the machine performs this function in your environment Machine Operation after Detecting the Document Guard Pattern Item Description Common operation Displays the message that indic...

Page 398: ...d on the colored paper or paper that is decorated with special design may not be detected We do not guarantee the integrity of the detection If a malfunction occurs contact your service representative...

Page 399: ...esume when the power is turned on but complete sanitization cannot be guaranteed The data erased by initialization is shown below Category Data erased Devices jobs Job settings set by user Network set...

Page 400: ...ust log in with administrator authority Refer to Adding a User Local User List on page 10 5 for the default login user name and password 3 Press Start Initialization starts When initialization is comp...

Page 401: ...d differ depending on the application Starting Application Use Use the procedure below to start using an application 1 Press the System Menu key 2 Press System and then Next of Optional Function NOTE...

Page 402: ...Accessibility Display Enlarged Touch Panel Display Touch panel characters and key displays can be enlarged Use the numeric keys to select items and proceed to the next screen NOTE Accessibility can be...

Page 403: ...10 1 10 Management This chapter explains the following operations User Login Setting 10 2 Job Accounting Setting 10 20...

Page 404: ...ser for whom the function is not prohibited First User Login Administration Follow these steps for the first user login administration Enable user login administration page 10 2 Add a user page 10 5 L...

Page 405: ...entry screen appears each time you use this machine NOTE If the guest authentication setting is enabled the authentication logout key must be pressed when logging in Login Use the procedure below to...

Page 406: ...ocal or Network can be selected as the authentication destination 5 Check the login user name and password are correct and press Login Logout To log out the machine press the Authentication Logout key...

Page 407: ...ID Refer to Job Accounting Setting on page 10 20 E mail Address The user can register his her E mail address The registered address will be automatically selected for subsequent operations that need...

Page 408: ...u key 3 Press User Login Job Accounting 4 If the user authentication screen appears enter your login user name and password and then press Login For this you need to login with administrator privilege...

Page 409: ...Press Save to add a new user on the local user list NOTE If simple login is enabled a confirmation screen appears when new registration is finished asking if you will configure simple login settings T...

Page 410: ...password and then press Login For this you need to login with administrator privileges Refer to Adding a User Local User List on page 10 5 for the default login user name and password 4 Press Next of...

Page 411: ...es Press Detail of Login User Name or Account Name to check the present status 4 Press Save to finalize changed user properties Local Authorization Select whether or not to use Local Authorization Use...

Page 412: ...t 6 Press OK Group Authorization Set Set restrictions of the machine usage by each individual group registered in the authentication server NOTE To use the group authorization settings Network Authent...

Page 413: ...of user properties If you are using Windows Server 2000 2003 check ADSIEdit ADSIEdit is a support tool included on the installation DVD for Windows Server OS under SUPPORT TOOLS Enter the ID displaye...

Page 414: ...est users who cannot log in to the machine are allowed to use NOTE To use Guest Authorization Set User Login Administration must be enabled in User Login on page 10 2 Cannot be used when the Key Count...

Page 415: ...cription User Name Enter the name displayed on the user list up to 32 characters Access Level The authority of the user appears This cannot be changed Account Name Add an account where the user belong...

Page 416: ...o the Character Entry Method on Appendix 9 for details on entering characters 7 Press Change of Account Name 8 Select the account and press OK NOTE Select Name and ID from the Sort pull down menu to s...

Page 417: ...etwork Authentication Use the procedure below 1 Press the System Menu key 2 Press User Login Job Accounting 3 If the user authentication screen appears enter your login user name and password and then...

Page 418: ...ype to Kerberos press Authentication Type and set the authentication method 15 Press Search Timeout to set the amount of time to wait before time out 16 Press or the numeric keys to enter the time and...

Page 419: ...and then press Login For this you need to login with administrator privileges Refer to Adding a User Local User List on page 10 5 for the default login user name and password 4 Press Next of User Logi...

Page 420: ...user to be set for simple login NOTE Destinations can be sorted or searched by destination name or address number Refer to Specifying Destination on page 3 39 for Address List Status Add or edit the...

Page 421: ...on entering characters 10 Press Change of Password Login 11 Press On or Off and then press OK 12 Press Change of Icon 13 Select the user icon to be displayed and press OK 14 Press Save Status User Na...

Page 422: ...Follow these steps for the first job accounting setup Enable job accounting page 10 20 Add an account page 10 22 Log out page 10 21 Other users login for operations page 10 21 Job Accounting Enable j...

Page 423: ...nter you can refer to the number of pages printed and the number of pages scanned When the screen to enter the login user name and password appears If user login administration is enabled the screen t...

Page 424: ...een reappears NOTE Refer to the Character Entry Method on Appendix 9 for details on entering characters 7 Follow steps 5 and 6 above to enter the Account ID NOTE Any account ID that has already regist...

Page 425: ...nt name or account ID The procedure differs depending on the details to be edited Changing account information 1 Press Detail 2 Refer to steps 5 to 7 of Adding an Account and steps 2 to 5 of Restricti...

Page 426: ...lt login user name and password 4 Press Next of Job Accounting Setting Next of Default Setting and then Change of Copy Printer Count 5 Press Total or Split 6 Press OK Restricting the Use of the Machin...

Page 427: ...ss Save The restricted account is added Item Detail Print Restriction Total Limits the total number of sheets used for copying and printing Scan Restriction Others Limits the number of sheets scanned...

Page 428: ...ress Next of Job Accounting Setting Next of Default Setting and then Change of Apply Limit 5 Select Immediately Subsequently or Alert Only 6 Press OK Default Counter Limit When you add a new account y...

Page 429: ...ion Total Sets the default restriction on the number of sheets used for copying Print Restriction Total Sets the default restriction on the number of sheets used forprinting Scan Restriction Others Se...

Page 430: ...t by Paper Size to check the number of pages used in the paper size set in Count by Paper Size on page 10 30 as well as the number of pages used in other paper sizes You can use the Count by Duplex Co...

Page 431: ...firm the count and press Close 7 Press Start of Counter Reset to reset the counter 8 Press Yes on the screen to confirm the reset The counter is reset Each Job Accounting This counts the number of pag...

Page 432: ...g count the letter size color paper used If no media type is specified usage is counted for all media types of that size Use the procedure below to count the number of pages 1 Press the System Menu ke...

Page 433: ...to specify media type 7 Select the media type and press OK 8 Press Close User Login Job Accounting Paper Size 1 Select the paper sizes and types to count On Off Cancel OK A5 Plain Media Type B4 A3 A4...

Page 434: ...o print a job accounting report 1 Check that Letter or A4 paper is loaded in the cassette 2 Press the System Menu key 3 Press User Login Job Accounting 4 If the user authentication screen appears ente...

Page 435: ...d Printing Counter Press the Counter key to check the number of sheets printed and scanned You can check the number of pages printed in each paper size by pressing Printed Pages by Paper Size Counter...

Page 436: ...Management 10 34...

Page 437: ...11 1 11 Maintenance This chapter describes cleaning and toner replacement Regular Maintenance 11 2 Cleaning 11 15...

Page 438: ...sing a toner container that is not genuine may cause image defects and product failure The memory chip in the toner container of this product stores information necessary for improving customer conven...

Page 439: ...isposal bag 4 Remove the new toner container from the box 5 Place a cushioning material on a flat surface hold the toner container vertically on the material and tap the upper part of the container ab...

Page 440: ...way in 8 After pushing the toner container all the way in turn the toner container release lever to the horizontal position 9 Close the front cover NOTE Return the exhausted toner container and waste...

Page 441: ...acement When the touch panel shows Check waste toner box immediately replace the waste toner box CAUTION Do not attempt to incinerate the toner container or the waste toner box Dangerous sparks may ca...

Page 442: ...Maintenance 11 6 4 Insert into the provided plastic disposal bag 5 Gently remove the new waste toner box from its packaging and open the cap 6 Install a new waste toner box...

Page 443: ...correct position it locks in place with a clicking sound 8 Close the front cover NOTE Return the exhausted toner container and waste toner box to your dealer or service representative The collected to...

Page 444: ...holder need to be replenished with staples NOTE If the Staple Unit runs out of staples contact your service representative or the place of purchase Follow the steps below to refill staples 1 000 shee...

Page 445: ...4 Insert the new staple cartridge into the staple cartridge holder 5 Re install the staple cartridge holder The staple cartridge holder will click into place when it has been inserted correctly 6 Clo...

Page 446: ...cartridge holders B and C are the same as for staple cartridge holder A Refilling Staple Cartridge Holder A NOTE See page 11 11 to refill staple cartridge holder B C of the optional folding unit 1 Op...

Page 447: ...older will click into place when it has been inserted correctly 6 Close the front cover 1 Refilling Staple Cartridge Holders B C Option Follow the steps below to refill staples for the optional foldin...

Page 448: ...en re installing align the triangle marks on the staple cartridge holder and the staple unit The staple cartridge holder will click into place when it has been inserted correctly 6 Close the front cov...

Page 449: ...box handle and remove the box from the Document Finisher NOTE Take care not to spill the waste hole punch scraps when removing the container 3 Dispose of the hole punch scraps appropriately 4 Re insta...

Page 450: ...x handle and remove the box from the Document Finisher NOTE Take care not to spill the waste hole punch scraps when removing the container 3 Dispose of the hole punch scraps appropriately 4 Re install...

Page 451: ...ys unplug the power cord before cleaning the machine Platen Cover Glass Platen Wipe the backside of the platen cover the inside of the document processor and the glass platen with a soft cloth dampene...

Page 452: ...t also NOTE Wipe the slit glasses with the dry accessory cloth Do not use water soap or solvents for cleaning 1 Remove the cloth from the cleaning cloth compartment 2 Open the document processor and w...

Page 453: ...re using the dual scan document processor open the top cover of the document processor and wipe the glass scanning unit 5 Wipe the white roller 6 Close the document processor top cover and return the...

Page 454: ...olvents for cleaning Do not touch the photoconductor drum 1 Pull out cassette 1 and remove the cloth from the cleaning cloth compartment 2 Pull up the lever and open the right cover 1 3 Wipe off the d...

Page 455: ...st monthly to ensure optimum output quality 1 Open the front cover 2 Remove the cleaning brush blue colored 3 Pull up the lever and open the right cover 1 4 As shown in the figure clean dirt from the...

Page 456: ...Maintenance 11 20 5 Press the specified position of the right cover 1 to close 6 Put away the cleaning brush and close the front cover...

Page 457: ...12 1 12 Troubleshooting This chapter explains how to solve problems with the machine Solving Malfunctions 12 2 Responding when Error Messages 12 7 Clearing Paper Jams 12 21...

Page 458: ...ine in Sleep mode Press the Power key to recover the machine from Sleep mode The machine will be ready to copy within a minute 2 10 Blank sheets are ejected Are the originals loaded correctly When pla...

Page 459: ...en or the document processor dirty Clean the platen or the document processor 11 15 Is the conveying guide dirty Clean the conveying guide 11 18 Run Drum Refresh1 9 69 Run Developer Refresh 9 71 Print...

Page 460: ...ith new paper 2 27 Change the orientation in which the paper is positioned xl 2 28 2 35 Cannot print Is the machine plugged in Plug the power cord into an AC outlet Is the machine powered on Turn on t...

Page 461: ...t Clean the paper ramp using a soft dry lint free cloth Part of the image is periodically faint or blurred Run Developer Refresh 9 71 Run Drum Refresh1 9 69 Part of the image is periodically faint or...

Page 462: ...Host Name been entered properly Check the name of the computer to which data is being sent 3 24 Has the Path been entered properly Check the share name for the shared folder 3 24 Has the Login User Na...

Page 463: ...trator Expansion Authentication is disabled Turn the main power switch off and on If the error exists contact administrator Add paper in cassette Is the indicated cassette out of paper Load paper Sele...

Page 464: ...ation shared folder to the previous setting 3 29 Is the account information user ID password used to access the shared folder to which the scanned image is to be sent incorrect Enter the correct user...

Page 465: ...er size type that cannot be stapled If the selected paper is not changed and Continue is pressed staple is released Select the available paper Press Continue to print Cannot use due to a failure Call...

Page 466: ...Replace the waste toner box 11 5 Confidential document was detected The machine detects the document guard pattern Job is canceled Press End 9 103 Empty the punch waste box Is the punch waste box full...

Page 467: ...ID The account ID was incorrect when processing the job externally The job is canceled Press End Incorrect box password The box password was incorrect when processing the job externally The job is can...

Page 468: ...inting then resumes Maximum number of scanned pages Is the acceptable scanning count exceeded Cannot scan pages any more Follow the instructions on the touch panel Memory is full The memory is full an...

Page 469: ...removable memory The job stopped Press End Possible error codes are as follows 01 Connect a removable memory that can be written to An error occurred in the removable memory The job stopped Press End...

Page 470: ...scanner Follow the instructions on the touch panel Send error An error has occurred during transmission The job is canceled Press End Refer to Responding to Send Error for the error code and correctiv...

Page 471: ...ng Clean the slit glass using the cleaning cloth supplied with the document processor 11 16 Toner is empty Replace the toner container to our specified toner container 11 2 Toner is running out It is...

Page 472: ...om temperature Adjust the temperature and the humidity of your room Warning low memory Cannot start the job Try again later Waste toner box almost full It is almost time to replace the waste toner box...

Page 473: ...and login password NOTE If the sender is a domain user specify the domain name Host name Path 3 24 Failed to send the e mail Failed to send i FAX Check the following on the Command Center RX SMTP logi...

Page 474: ...et Faxing i FAX Option 1106 Failed to send the e mail Failed to send i FAX Check the sender address of SMTP on the Embedded Web Server RX 2 25 1131 Failed to send via FTP Select On of the secure proto...

Page 475: ...b is not operating properly The server is not operating properly 2202 Failed to send the e mail Failed to send via FTP Failed to send i FAX 2203 Failed to send via FTP Failed to send via SMB 2231 Fail...

Page 476: ...h off and back on If this error occurs several times make a note of the displayed error code and contact your service representative 9181 The scanned original exceeds the acceptable number of pages of...

Page 477: ...multi purpose tray 3 Open fuser cover A1 and remove the paper 4 Close the cover Status 10 10 2010 10 10 Hold JAM Paper jam 02 04 1 Remove the paper from the paper ejector 2 Open main unit right cover...

Page 478: ...f paper from inside the machine Scraps of paper left in the machine could cause subsequent jamming Discard paper that has jammed in the optional document finisher A page affected by a paper jam will b...

Page 479: ...tears remove every loose scrap from inside the machine 5 Push cassette 1 back in place securely 6 Press the specified position to close right cover 1 Cassette 2 Follow the steps below to clear paper j...

Page 480: ...sh cassette 2 back in place securely 6 Close right cover 3 Optional Cassettes 3 and 4 Follow the steps below to clear paper jams in cassettes 3 or 4 when using the optional paper feeder Paper Feeder 5...

Page 481: ...right cover 4 3 Remove the jammed paper If the paper tears remove every loose scrap from inside the machine 4 Pull out the cassette in use 5 Remove the jammed paper 6 Push the cassette back in place...

Page 482: ...u are using the optional side feeder pull up the release lever and separate the side feeder from the multifunction machine 2 Open right cover 4 3 Remove the jammed paper If the paper tears remove ever...

Page 483: ...6 Pull out the paper feed unit B1 7 Open the paper feed unit cover B2 and remove the jammed paper 8 Close the paper feed unit cover B2 and push the paper feed unit all the way back in 9 Push the cass...

Page 484: ...multi purpose tray 1 Remove all sheets of paper from the multi purpose tray 2 If paper is jammed inside pull the paper toward you to remove 3 Pull up right cover 1 lever and open the right cover 1 4 R...

Page 485: ...ers 1 3 and 4 Follow the steps below to clear paper jams inside right cover 1 3 or 4 when using the optional paper feeder 1 Remove all sheets of paper from the multi purpose tray 2 If paper is jammed...

Page 486: ...e jammed paper If the paper tears remove every loose scrap from inside the machine 5 If you are using the optional document finisher follow step on page 12 39 to remove jammed paper in the optional br...

Page 487: ...2 31 12 Duplex unit Follow the steps below to clear paper jams in the duplex unit 1 Pull up right cover 1 lever and open the right cover 1 2 Remove the jammed paper 3 Press the specified position to c...

Page 488: ...ette 1 Follow the steps below to clear paper jams in duplex unit and cassette 1 1 Pull up right cover 1 lever and open the right cover 1 2 Remove the jammed paper 3 Press the specified position to clo...

Page 489: ...f the paper tears remove every loose scrap from inside the machine 6 Close the right cover 2 7 Pull out cassette 1 and remove the jammed paper If the paper tears remove every loose scrap from inside t...

Page 490: ...cover 1 lever and open the right cover 1 2 Remove the jammed paper 3 Open the fuser cover CAUTION The fixing unit is extremely hot Take sufficient care when working in this area as there is a danger...

Page 491: ...6 Push the fuser cover back in place and press the specified position to close right cover 1 Optional Document Processor Follow the steps below to clear paper jams in the optional document processor...

Page 492: ...original tears remove every loose scrap from inside the machine If you are using the document processor go to step 4 If you are using the document processor Dual scan DP go to step 6 4 Lift up the rev...

Page 493: ...pull it toward your side to remove it If the paper tears remove every loose scrap from inside the machine 2 Pull up right cover 1 lever and open the right cover 1 3 Press the lever and open the fuser...

Page 494: ...1 Right Job Separator 1 If jammed paper is seen through the paper ejection slot of the right job separator pull it toward your side to remove it If the paper tears remove every loose scrap from insid...

Page 495: ...t follow the steps below to remove the jam 1 Pull out the relay unit 2 Open the relay unit cover and remove the jammed paper 3 Remove the jammed paper If the paper tears remove every loose scrap from...

Page 496: ...onal 1 000 sheet finisher follow the steps below to remove the jam 1 If jammed paper is seen through the paper ejection slot pull it toward your side to remove it 2 Open the front cover 3 Open feed gu...

Page 497: ...pen feed guides and close the top and front covers 4 000 sheet Finisher Option If a paper jam occurs in the optional 4 000 sheet finisher follow the steps below to remove the jam Coupling Section 1 Op...

Page 498: ...is seen through the paper ejection slot pull it toward your side to remove it 2 Open the front cover 1 3 Open the conveyor guide D6 and remove the jammed paper 4 Close the conveyor guide D6 5 Open the...

Page 499: ...ed knob D3 until the jammed paper is in a location where it is easy to remove 6 Close the conveyor guide D4 and front cover 1 Tray B 1 If jammed paper is seen through the paper ejection slot pull it t...

Page 500: ...Turn the conveyor knob D3 to the left to feed the paper along to enable easy removal 5 Close the conveyor guide D2 and front cover 1 Tray C 1 Open the upper left cover 2 Remove the jammed paper 3 Clo...

Page 501: ...2 Open the conveyor guide D2 3 Turn the conveyor knob D3 to the left to feed the paper along to enable easy removal 4 Follow step 2 onward on page 12 42 to remove jammed paper Mailbox Option 1 Open th...

Page 502: ...e left cover of the center fold unit and remove the jammed paper 4 Turn feed knob D9 until the jammed paper is in a location where it is easy to remove 5 Close the folding unit left cover 6 Open the f...

Page 503: ...until the jammed paper is in a location where it is easy to remove If there is no paper jam in the conveyor guide D7 proceed to the following step 4 Close the conveyor guide D7 5 Open the conveyor gu...

Page 504: ...er 3 000 sheet follow the steps below to remove the jam 1 Pull up the release lever and separate the side feeder from the multifunction machine 2 Remove the paper from the connection port 3 Pull out c...

Page 505: ...l remove the jammed staples Follow the steps below to remove jammed staples 1 000 sheet Finisher 1 Open the front cover 2 Remove the staple cartridge holder 3 Open the cover plate A of the staple cart...

Page 506: ...der will click into place when it has been inserted correctly 6 Close the front cover 4 000 sheet Finisher Staple cartridge holder A 1 Open the front cover 1 2 Remove the staple cartridge holder A 3 O...

Page 507: ...l the staple cartridge holder The staple cartridge holder will click into place when it has been inserted correctly 6 Close the front cover 1 Staple cartridge holder B C Follow the steps below to remo...

Page 508: ...r B plate of the staple cartridge holder into its original position 5 Re install the staple cartridge holder When re installing align the triangle marks on the staple cartridge holder and the staple u...

Page 509: ...Appendix 1 Appendix Optional Equipment Appendix 2 Character Entry Method Appendix 9 Paper Appendix 12 Specifications Appendix 20 Glossary Appendix 30...

Page 510: ...side feeder is installed the toppling prevention kit must be installed Document Processor Document Processor Dual scan DP 4 000 sheet Finisher 1 000 sheet Finisher Side Feeder 3 000 sheet Paper Feede...

Page 511: ...Appendix 3 Key Counter FAX Kit Expansion Memory Gigabit Ethernet Board Document Table Expansion Memory...

Page 512: ...is a document finisher capable of holding large print runs and of separating and offsetting multiple copies of a printout into individual copies It can also staple or hole punch optional the offset pr...

Page 513: ...on button cannot be used The stapling lamp lights when the paper is properly placed If it does not light replace the paper 4 Let go of the paper and then press the stapling button Stapling starts Stap...

Page 514: ...output destination or change the default setting For details refer to the Paper Output on page 9 15 When removing paper from the Inner Job Separator pull it out at an angle Right Job Separator Separat...

Page 515: ...with TCP IP NetWare NetBEUI and AppleTalk protocols in the same way as the main unit it fulfills the network printing demands on Windows Macintosh and UNIX environments This expansion kit is also com...

Page 516: ...special mount is also available to install the keyboard on the MFP Please contact your dealer or service representative for information on keyboards that are compatible with your MFP before you purch...

Page 517: ...ry Screen Status Use the keyboard to enter Backspace Upper case Lower case No Symbol Space Cancel OK Lower case _ Q W E R T Y U I O P A S D F G H J K L Z X C V B N M 10 10 2010 10 10 Input characters...

Page 518: ...ower case No Symbol Space Cancel OK Lower case _ Q W E R T Y U I O P A S D F G H J K L Z X C V B N M 10 10 2010 10 10 Input characters Limit characters 0 128 Status Use the keyboard to enter Backspace...

Page 519: ...Backspace Upper case Lower case No Symbol Space Cancel OK Lower case L _ Q W E R T Y U I O P A S D F G H J K L Z X C V B N M 10 10 2010 10 10 Input characters Limit characters 1 128 Status Use the key...

Page 520: ...er Legal Oficio II 12 18 Letter Letter R Statement R Folio 8K 16K 16K R 216 340 mm 550 64 g m2 500 80 g m2 Supported types Supported paper sizes No of sheets Plain paper 60 to 256 g m2 Recycled paper...

Page 521: ...th this machine as listed in the Basic Paper Specifications shown below such as moisture or pulp content For this reason we recommend purchasing a small amount of recycled paper as a sample for testin...

Page 522: ...amage the drum Be sure to use the standard paper that contains at least 80 pulp i e not more than 20 of the total paper content consists of cotton or other fibers Supported Paper Sizes Paper of the fo...

Page 523: ...moisture to dryness expressed as a percentage Moisture affects how the paper is supplied the electrostatic chargeability of the paper and how the toner adheres Paper moisture content varies depending...

Page 524: ...ugh sheets are uncut or edges or corners are crushed In order to prevent these problems be especially careful when you cut the paper yourself Packaging Choose paper that is properly packaged and stack...

Page 525: ...conditions To avoid problems use the multi purpose tray for transparencies and load transparencies with the long side facing the machine If transparencies jam frequently at output try pulling the lea...

Page 526: ...with Hagaki by placing the paper on a flat surface and rubbing the edges gently a few times with a ruler Printing onto paper with rough edges may cause jams NOTE If the paper is not supplied correctl...

Page 527: ...the Appendix The colored ink must be able to withstand the heat of printing It must be resistant to silicone oil as well Do not use paper with a treated surface such as glossy paper used for calendars...

Page 528: ...bels Recycled Preprinted Bond Cardstock Color Colour Prepunched Letterhead Thick Coated Envelope High Quality Custom 1 to 8 Paper Size Cassette 1 2 Maximum 12 18 A3 Duplex 12 18 A3 Minimum Statement R...

Page 529: ...seconds or less Paper Capacity Cassette 1 550 sheets 64 g m2 500 sheets 80 g m2 Cassette 2 550 sheets 64 g m2 500 sheets 80 g m2 Multi Purpose Tray A4 Letter or less 165 sheets 64 g m2 150 sheets 80 g...

Page 530: ...30 3 16 977 767 mm Power Source 120 V Specification Model 120 V AC 60 Hz 12 0 A 230 V Specification Model 220 to 240 V AC 50 60 Hz 7 2 A Options Document Processor Platen Cover Document Table Paper F...

Page 531: ...pi 300 dpi 200 dpi 200 100 dpi 200 400 dpi Resolution in FAX mode included File Format TIFF JPEG XPS PDF MMR JPEG compression PDF high compression Scanning Speed 1 35 ppm model 45 ppm model 55 ppm mod...

Page 532: ...80 g m2 maximum 175 sheets 50 to 80 g m2 maximum Mixed original sizes auto selection 30 sheets 50 to 80 g m2 maximum Dimensions W D H 22 23 32 21 13 64 7 5 64 577 534 180 mm 23 5 8 20 13 64 6 45 64 60...

Page 533: ...60 256 g m2 Media types standard recycled Thick Dimensions W D H 23 35 64 27 52 64 12 26 64 598 706 6 315 mm Weight Approx 63 93 lbs Approx 29 kg Item Description Paper Supply Method Feed reverse roll...

Page 534: ...ope 9 Commercial 9 Envelope 6 Commercial 6 3 4 Envelope Monarch Youkei 2 Youkei 4 Statement R Executive Custom 98 148mm to 297 432mm 100 sheets Supported Paper Weight Stapling 90 g m2 or less Stapling...

Page 535: ...216 340 mm Folio 8K 16K R 30 sheets 52 to 90 g m2 20 sheets 91 to 105 g m2 2 cover sheet only 106 g m2 to 135 g m2 A4 A4 R B5 Letter Letter R 16K 65 sheets 52 to 90 g m2 55 sheets 91 to 105 g m2 2 co...

Page 536: ...m2 3 sheets 91 to 120 g m2 1 sheet 121 to 256 g m2 Saddle Stitch 16 sheets 60 to 90 g m2 13 sheets 91 to 105 g m2 1 cover sheet only 106 g m2 or heavier Tri Fold 5 sheets 60 to 90 g m2 3 sheets 91 to...

Page 537: ...ated Thick High Quality Custom 1 to 8 Dimensions W D H 17 7 16 15 7 16 4 1 64 443 392 102 mm Weight 1 76 lbs 0 8 kg Item Description Number of Trays 1 tray Maximum Sheets A4 A4 R B5 Letter Letter R 10...

Page 538: ...originals when printing Auto Sleep A mode designed for electrical power saving activated when the machine is left unused or there is no data transfer for a specific period In Sleep mode power consump...

Page 539: ...es made in this mode are thus lighter than normal Emulation The function to interpret and execute other printers page description languages The machine emulates operation of PCL6 KPDL and KPDL automat...

Page 540: ...rvices NetWare Novell s network management software that is able to run on a variety of operating systems PDF A This is ISO 19005 1 Document management Electronic document file format for long term pr...

Page 541: ...is context indicates the first section of the IP address When an IP address is written the length of the network address is indicated by the prefix length after a forward slash For example 24 in the a...

Page 542: ...speed data transfer WIA Windows Imaging Acquisition A function to import images supported after Windows Me XP from digital cameras and other peripheral devices This function replaces what TWAIN used...

Page 543: ...rightness 9 68 Drum Refresh1 9 69 Drum Refresh2 9 70 Silent Mode 9 68 System Initialization 9 67 Tone Curve Adjustment 9 68 Apache License Version 2 0 xxxiv AppleTalk Appendix 30 Setup 2 15 Applicatio...

Page 544: ...lt Screen 9 3 Error Handling 9 13 Function Defaults 9 16 Language 9 2 Low Toner Alert Level 9 39 Manual Staple 9 38 Orientation Confirmation 9 16 Original Paper Settings 9 4 Paper Output 9 15 Sound 9...

Page 545: ...Entry 9 27 High Comp PDF Image 9 24 Image Quality File Format 9 24 JPEG TIFF Print 9 25 Margin Default 9 22 Original Image Copy 9 17 Original Image Send Store 9 17 Original Orientation 9 16 PDF A 9 2...

Page 546: ...9 54 Emulation Option Appendix 7 Energy Star Program xxxvii Enhanced WSD Setup 9 96 Enhanced WSD SSL Setup 9 97 Enlarged Display 9 108 Enter key 3 4 Entry File Name 4 42 Entry Check for New Dest 9 44...

Page 547: ...ilable Status 8 2 Canceling 3 51 8 11 Checking History 8 9 Checking Status 8 2 Detailed Information 8 7 Detailed Information of Histories 8 10 Details of the Status Screens 8 3 Displaying History Scre...

Page 548: ...x 32 Paper Size and Media 2 41 9 7 Multi Purpose Tray 1 6 Multi Sending Sending to Different Types of Destinations 3 41 N Negative Image 4 38 NetBEUI Appendix 32 Protocol Detail 9 94 NetWare Appendix...

Page 549: ...l SSLeay License xxxii Originals Automatic Detection 9 10 Copy 4 2 Custom 9 4 Setup 9 4 Size Selection 4 2 6 2 P Page 4 24 Paper Appropriate Paper Appendix 14 Auto Selection 9 10 Before Loading 2 27 C...

Page 550: ...Settings Copies 9 57 CR Action 9 59 Duplex 9 57 EcoPrint 9 56 Emulation 9 54 Form Feed Timeout 9 58 Job Name 9 59 KIR 9 60 LF Action 9 59 Orientation 9 58 Override A4 Letter 9 56 Paper Feed Mode 9 60...

Page 551: ...orward Color Setting 9 47 Destination 9 46 E mail Subject 9 51 File Format 9 48 File Separation 9 50 Forward 9 45 FTP Encrypted TX 9 51 Scan Resolution 9 48 Send Log History Sending Log History 9 64 S...

Page 552: ...cking the Remaining Amount 8 13 Support Tray Section of the Multi Purpose Tray 1 6 Switching the Language 2 11 Symbols i System Document Guard 9 103 Optional Functions 9 107 Restart Entire Device 9 89...

Page 553: ...Set 10 10 Local Authorization 10 9 Obtain NW User Property 10 15 User Login 10 2 User Login Job Accounting Job Accounting Setting 10 20 Unknown ID Job 10 10 User Login Setting 10 2 W Waste Toner Box 1...

Page 554: ...Index Index 12...

Page 555: ...you need and the instructions for handling the waste correctly for example location and times of the waste collection centres etc b When you purchase a new device of ours give a used device similar t...

Page 556: ...s for harmonic current emissions equipment input current 16 A per phase EN 61000 3 3 1995 A1 2001 A2 2005 Electromagnetic Compatibility EMC Part 3 Limits Section 3 Limitation of voltage fluctuations a...

Reviews: