background image

.-

olivetti 

CONSUMER  PRODUCTS  LIMITED  WARRANTY 

OLIVETTI CONSUMER  PRODUCTS SERVICE CENTER 

Sould defects covered by this Limited Warranty arise,  within the warranty period,  return the  machine with proof of 

purchase to the dealer from whom  it was purchased.  If purchase was made from  a dealer who has no service,  or 

from a retail store, please forward your machine for repair to an Authorized Service Center or to Olivetti's Consumer 

Products Service Center located  at: 

Olivetti  USA 

Consumer Products Service Center 

765 U.S.  Hwy.  202 

Somerville,  NJ  08876 

201-218-5675

OLIVETTI  USA

CONSUMER PRODUCTS LIMITED WARRANTY 

This Olivetti equipment is under warranty to the original purchaser  against defective materials or workmanship for 

ninety  (90) days for labor and parts from  the  date of original purchase.  Olivetti agrees,  at its option,  to repair such 

a defect, or to furnish an equal unit in exchange.  This unit must be carefully packaged and shipped PREPAID to the 

Olivetti  consumer  Products  Service  Center  (address  appears on back  page). 

When  returning  your  equipment  for  warranty  service,  the  shipping  charges  must be PREPAID  and  copy  of the  Bill 

of Sale must be enc1osed;  if not,  the After Warranty  Procedure  will prevail.  Please RETAIN SHIPPING CARTON and 

PACKING  MATERIAL  in the event your unit  should  require  repair. 

This warranty covers all defects incurred in normal use of the equipment but does not apply to supplies (i.e. printwheels, 

ribbons and tapes) or  in  the following cases: 

a. Loss or damage to the equipment due to abuse, mishandling, accident, improper packaging for shipment or failure

to follow operating  instructions.

b) Service or modification by other than  an  Authorized Olivetti Service Center.

c) Damage caused by the  use  of non-Olivetti supplies.

OLIVETTI  MAKES NO OTHER REPRESENTATION OR WARRANTY OF  ANY OTHER KIND,  EXPRESS OR  IMPLIED 

WITH  RESPECT  TO  THIS  EQUIPMENT,  WHETNER  AS  TO  MERCHANTABILITY,  FITNESS  FOR  A  PARTICULAR 

PURPOSE OR ANY OTHER MATTER. NO OTHER EXPRESS WARRANTY OR GUARANTEE GIVEN BY ANY PERSON, 

FIRM OR CORPORATION  WITH RESPECT TO THIS EQUIPMENT SHALL BIND OLIVETTI. 

Some states do not allow limitations on how long an implied warranty lasts,  therefore,  the above limitatins may not 

apply to you. 

IN NO EVENT SHALL OLIVETTI BE LIABLE FOR ANY AND ALL LOSSES AND DAMAGES TO BUYER IN EXCESS 

OF THE PURCHASE PRICE OF THE EQUIPMENT WITH RESPECT TO WHICH LOSSES OR DAMAGES ARE CLAIMED 

AND RESULTING  FROM CAUSE WHATSOEVER,  INCLUDING NEGLIGENCE,  ALLEGED DAMAGED OR DEFECTIVE 

EQUIPMENT, WHETHER SUCH DEFECTS ARE DISCOVERABLE OR LATENT. IN NO EVENT, INCLUDING THE CASE 

OF NEGLIGENCE,  SHALL OLIVETTI BE LIABLE FOR INCIDENTAL OR CONSEQUENTIAL DAMAGES. 

Some  states do not  allow the exclusion or limitation of incidental  or consequential damages,  therefor,  the  above 

limitations or exclusion may not apply to you. This warranty shall not extend to anyone other than the original purchaser 

of this equipment or the person for  whom it was purchased as  a gift. 

Should a defect arise after the Warranty period has expired, return the unit to the dealer from whom it was purchased, 

to an Authorized Olivetti Service Center,  or to the Olivetti Consumer Products Service Center for repair.  The Olivetti 

USA After Warranty procedure is as follows 

CONSUMER PRODUCTS AFTER WARRANTY PROCEDURE 

Authorized dealers may repair units at their prevailing rates or  the Olivetti Consumer Products Service Center  will 

repaier your unit at the following rates: 

Electronic Consumer Typewriters 

$85.00 

The above charges apply per unit received. Olivetti agrees, at its option, to repair such a defect or to furnish an equal 

unit  in  exchange.  Exclusions  reflected  in  section  a  - c  of the  Limited  Warranty  also  apply  to  the  After  Warranty 

Procedure. This flat rate is subject to change without notice at any time.  A check or money order for payment 

in 

full 

must accompany the nonworking unit.  There are NO EXCEPTIONS to this policy. The check or money order mustbe 

made payable to Olivetti USA. The unit must be shipped PREPAID to the Olivetti Consumer Products Service 

Center 

Summary of Contents for 900X

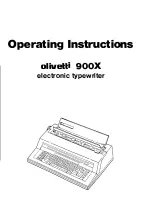
Page 1: ...Operating Instructions olivetti 900X electronic typewriter...

Page 2: ...ULAR PURPOSE OR ANY OTHER MATTER NO OTHER EXPRESS WARRANTY OR GUARANTEE GIVEN BY ANY PERSON FIRM OR CORPORATION WITH RESPECT TO THIS EQUIPMENT SHALL BIND OLIVETTI Some states do not allow limitations...

Page 3: ...ular installation If this equipment does cause interference to radio or television reception which can be determined by turning the equipment off and on the user is encouraged to try to correct the in...

Page 4: ...Second keyboard special character set Automatic paragraph indentation Automatic carrier return Automatic centering Decimal center flush right tabulation Automatic full word underline Caps lock Printe...

Page 5: ...O START TYPING PaperSupport Panel 8 Tu rning on the Machine 8 Inserting Paper 8 Au toPaper Insertion 9 Centering orStraightening Paper 9 Impression Control 9 Type PitchSelector 9 Line SpaceSelector 9...

Page 6: ...tic Centering 28 8 5 Decimal Tabulation 29 8 6 Center Tabulation 30 8 7 Flush Right Tabulation 31 8 8 Automatic Underlining 32 8 9 Caps Lock 32 8 10 Stencil Typing 33 9 SUPPLIES 9 1 Printwheels 34 9 2...

Page 7: ...cause damage to the typewriter and or result in an electrical shock 5 Do not leave the typewriter unattended when turned on Always turn it off when you have finished typing WARNING If this is the fir...

Page 8: ...26 Relocation Key 8 Left Margin Set Key 27 Express Backspace Key 9 Impression Control 28 Correction Key 10 Right Margin Set Key 29 Back Space Key 11 Type Pitch Selector 30 Top Cover 12 Tab Set Key 31...

Page 9: ...Tabulation 44 Flush Right Tabulation 45 Auto Full Underlining 46 Auto Word Underlining 47 File Storage 48 File Recall 49 Stop Code 50 File Listing 51 Available Memory Capacity 52 File Deletion 53 Req...

Page 10: ...sm under theTop Cover 60 Cursor Lamp green 61 Cassette Release Lever red 62 Cassette Ribbon 63 Printwheel Release Lever red 64 Correcton Tape 65 Guide Roller 66 Printwheel 67 Print Point Indicator 68...

Page 11: ...ibbon damage 2 Installing Ribbon Cassette 1 Before installing the Cassette always tighten the ribbon by rotating the Cassette Wind Knob counterclockwise For a new Cassette wind completely past the col...

Page 12: ...4 Remove the Printwheel Figure 3 2 b 2 Installing Printwheel 1 Make sure the Guide Pin is aligned with the Center Shaft and the Print Hammer Figure 3 2 c 2 Fit the Round Hole in the center of the Pri...

Page 13: ...off the Takeup Spindle with your left hand while you lift up Arm B with your right hand Figure 3 3 c 4 Remove the Correction Tape 2 Installing Correction Tape 1 With the full spool in your left hand...

Page 14: ...he following start up operations occur 1 The Cursor Lamp behind the Margin Scale lights up 2 The Carrier moves to the extreme left side then moves to the left margin and stops 3 The Printwheel rotates...

Page 15: ...elease Lever to release the paper Figure 4 5 a Next adjust the paper by hand Figure 4 5 b Be sure to place the lever in its forward position when the paper is seated as desired Return the Paper Insert...

Page 16: ...beep sounds if you continue typing at the right margin 2 To set new margins inside the present margins 1 Move the Print Point Indicator to the desired position with the Space Ba r or Back Space Key 2...

Page 17: ...er Return function is activated you can go past the right margin by using the Tab Key See Item 8 1 Automatic Carrier Return 6 Memory back up Your typewriter has a memory back up circuit which protects...

Page 18: ...leared All tabs can be cleared regardless of carrier position 4 How to tab 7 Press the Tab Key to advance the carrier to the next tab on the right If there is no tab between the carrier and the right...

Page 19: ...nt Indicator ahead one space For repeated spacing hold down the Space Bar The Space Bar is also used to cancel the File Listing Available Memory Capacity File Deletion and Memory All Clear functions 5...

Page 20: ...Reverse Index Key Press to retract paper one half line without moving the Print Point Indicator If you press the key all the way down and hold it paper will retract continuously 5 9 Express Key Press...

Page 21: ...ll not be performed properly Use only the Index or Reverse Index Keys 5 1 4 Paper Bail The Paper Bail holds paper firmly against the platen and indicates position in 10 pitch of the Print Point Indica...

Page 22: ...h the on the Erasure Table to determine how much paper remains Figure 5 1 8 b In this example two inches or five centimeters of paper remains 5 1 7 Second Keyboard KBII Special Character Set Your type...

Page 23: ...is released 2 Type the correct characters 6 2 Correcting the Last Character Typed 1 Touch the Correction Key once do NOT hold down The carrier will backspace once and erase the incorrect character 2 T...

Page 24: ...The character will be erased 4 Type the correct character Note 11 you want to correct more than one character repeat steps 1 through 4 Refer to the Item 8 1 0 Stencil Typing for correcting a consecut...

Page 25: ...ntents If the back up battery is completely dis charged the contents of the memory are lost 7 1 File Storage This typewriter is equipped with a 4 000 character memory for storing up to 50 files File s...

Page 26: ...g in th en a beep so und s Th e On lin e Lamp re d beg in s b link ing Th e au t o m a t i c c arr ier r e tu rn funct io n is au t o m a t i c all y act iv a t ed T wo b eep s so und i f you sp e c i...

Page 27: ...eturn fun ct i on i s au tomat ical ly a ct i vated Two beeps sound i f you spe ci fy a fi le name wh ich has a lready been sto red Refe r to Ad d ing text at the end of f ile i f you w i sh to add to...

Page 28: ...ewrit er h a s st o pped a t a st o p c o d e d uring pr int out a b eep s ounds and th e On l in e L amp r e d b eg ins b link ing 2 Typ e d es ir e d text 3 H old d own th eC o d e Key and pr e ss...

Page 29: ...ert e d aft er th e pos i tion wh er e p rint ing of th ef il e i s stopp e d If you want to d el e t etext stop p rinting of th e f il e aft er th et e xt to b e d el e t ed and eras ethat text with...

Page 30: ...nd indicating that the recall function has been cancelled 3 When recall of the file has been completed two beeps will sound 2 Recalling PHRASE file 1 While holding down the Code Key press the 6 Key an...

Page 31: ...ng printout 7 6 Available Memory Capacity This feature allows you to printout the available amount of memory 1 Hold down the Code Key and press the 9 Key 2 The available amount of memory and files are...

Page 32: ...s before the right mg rgin a beep will sound indicating that you have entered the hot zone The carrier automatically returns wherever you type a space or hyphen in this zone 3 To terminate the Auto Ca...

Page 33: ...typ ewriter is now in th e P arag raph Ind enta tion mo d e 3 T yp e th e material to be ind ented Th e typ e writer will ind ent al l text u ntil th is mo d e is ter minate d 4 T o terminate th e P a...

Page 34: ...cters typ e d A t this stag e the cha racters will n ot be p rin te d 3 If a m istak e is mad e simp ly pr ess th eC orrec tio n Key tod elete a ll text en tere d and resta rt the cen tering pr oce du...

Page 35: ...2 Use 1 Move the Print Point Indicator to the left margin currently in use by pressing the Express Key 2 Press the Tab Key to move the Print Point Indi cator to the decimal tab position 3 Type the nu...

Page 36: ...s no w in th e C ent er Tab mod e 2 Use 1 Mov eth e Pr int Po int Ind icator to th e le ft marg in curr ent ly in u se b y pr essing th e E xpress Key 2 Pr ess th eTab Keyto mov eth e Pr int Po int In...

Page 37: ...h R igh t T ab m o d e 2 Use 1 Mo v e th e P rin t P o i n t Indi cator to th e le ft m argin curren tly in use b y p re ssing th e Exp ress Key 2 P ress th eT ab Key tom o v e th e P rin t P o in t I...

Page 38: ...nderlining 1 Ho ld do wn theCod e K ey and p ress the 4 K ey A b eep will sou nd ind icating that you typ e writer is no w in the Wo rd Und erlin e mod e 2 T yp e the text to be u nd erlin ed In this...

Page 39: ...f Space Key again One or beep sounds L 2 Using stencil typing function to quickly cor rect text outside correction memory The Stencil Typing mode can also be used to quickly delete text outside the co...

Page 40: ...more characters can be typed at a lower cost 3 Nylon Fabric Ribbon This optional ribbon can be used to type a considerably la rger number of characters than the other types of ribbon 9 3 Correction Ta...

Page 41: ...ended that your typewriter be serviced at least once a year by an authorized service technician Any malfunction caused by maintenance performed by anyone other than authorized service personnel will v...

Page 42: ...s possible to the typewriter and appropriate port in the host computer Secure the cable with the clamp springs 11 2 Set Modes Put On Line 1 Turn the typewriter Power Switch on set the Line Space Type...

Page 43: ...feed with a carriage return the typewriter wi ll not perform a l ine feed when the computer sends a carriage return and l ines will print on top of each other Refer to the operation manual for your c...

Page 44: ...ence codes are received in the typewriter from your word processor i e computer the typewriter performs the correponding functions The codes include those for the 1 00 characters shown in ASCII and U...

Page 45: ...ur typewriter 1 Character transmission Any one of three coding methods can be used for character transmission enclosing the character s in quotes in which case the computer computes the coding automat...

Page 46: ...00 4 4 20 0 1 0 1 5 r s 1 21 t 0 1 1 0 6 16 22 BEL 7 17 23 I 1 000 8 BS 18 24 1 00 1 9 HT 125 1 0 1 0 A LF SUB 26 1 0 1 1 8 ESC r C FF 12 1 1 0 1 D CR 1 13 129 1 1 1 0 E RS 1 4 3o 1 1 1 1 F us 115 13...

Page 47: ...0 0 1 0 1 0 1 1 0 0 1 1 1 4 5 6 7 p 164 p i80 3 196 p 1112 A 165 O T a 197 q I m l B 166 R 182 b gs r f C s c D T 184 d 100 7 E u 185 e a u J D L F i O v i86 f 1 1 02 V 1 1 1 8 I G w el g f o 3 w j 1...

Page 48: ...66 72 72 72 72 72 Number of lines per page in Automatic Top of Form mode FINNISH DUTCH I I I A I A IJ a I 6 I a i_i 1 1 I I l T I 0 T I T 72 72 SWISS SWISS CANADA ITALIAN SPANISH GERMAN FRENCH FRENCH...

Page 49: ...at current position Control to slide switch Full underline ON underline words and spaces Ful l underline OFF cancel full underline Double strike ON Double strike print OFF Backward print ON print fro...

Page 50: ...9 1B 4 F Double strike print ON 50 ESC 27 38 1B 26 Double strike print OFF 50 ESC I 27 123 1B 7B Pound print symbol 51 ESC I 27 125 1B 7 D Paragraph print symbol 51 ESC H 27 72 1B 48 Subsection print...

Page 51: ...mands Codes DEC HEX Description Page N U L 0 00 Null for application software only 57 BEL 7 07 Sound bell 57 DC3 1 9 13 Device control 3 58 DC1 17 1 1 Device control 1 58 ESC 27 1B Escape prepares th...

Page 52: ...tion The right margin cannot be set to the left of the left margin lJse Space SP n CHR 32 or Back space CHR 9 to move the carrier to the desired position Sample Program REM LPRINT LPRINT LPRINT LPRINT...

Page 53: ...ample Program and Sample Printing Refer to Item 6 Set horizontal tab 5 Absolute horizontal tab to position n 1 ESC HT n Format LPR I NT CHR 27 CHR 9 CHR n or l PR I NT CHR H1B CHR H9 CHR n n 1 to 126...

Page 54: ...890123456789 130 LPRINT SPC lO CHR 1 2 7 1 SPC 5 CHR 2 7 1 140 FOR 1 1 TO 2 1 5 0 LPRINT CHR 9 HT 1 6 0 NEXT I 1 7 0 END Sample Printing 0 1 23456789012345678901234567890123456789012 3456789 HT HT 7 C...

Page 55: ...89 0 1 2 345 6 7 8 9 0 1 2 34567 8901 2 3456789 Tab Tab Tab Tab Tab A l l Tabs C l eared 9 Return HMI control to slide switch ESC S Format LPRINT CHR 27 S or LPRINT CHR H1B S Function This escape sequ...

Page 56: ...he double strike printing mode on All characters are printed twice This mode is cancelled by ESC or CR carriage return Sample Program and Sample Printing Sample Program 100 REM 1 1 0 LPRINT 1 20 LPRIN...

Page 57: ...EM ASCI I Charac t e r s E S C H I J K Symbo l s CHR 2 7 CHR 2 7 CHR 2 7 H CHR 2 7 I CHR 2 7 J CHR 2 7 K AS C I I Charac ters ESC H I J K Symbo l s 0 H I J K RESET l and can be p1 inted only when an A...

Page 58: ...ne Format LPRINT CHR 32 or LPRI NT CH R H20 Function The P code moves the ca rrier one space to the right Sample Program 100 REM Space S P 1 1 0 LPRINT CHR 2 7 CHR 2 6 I REM RESET 1 2 0 LPRINT 0 1 2 3...

Page 59: ...LPRI NT CH R 27 6 or LPRI NT CH R H 1 8 6 Function This escape sequence causes the printer to pri nt in the opposite direction from the right to the left A space moves the carrier from the right to t...

Page 60: ...n code CR and prints only from the left to right This mode is cleared by sending ESC ESC S U B I or turning the power switch off Sample Program 100 REM B i d i rec tiona l Prin t On ESC and Off ESC 11...

Page 61: ...ction This escape sequence performs a half line feed in the forward direction The amount of line feed performed by this code is one half the line feed that has been set with ESC RS n or the Space Sele...

Page 62: ...7 CHR 2 6 I REM 1 20 LPRINT I I 130 REM L ine Feed 5 1 48 inch 1 40 LPRINT CHR 2 7 CHR 3 0 CHR 5 150 LPRINT CHR 1 0 1 60 LPRINT I I 1 1 2 inch Line Feed 1 7 0 END Sample Printing 1 1 2 inch Line Feed...

Page 63: ...6 I REM RESET 1 20 FOR 1 7 TO 1 1 STEP 2 130 FOR N l TO 3 1 40 LPRINT CHR 2 7 CHR 3 0 CHR I 15 0 LPRINT I 1 48 inch 1 6 0 NEXT N 1 7 0 NEXT I Sample Printing 7 l i 48 inch 7 1 48 inch 7 1 48 inch 9 1...

Page 64: ...C 1 LPRINT CHR 27 CHR 2 6 I REM RESET REM DC 3 LPRINT CHR 19 LPRINT George REM DC 1 LPRINT CHR 1 7 LPRINT 3 2 1 654 5148 Sample Print ing 3 2 1 654 5148 5 Escape ESC Format LPRINT CHR 27 or LPRINT CH...

Page 65: ...nt printing position becomes the top of the page 7 The current setting for the number of lines per page is cancelled and the default setting 66 lines per page with 1 6 inch line spac ing becomes effec...

Page 66: ...7 25 DATA 6 In 8 26 DATA 7 In 9 27 DATA 8 In 10 28 ACKNLG Out Approx 10 s handshaking pulse that tells the host computer that the printer has received data 1 1 BUSY Out Handshaking signal that tells...

Page 67: ...ing Diagram BUSY ACKNLG s H dMi r 0 5 S Min I lApprox 10 11 13 Relation Between On Line Key and SLCT Signal On Line Key SLCT ERROR BUSY ACKNLG MODE OFF HIGH HIGH HIGH Not Generated Typewriter ON HIGH...

Page 68: ...mputer stores 2 Ribbons Correctable 7895057 Fabric Nylon 7347657 3 Correction Tapes Lift off Cover up 7270257 7270457 Olivetti ProductCode 4 Printwheels Sample printings are typed in USA standard type...

Page 69: ...Printed in Japan 001 01414 10 PO 880307 ST TP00124...

Reviews:

Related manuals for 900X