background image

HP-400P                                                                                                                                      HORIZONTAL BAND RESAW -49- 

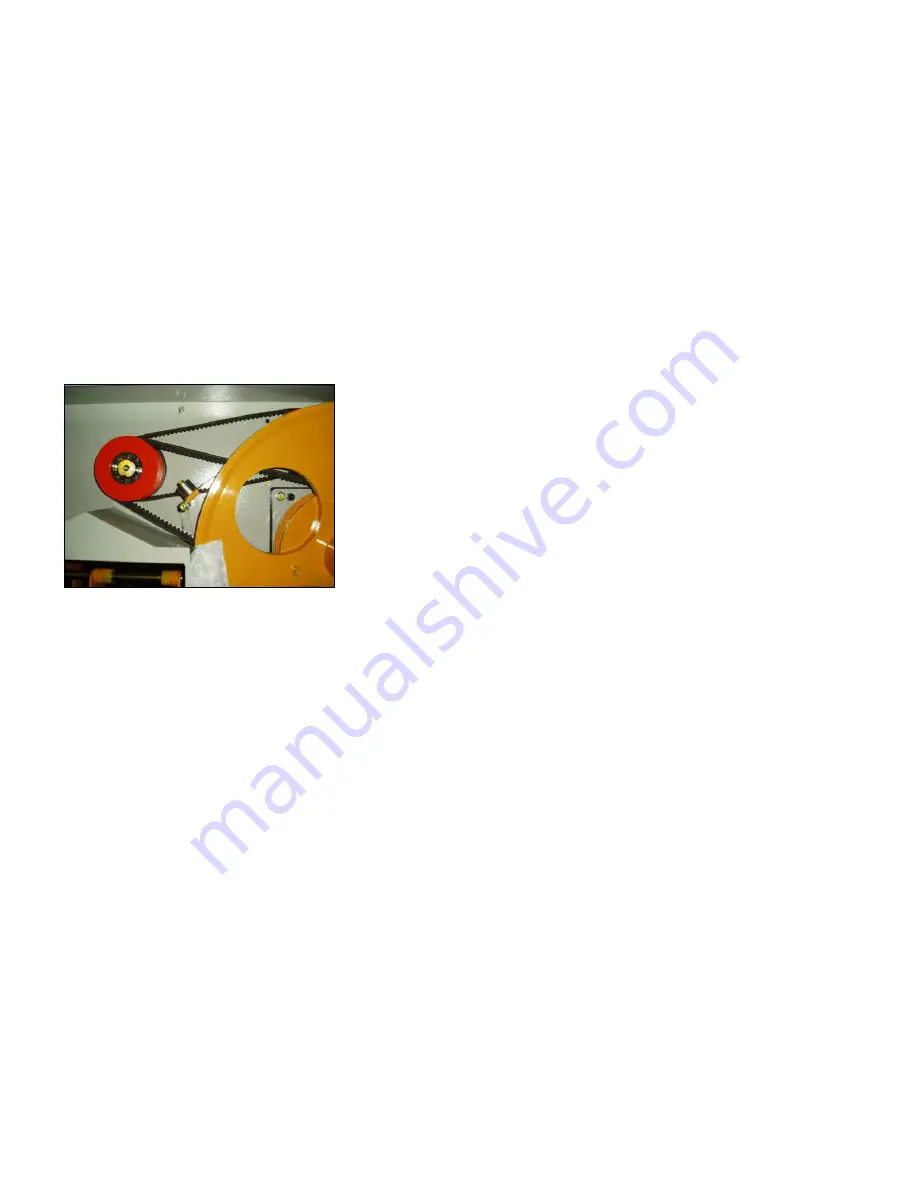
Adjusting V-Belt Tension 


Properly tensioned V-belts help the Model HP-400P operate at its best. However, adjusting the V-belts is not 

an exact science and does require personal judgement. Adjusting the belts too loose will decrease the 

performance of the machine and adjusting the belts too tight may cause premature wear of the bearings and 

other components attached to the belts. 


On the Model HP-400P there is a triple-drive V-belt system that connects the motor to the wheel pulley and a 

single-drive V-belt system that connects the wheel pulley to the hydraulic pump. 


On both systems, the belts should deflect no more than 1/2" and not less than 1/4" when pressing between the 

pulleys with your index finger. 


To adjust the V-belt tension for the saw wheels


1. Disconnect the resaw from the power source. 


2. To tension the three V-belts that connect the motor to the wheel pulley, adjust the tension by moving the 

motor mount nuts up or down until the belts are in the proper deflection range.   


Note—The belts tighten when you move the motor mount up. 


To adjust the tension for the hydraulic pump V-belt


1. Remove the small pulley cover from the pump seat. 


2. Adjust the belt tension by loosening the cap screws. 


3. Rotate the pump seat up or down until the belt has the proper deflection. 


4. Tighten the cap screws to lock the pump seat in place. 


5. Re-install the pulley covers. 


Summary of Contents for 4685

Page 1: ...4685 Horizontal Band Resaw Owner s Manual Oliver Machinery M 4685 10 2013 Seattle WA Copyright 2013 2017 info olivermachinery net www olivermachinery net ...

Page 2: ...use negligence accidents unauthorized repairs alterations lack of maintenance acts of nature or items that would normally be consumed or require replacement due to normal wear In no event shall Oliver be liable for death personal or property injury or damages arising from the use of its products Warning Read this manual thoroughly before operating the machine Oliver Machinery disclaims any liabili...

Page 3: ...es of these chemicals are Lead from lead based paints Crystalline silica from bricks cement and other masonry products Arsenic and chromium from chemically treated lumber Your risk from these exposures varies depending on how often you do this type of work To reduce your exposure to these chemicals works in a well ventilated area and work with approved safety equipment such as those dust masks tha...

Page 4: ...25 M m Max cutting Length 50mm Min cutting Thickness 3mm Controlling Blade Tension Hand press pump Main Motor Horsepower 25HP Voltage Phase Cycle Hydraulic Motor In feed Speed OMP250 Out feed Speed OMP160 Elevation Motor Horsepower 1 4HP x 6P Construction Base Construction Steel Saw Wheel Steel Conveyor Table Steel Conveyor Belt Rubber Saw Blade Guide Ceramic Machine Dimensions 2780mm L x 2150mm W...

Page 5: ...4 7 SECTION 2 CIRCUIT REQUIREMENTS 8 SECTION 3 GENERAL INFORMATION 9 SECTION 4 MACHINE FEATURES 10 29 SECTION 5 SET UP 30 37 SECTION 6 OPERATIONS 38 41 SECTION 7 MAINTENANCE 42 47 SECTION 8 SERVICE ADJUSTMENTS 48 53 SECTION 9 OPTIONAL 54 SECTION 10 REFERENCE INFO 55 58 ...

Page 6: ... serious injury CAUTION Indicates a potentially hazardous situation which if not avoided MAY result in minor or moderate injury It may also be used to alert against unsafe practices NOTICE This symbol is used to alert the user to useful information about proper operation of the equipment WARNING Safety Instructions for Power Tools 1 Keep guards in place and in working order 2 Remove adjusting keys...

Page 7: ... sharp and clean for best and safest performance Follow instructions for lubricating and changing accessories 15 Use recommended accessories Consult the instruction manual for recommended accessories The use of improper accessories may cause risk of injury 16 Reduce the risk of unintentional starting On machines with magnetic contact starting switches there is a risk of starting if the machine is ...

Page 8: ...me to a complete stop before you leave it unattended 11 All inspections adjustments and maintenance must be done with the power off and the circuit breaker shut off Wait for all moving parts to come to a complete stop 12 Habits good and bad are hard to break Develop good habits in your shop and safety will become second nature to you 13 If at any time you are experiencing difficulties performing t...

Page 9: ...ur eyes from hot pressurized fluid The best way to protect yourself is to stay away from leaks until you can depressurize the system 4 Stop the machine if you notice a hydraulic leak Allowing the machine to continue running with a leak may increase the hazard of the situation 5 Depressurize the hydraulic system before attempting to adjust any hydraulic lines or fittings Stop the resaw open the con...

Page 10: ... of the high amperage draw from this machine we recommend that you hardwire it directly to your circuit breaker and install a locking shut off lever near the machine as a way to quickly disconnect the power Your factory Circuit Capacity Always check to see if the wires in your circuit are capable of handling the amperage draw from your machine as well as any other machines that could be operating ...

Page 11: ...stated in this manual you can expect years of trouble free enjoyable operation and proof of BLUE STEEL s commitment to customer satisfaction We are also pleased to provide this manual for the Model HP 400P It was written to guide you through assembly review safety considerations and cover general operating procedures It represents our latest effort to produce the best documentation possible If you...

Page 12: ...ECTION 4 MACHINE FEATURES Main Features 1 Infeed Pressure Rollers Maintain downward pressure on the board to keep it sturdy whiles the blade cuts through it 2 Blade Tensional Provides a mechanical means for properly tightening the blade ...

Page 13: ...s and blade up or down as needed 4 Electrical Control Box Main area for wiring rewiring and changing the fuses Should never be opened when the machine is connected to the power source 5 Infeed Conveyor Moves the board through the bandsaw blade during cutting 6 4 Dust Port Allows the resaw to be connected to a dust collection system ...

Page 14: ...s moving 9 Control Panel The part of the resaw where the operator can control the starting and stopping of the motor the various height changes and the calibration of the blade height to the conveyor The control panel also houses a load meter that allows the operator to monitor the load being placed on the resaw during operation 10 Main Motor Powers the saw wheels for blade movement and drives the...

Page 15: ...ND RESAW 13 movement 11 Hydraulic Pump Creates hydraulic oil flow which drives the conveyor motors 12 Hydraulic Tank Holds the hydraulic fluid for the hydraulic system 13 Blade Tension Gauge Shows the current blade tension ...

Page 16: ...et display 3 MM INCH indicator light 4 Running indicator light 5 Number 0 9 6 Button of down dim 9 4 digits gauge display 7 Button of up dim 15 POWER ON 16 MOTOR START 17 MOTOR STOP 20 DOWN 19 UP 18 EMG STOP 13 Stop button 12 Setting gauge button 11 Setting preset button 10 Start button 14 Saving Dimension ...

Page 17: ... ON SWITCH Turning this switch for power on and the indication lamp lights on MOTOR START Used for starting saw wheels running and the indication lamp lights on MEMORY This button is used for constant thickness setting It provides convenient repetitive thickness setting without need to set the sizes again EMERGENCY STOPSWITCH During operation in case any abnormal motion occurs press this switch th...

Page 18: ...ntactor out of order 10 For reducing controller interference Please separate signal wire and power wire 11 Please add Varistor on AC load for reducing interference 12 Don t connect the shielded cable of the Induction unit to circuit 0 volt or GND 13 The programmable controller is intended of use in Zone B typical industrial environment 14 All interfacing cables are less than 3M WARNING The electri...

Page 19: ...stop running and operating 7 MM INCH indicator light 8 Running indicator light 9 Figure buttons for input dimension size 10 Manual operation button for decrase 11 Manual operation button for increase 12 Saving input Dimension 1 4 Digits Preset display 5 Setting Gauge Button 6 Stop Button 4 Setting Press Button 3 Start Button 2 4 Digits Gauge display 7 MM INCHl Indicator light 8 Running indlcator L...

Page 20: ...agrams demonstrated Diagram 3 PS Press button prior to press the display will stop flashing WARNING In order not to cause any danger by the wrong dimension of machinery operation except electricians it s prohibited to operate or make any change STEP 1 Press button 000 0 is shown on the GAUGE display and start flash STEP 2 Press button 000 1 is shown on the display and continue flash STEP 3 Press b...

Page 21: ... times The running indicator light will be on The 18 7mm will be obtained C The same theory for movement Diagram 4 2 JOG A Press button and keep on motor will be running gauge display continue show gauge data B Release button then motor will be stop C The same theory for Current figure showns 18 5mm STEP 1 Press button twice wait 1 second STEP 2 Preset data change to 18 7mm and controller is auto ...

Page 22: ...ease press button to stop action of the controller Diagram 5 WARNING To avoid and danger while operating this function please note that raw material can not be put into the machine until the operation is completed Current figure shown is 18 7 STEP 1 Press 000 0 is shown on the preset display and start to flash STEP 2 Press 000 1 is shown on the display and start to flash STEP 3 Press 001 2 is show...

Page 23: ...emory size is completed 3 TO Start operation The step to operate are as the following diagrams 7 demonstrated STEP 1 Press button the PRESET size shows 032 1and flash STEP 2 Press button the PRESET size stop to flash running indicator light is on and Working table start to move to target size after arrived the running indicator light off and PRESET return to 000 0 the GAUGE shows 32 1 Diagram 6 ST...

Page 24: ...hen press button the display will stop to flash and run STEP 3 Press button PRESET display shows 340 3 and flash STEP 6 Press button 3 sec PRESET display shows 000 0 and stop to flash This display shows 18 5mm Gauge STEP 1 Press button the preset dimension is show 032 1 and flash STEP 2 Press button working table start move to the preset dimension STEP 3 To reach the press dimension 032 1 the pres...

Page 25: ... danger while operating this function please note that raw meterial can not be put into the machine until the operation is completed Note The max pneset working thickness is 150mm The Digital Readout won t work for any sizes are over 150mm STEP 1 Press 000 0 is shown on the preset display and start to flash STEP 2 Press 000 3 is shown on the display and start to flash STEP 3 Press 003 0 is shown o...

Page 26: ...SE OF THE DISPLAY MINUS 1 Controller shows It means wrong dimension The controller can t running in the minus range 2 Correcting way Please reload correct dimension data 3 Please reference Page 2 chapter 4 To turn off the power Then Press the button and turn on the power The display shows automatically a new figure on basis of MM unit and right one decimal point To turn off the power Then Press th...

Page 27: ...f the proximity switch is used and under normal induction the instruction light of the induction switch will be illuminated or put out in accordance with the table moves up or down If the instruction lights fail to be illuminated please change the proximity switch 2 If the distance between the induction unit and induction sheet is more than 1MM Adjust the distance between the induction unit and in...

Page 28: ...ng switch HOW TO OBVIATING 1 Please make sure the actual dimension and after re enter correct data 2 Parameter data will go to change when the drive construction is different than before please to reach consignee they will show you instruction handbook teach you how to calculate correct parameter data and enter formula Function will follow kinds of controller and has difference Please make sure th...

Page 29: ...s ENCODER isn t good or couple loose FAULT SITUATION SEARCH FOR FAILURE The display does show figures when the up or down motor operates the figure fail to change in accordance with the change of machine s dimension 1 The distance between the induction unit and induction sheet isn t more or less than 1mm 2 lf ENCODER is used check if ENCODER runs in accordance with the table move up or down 3 Chec...

Page 30: ... slow distance is 1MM Terminal 8 9 LS1 COM are short circuit the slow figure is 5MM Terminal 9 10 COM LS2 are short circuit the slow figure is 15MM Terminal 8 9 10 LS1 LS2 COM are short circuit the slow figure is 30MM PS THIS FUNCTION IS DEPEND ON THE MACHINE CHARACTER USE OR NOT 4 This controller can choice up movement or down movement The original controller is movement The down movement is term...

Page 31: ...h other 6 R2 terminal 16 17 18 is the junction of figure decreasing control relay It can be made by connecting in parallel terminal 17 18 to control switch of mechanical figure decreasing PS R1 R2 must be locked each other Reference Diagram R1 R2 LOCKED EACH OTHER DIAGRAM WARNING In order not to cause any danger by the wrong dimension of machinery operation except electricians it s prohibited to o...

Page 32: ...er the machine is damaged after you have signed for delivery please immediately call Customer Service at 886 4 26201608 for advice Save the containers and all packing materials for possible inspection by the carrier or its agent Otherwise filing a freight claim can be difficult When you are completely satisfied with the condition of your shipment you should inventory its parts Piece Inventory Afte...

Page 33: ...ese solvents could cause serious personal health risks or fire Take precautions from this hazard by only using cleaning solvents in a well ventilated area Site Considerations 1 Floor Load The Model HP 400P represents a large weight load in a large footprint Most commercial floors are suitable for your machine Some residential floors may require additional build up to support both the machine and o...

Page 34: ... required we recommend that you mount your new resaw machine to the floor Because this is an optional step and floor materials may vary floor mounting hardware is not included Note The instructions below are given for a typical heavy duty shop floor made of 6 thick concrete Also anchor studs may be substituted for lag bolts but are more difficult to deal with if you decide to move your machine at ...

Page 35: ...er gloves 2 Open the wheel cover to gain access to the wheels 3 Hold the blade from each side and position it in front of the wheels so the blade teeth are facing the front of the machine 4 Carefully fit the blade over each wheel and position it between the blade guides Make sure the teeth point toward the right hand side of the machine as you are facing the front Blade positioned between blade gu...

Page 36: ...until instructed Guide Blocks The guide blocks consist of an upper and lower ceramic block that stabilize the blade from up down movement during operation The lower block is designed to remain in a fixed position and the upper block is designed to be adjusted during each blade change When the machine is new the lower block is set at the factory and should not need to be adjusted The upper block ho...

Page 37: ...pport bearing components to clarify the adjustment instruction Support bearing components To adjust the Support Bearings 1 Loosen the lock bolt approximately 1 4 turn Note If you loosen the lock bolt too much the support bearing will fall out of place 2 Turn the adjustment shaft until the support bearing is positioned approximately 0 016 behind the back of the blade Use a feeler gauge or four thic...

Page 38: ...re a snug fit Connecting to Power Source If you have performed all of the previous setup instructions you are ready to connect the resaw to the power source To connect the resaw to the power source 1 Read through Section 3 Circuit Requirements to double check that your setup follows the safety and circuit requirements and that the power cord you have chosen meets the minimum requirements for this ...

Page 39: ...WN buttons to make sure the resaw head moves in the proper direction If the resaw head moves in the opposite direction as the buttons state then the power needs to be disconnected and the power wires need to be switched at the circuit breaker in the electrical box 5 Once you have performed steps 1 4 and everything is okay with the machine and set up press the MOTOR START button As you are standing...

Page 40: ...e s applications Stock Preparation The Model HP 400P is capable of resawing rough cut lumber or slicing boards as thin as 1 16 with a high degree of precision Always make sure that any stock you plan on cutting is clean and free of nails staples or embedded stones Also keep in mind that precision cuts require a much greater preparation process than do rough cuts To prepare the stock for a precisio...

Page 41: ...anel Note The accuracy of the blade height shown on the digital display can only be assured if the calibration process has been performed 5 Press the MOTOR START button to start the bandsaw blade 6 Push the infeed conveyor engagement lever forward to start the infeed conveyor Turn the infeed conveyor speed dial counter clockwise to increase the speed and clockwise to decrease the speed 7 Double ch...

Page 42: ...nder the front pressure rollers with the jointed edge against the guide rollers 10 Receive the workpiece on the outfeed side of the machine Note If a second person is receiving the workpieces use the return conveyor to send them back to the person on the infeed side ...

Page 43: ... obtain longer use from a bandsaw blade if you give it fair treatment and always use the appropriate feed rate for your operation A clean blade will perform much better than a dirty blade A dirty blade passes through the cutting material with much more resistance than a clean blade This extra resistance will also cause unnecessary heat Maintain your blades with a cutting blade lubricant Blade Brea...

Page 44: ...or Belts Use compressed air to clean the built up sawdust from the conveyor belts Eye injuries frequently occur when cleaning with compressed air wear safety glasses to protect you Also wear a dust mask or respirator to protect your lungs from airborne dust particles Hydraulic Elevation Rams Use a dry rag to remove sawdust from the hydraulic elevation rams and then wipe the rams down with a light ...

Page 45: ...arings All bearings are standard sizes and replacements can be purchased from our parts department or bearing supply store Greasing The photos on this page label the grease fittings by number for easy identification Wipe clean and lubricate the grease fittings with two pumps of high temp bearing grease The proper greasing intervals are indicated by white boxes on the chart below Note This page was...

Page 46: ...to allow the hydraulic system to breathe during operation Below the breather cap is a plastic filler screen Visually inspect both the breather cap and the plastic filler screen If there is visual contamination clean both items with solvent and compressed air Allow them to completely dry before installing back in place Hydraulic System Minor Service The hydraulic system minor service consists of ch...

Page 47: ...nted on the bottom of the new filter and insert the new filter into the filter housing 10 Rub clean hydraulic fluid on the O ring that is on the filter housing shoulder and drop the entire filter housing in the tank in the same position as it was removed shoulder side up 11 Replace the filter cap spring and O ring and start the filter cap bolts by threading them into their holes two or three turns...

Page 48: ...th To drain the hydraulic fluid 1 Read the hydraulic safety instructions on page 6 before continuing 2 With your drain pan in place remove the drain plug 3 Replace the drain plug after the hydraulic tank is completely drained To clean the tank screen 1 Remove the access plate on top of the hydraulic tank 2 Remove the tank screen clean it with solvent and compressed air and allow it to dry 3 Re ins...

Page 49: ...HP 400P HORIZONTAL BAND RESAW 47 Maintenance Log Date Approximate Hours Of Use Maintenance Performed ...

Page 50: ...ould be adjusted To adjust the lower blade guides 1 Disconnect the resaw from the power source 2 Open the wheel cover for easy access to the blade guide assemblies 3 Make sure the blade is tensioned in the same manner that will be used for operation 4 Loosen the lateral adjustment bolts 5 Adjust the assembly so the blade guides are approximately 1 16 behind the gullets of the blade teeth and tight...

Page 51: ... pump On both systems the belts should deflect no more than 1 2 and not less than 1 4 when pressing between the pulleys with your index finger To adjust the V belt tension for the saw wheels 1 Disconnect the resaw from the power source 2 To tension the three V belts that connect the motor to the wheel pulley adjust the tension by moving the motor mount nuts up or down until the belts are in the pr...

Page 52: ...Re install and tension the hydraulic pump belt on the wheel pulley 8 Tension the newly installed V belts and replace the belt cover To replace the V belt that connects the hydraulic pump to the wheel pulley 1 Disconnect the resaw from the power source 2 Remove the large pulley guard that covers the wheel pulley 3 Remove the small pulley guard that covers the hydraulic pump pulley 4 Loosen the pump...

Page 53: ...thickness of the cut piece at all four corners and in even locations along the edges of the stock As you take these measurements write them directly on the stock near the location where you took the measurement 3 Study the written measurements on your test piece Note DO NOT place too much importance on the first and last six inches of the board because the board will only have been under one press...

Page 54: ... turn the front adjustment nut counter clockwise half of a turn and watch the belt tracking Note The effect of the adjustment can sometimes take two minutes before the results are fully apparent If the tracking was not corrected by this adjustment proceed to step 5 If the tracking was corrected skip to step 6 5 On the side that the belt tracks away from turn the front adjustment nut clockwise half...

Page 55: ... that you moved the nut Note Write the number of turns down so you do not forget Remembering this number is an important part of the re assembly process 7 Slide the roller brackets toward the body of the resaw to loosen the belt 8 Remove the stiff cable from the center of the seam to separate it 9 Remove the old conveyor belt from the conveyor table and replace the new conveyor belt in its place 1...

Page 56: ...into one gallon of tap water this equals 30 1 mixture At recommended dilutions this product meets criteria as a non hazardous industrial chemical Keep out of reach of children Do not ingest or contact eyes Under normal use and dilution it is not irritating to skin Product is non flammable biodegradable and can generally be disposed of thru sewer in compliance with acceptable local state and federa...

Page 57: ...ding this manual please e mail to bsm168 ms62 hinet net We recommend you keep a copy of our current catalog for complete information If you need additional technical information relating to this machine or if you need general assistance or replacement parts please contact the Service Department at the location listed below TAIWAN Blue Steel Machinery Company 86 10 Shen Ching Road Ching Shui Taiwan...

Page 58: ...in motor or loose connections 2 Low voltage 3 Incorrect fuses or circuit breakers in power line 4 Motor overloaded 1 Repair or replace connections on motor for loose or shorted terminals or worn insulation 2 Correct the low voltage conditions 3 Install correct fuses or circuit breakers 4 Reduce load on motor Machine slows when operating Applying too much pressure to workpiece Feed workpiece slower...

Page 59: ...the provisions of any law or acts unless the manufacturer so warrants We shall in no event be liable for death injuries to persons or property or for incidental and contingent special or consequential damages arising from the use of our products To take advantage of this warranty contact us by mail or phone and give us all the details We will not accept any item back without this number Proof of p...

Reviews: