User’s Guide> 37
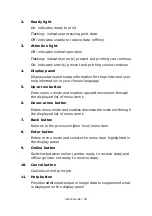
Restart). Available to support staff to allow printer
configurations and special functions to be set.
C
ONFIGURATION
INFORMATION
Configuration information displays printer configuration
information such as internal firmware versions.
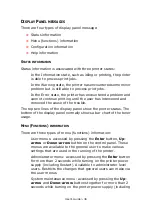
Menu options at each level can be scrolled through by moving the
highlight with the
Up-arrow
/
Down-arrow
buttons and a
highlighted option at that level can be selected by pressing the
Enter
button. When the lowest level menu has been selected, you
can change the setting for that menu by selecting the required
highlighted value from a list or by entering a numeric value. In other
cases, you can display or print configuration information.
H
ELP
MODE
When an error has occurred, press the
Help
button. Information
displays that will help you correct the error.
D
ISPLAY
P
ANEL
MESSAGES
The display panel messages, supplemented by the Help messages
where appropriate, are intended to be self-explanatory. More
information on typical messages is provided in
“Appendix A – Display
Panel Messages” on page 106
.
U
SING
THE
MENUS
NOTE
Menu details are given in
“Appendix B – Menu system” on
page 108
for reference.
The
Enter
,
Up-arrow
,
Down-arrow
and
Back
buttons are used to
move through the printer menus. You can adjust settings (e.g. set
the paper size for Tray 1) or view information (e.g. how much is left
of a selected consumable).
Many of these menu settings can be, and often are, overridden by
settings in the Windows printer drivers. However, several of the
driver settings can be left at "Printer Setting," which will then default
to the settings entered in these printer menus.
Summary of Contents for proColor Pro510DW
Page 1: ...p r o 5 1 0 D W U s e r s G u i d e...
Page 2: ......
Page 22: ...User s Guide 22 12 Face up stacker 13 Interface unit 14 Network interface connector 10 11 12...
Page 25: ...User s Guide 25 29 Drum basket 27 28 29...
Page 57: ...User s Guide 57 4 Turn on the printer...
Page 73: ...User s Guide 73 7 Replace the two top covers 8 Raise the front cover of the duplex unit...
Page 74: ...User s Guide 74 9 Push the duplex unit back into position...


