Installing upgrades > 146
Near the top of the page, between the two horizontal lines,
you will see the current MFP configuration. This should now
indicate that the hard disk unit is installed.
All that remains is to configure the Windows printer driver so that
it knows the hard disk unit has been fitted, and the additional
features can be made available immediately.
windows printer drivers” on page 147.
A
DDITIONAL
PAPER
TRAY
1.
Switch the MFP off and disconnect the AC power cable.
2.
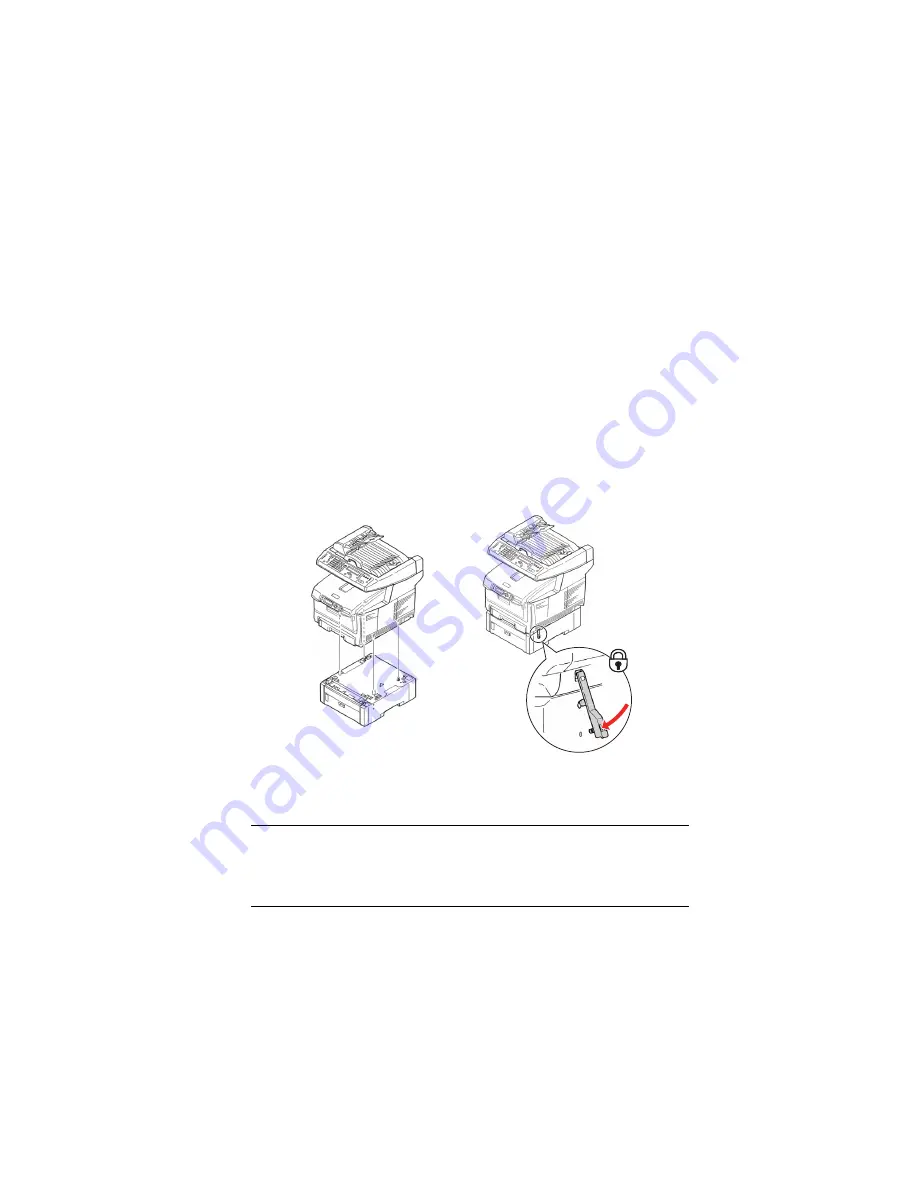
Place additional paper tray on desired location.
3.
Observing safety rules for lifting and, using locating
guides, place MFP on top of the additional paper tray.
2nd tray & lock installation.eps
4.
Locate securing clip, press down and lock into position.
5.
Re-connect the AC power cable and switch the MFP ON.
NOTE
If you need to transport this product, make sure you unlock
the securing clip and remove the additional paper tray
beforehand.


