2 BASIC OPERATION
30 Scan to USB
4
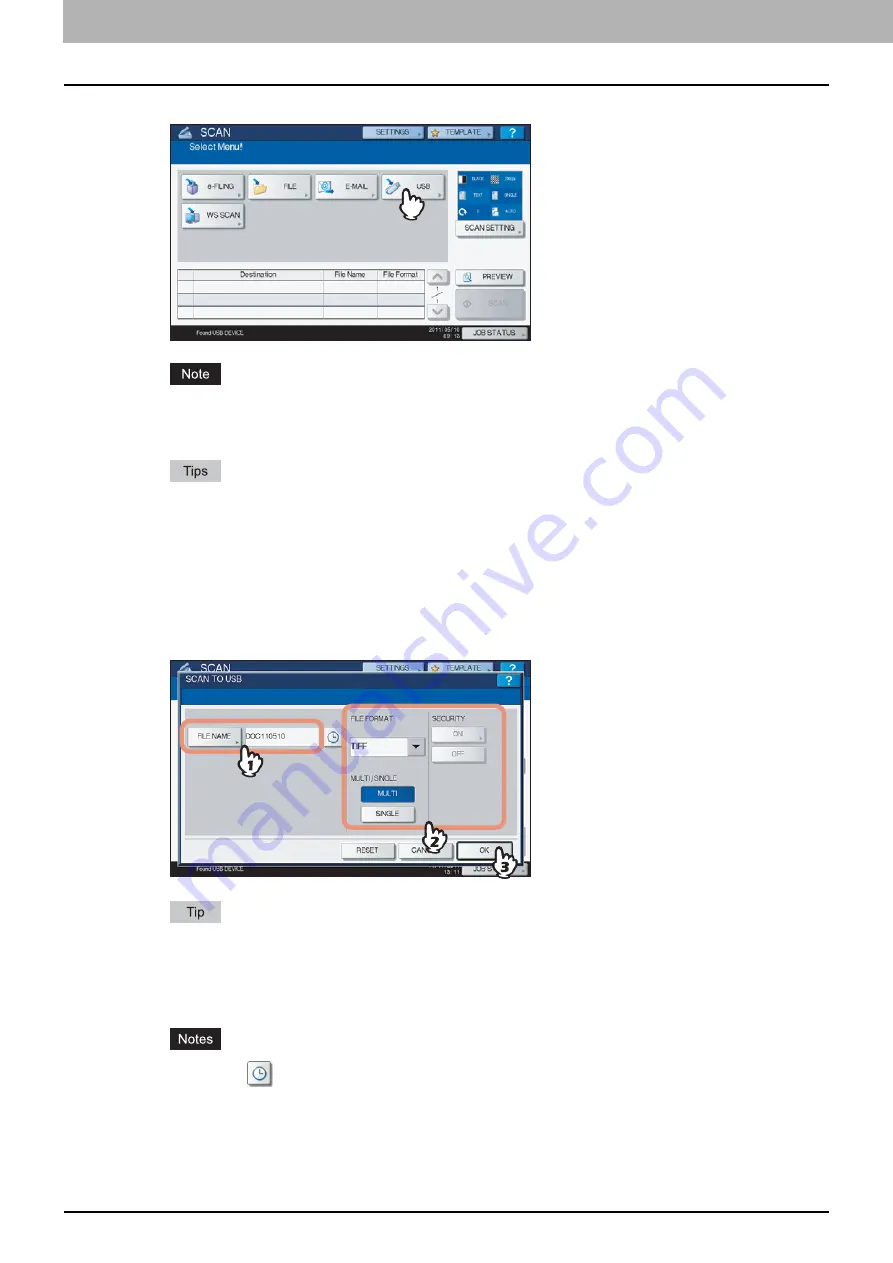
When “Found USB DEVICE.” message appears on the touch panel, press [USB].
When you store scans in a USB storage device, never attempt to remove the device from the equipment until
data transmission is completed. Removing the USB storage device during data transmission may corrupt the
device.
Storing scans to a USB storage device may take a long time depending on the volume of the scans.
If the equipment is either the ES9460 MFP/ES9470 MFP/CX3535 MFP/CX4545 MFP, press [PREVIEW]
here and then select the scanning function in order to preview the scanned data at the end of the operation.
For previewing scans, see the following section:
5
Define the settings for the new file as required.
1) Press [FILE NAME] to change the file name.
2) Select an option for each of the FILE FORMAT, MULTI/SINGLE PAGE and SECURITY settings.
3) After the settings are done, press [OK].
To clear the settings, press [RESET].
[FILE NAME]
Pressing this button displays an on-screen keyboard. Change the file name using the keyboard and digital keys,
and then press [OK] to set the entry. A maximum of 128 letters can be used for the file name.
Pressing
adds some numbers such as date and time to the file name. These numbers can be set in the
format selected in the Date Format setting of the TopAccess menu, which can be set by the administrator.
For details, refer to the
TopAccess Guide
.
The trailing characters in a file name (maximum 74) may be deleted depending on the type of letters used.
Summary of Contents for ES9160 MFP/ES9170 MFPES9460 MFP
Page 92: ......
Page 112: ......
Page 115: ...ES9160 MFP ES9170 MFP ES9460 MFP ES9470 MFP CX3535 MFP CX4545 MFP ...


