5
Setting Up the Printing Unit
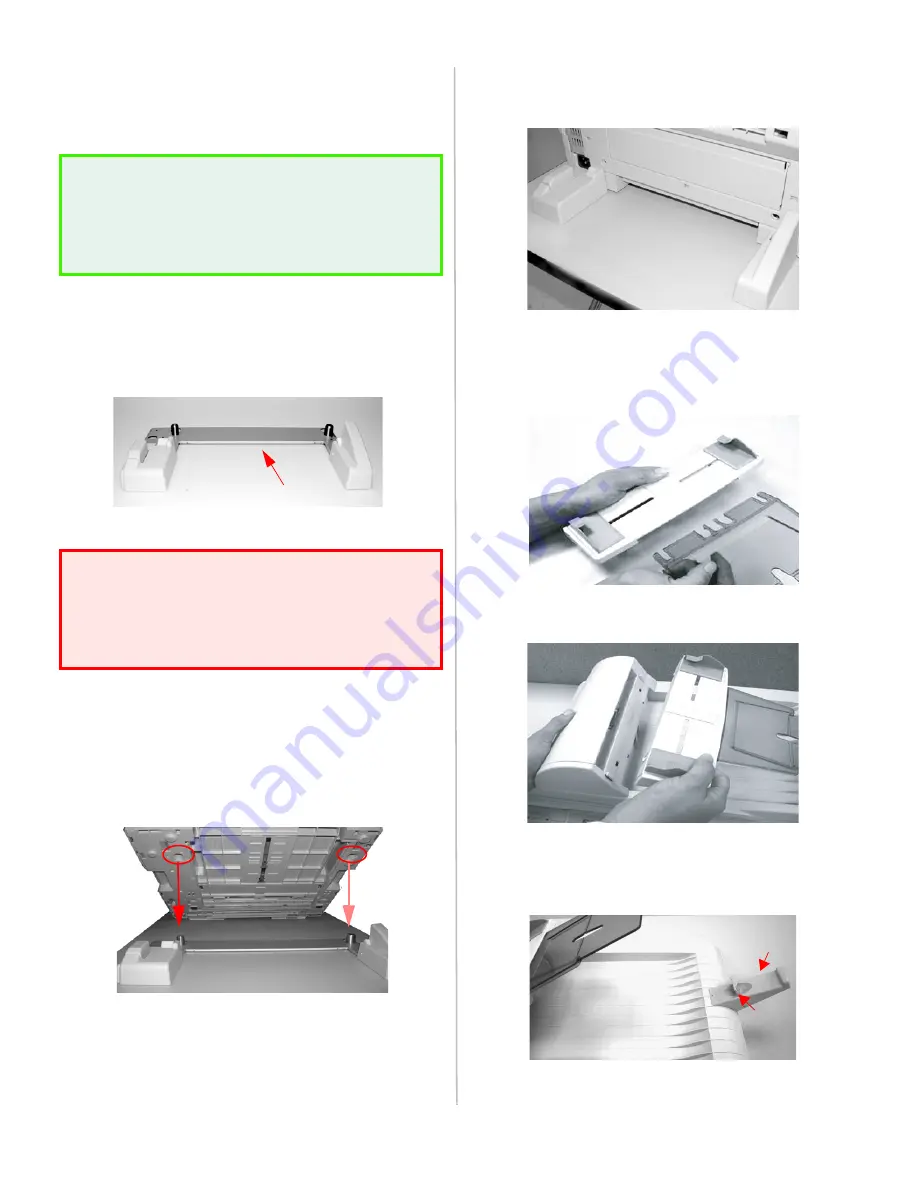
1. Remove the transport tape from front and back of
printing unit.
Install the Support Bracket
2. Place the printing unit on the surface you have
chosen. Place the support bracket (
1
) at the back
of the printing unit.
3. Carefully lift the back of the printing unit and align
the wells under the back of the printing unit with
the plugs on the support bracket. Lower the
printing unit on top of the bracket. The bracket
provides stability for the MFP when the scanning
unit is attached.
4. Make sure the printing unit and the support
bracket are aligned and the unit is firmly in place.
Setting up the Scanning Unit
1. Attach the paper support to the paper feed tray.
2. Attach the paper feed tray to the machine.
3. Install the Paper Stopper (
1
). If using letter size
paper, pull the lever (
2
) up to stop paper from
falling.
NOTE!
Do not remove the orange paper band extending
from inside the printing unit at this time. This
band provides instructions for preparing the
fusing unit.
WARNING!
The support bracket prevents the unit from
tipping over when in use. Using the unit without
installing the support bracket may cause
damage or personal injury.
1
1
2


