background image

- 12 -

● Adjustment is necessary if the screw flow is not smooth or if there is too much rail vibration.
  ○ Adjust the Amplitude control dial on the back of the machine using the precision screwdriver.
  ○ Adjust the Vibration frequency control dial on the back of the machine using the precision screwdriver and find the 

resonance point.

    Adjust these dials to locate the optimum conditions for smooth movement of screws.
● Maximize the amplitude and adjust the vibration frequency to locate the resonance point (frequency when the rail vi-

bration is at a maximum.) Then turn down the amplitude to locate the optimum conditions for smooth movement of 
screws.

● Although it is not recommended, the rail vibration can be adjusted while the machine is operating.
● During control dial adjustment, do not force the screwdriver beyond its rotation limits.

● The rail vibration has been adjusted before shipment using screws that correspond to the rail size. 

(Refer to the label number on the rail for the nominal screw diameter: e.g. 17 is φ1.7)

● Put 2 or 3 screws into the rail groove and turn the machine on.

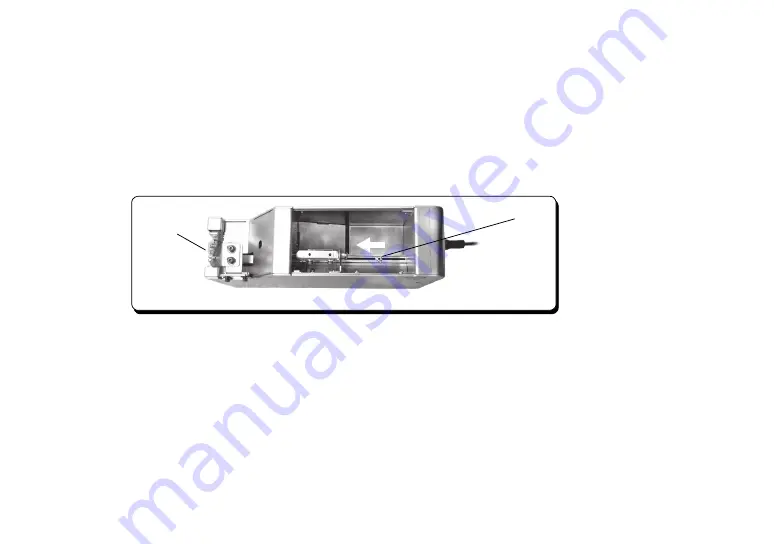
● No adjustment is necessary if the screws move to the stopper position smoothly. (See Picture 13)

●When the number of screws is low and no screw is picked up in a given period of time, vibration will become the 

maximum and it will stop operation after that. (Refer to 4-2 “Basic Operation.”)Adjustment of volume is not effective 

at the time of a forced oscillation. 

● After it stops, turn on the machine again and repeat the above procedure.

5 - 5. Rail Vibration Adjustment

Stopper

Adjust the rail vibration so that the screw moves 

smoothly in the direction of the arrow.

Screw

Picture 13

Summary of Contents for SS Series

Page 1: ...U www ohtake root co jp HP www ohtake root co jp ATTENTION www ohtake root co jp is the only web site associated with our company We do not have any branches in China Operation Manual Read these instr...

Page 2: ...e machine Instruction Manual 1 copy AC Adapter 1 unit Hexagonal Wrench 1 piece Screwdriver 1 piece Ground wire 1 piece The design performance and specifications are subject to change without prior not...

Page 3: ...ates there is a chance of personal injury or damage to property if the instructions are not followed Symbols indicating type of danger and preventative measures This indicates to stop operations Unplu...

Page 4: ...detect overheating smoke a pungent odor or any other unusual condition as there may be a risk of fire or electric shock Contact the dealer from which you purchased the machine and have it examined an...

Page 5: ...oving the machine always disconnect the AC adapter from the wall outlet or it may result in damage to the cord or cause a fire or electric shock Turn off the machine and unplug the AC adapter from the...

Page 6: ...ide height adjustment screw 5 Bit guide depth adjustment screw 4 Bit guide width adjustment screw 13 DC jack Back View 12 Timer control dial 11 Amplitude control dial 10 Vibrational frequen cy control...

Page 7: ...eter of the screws you are using Stops screws at the tip of the rail Controls the vibrational frequency using a precision screw driver Controls the amplitude using a precision screw driver Controls th...

Page 8: ...nual the machine may not work properly In this case check and readjust the following Screw amount Brush Passing plate and slide plate Vibrational frequency Bit guide Timer Sensor voltage level The mac...

Page 9: ...ust the brush height See Picture 4 1 Move the brush manually to check that the brush touches heads of the screws in the rail groove See Picture 4 2 If the brush position is too high screws in incorrec...

Page 10: ...om the before replacing the rail Loosen the bit guide height adjustment screws See Picture 5 Slightly loosen the front and rear rail fixing screws See Picture 6 Lift the bit guide Assembly and pull th...

Page 11: ...and the rail groove is too wide the screw flow may stop If the gap is too small the screw flow may also stop Screws cannot pass through the gap Ad just the height to the exact height of the screw hea...

Page 12: ...holding plate fixing screw and adjust the gap between the holding plate and rail groove See Picture 10 Removing the holding plate before ad justment will allow you to easily place screws into the rail...

Page 13: ...ne is operating During control dial adjustment do not force the screwdriver beyond its rotation limits The rail vibration has been adjusted before shipment using screws that correspond to the rail siz...

Page 14: ...de height so that it doesn t touch the holding plate Use the plate adjustment screws and bit guide width adjustment screws to adjust the bit guide groove width and position so that the bit guide width...

Page 15: ...ving slowly it may be necessary to set the timer to Max Adjust the Timer control dial on the back of the machine using a precision screwdriver See Picture 16 Turn the dial clockwise to reduce the vibr...

Page 16: ...ard See Picture 17 Measure the voltage level using Pins 3 5 and 7 on the IC4050 Ground the metal part of the body Use testing clips for the voltage measurement Recommended item Testing clip FP 7 manuf...

Page 17: ...t the light receiving sensor position vertically See Picture 20 0 25 1 5V There are no screws on the stopper 3 5V or more There are screws on the stopper If the voltage is 2 5V or over the sensor judg...

Page 18: ...ation and an inversion for about 2 seconds at a time and the scooper carries screws to the rail The vibrator solenoid continuously sends screws to the front stopper to be picked up using the screwdriv...

Page 19: ...rce when fitting the screwdriver bit to the screw head This may bend the rail or lead to malfunction of the machine To fit the bit securely into the cross slot of the screw slightly rotate the screwdr...

Page 20: ...rotection circuit Normally the driving motor rotates and sends screws to the rail However if an overload is applied to the machine s moving parts the driving motor rotates in the counter direction for...

Page 21: ...21 to replace the brush Reverse the procedure for removing the brush to attach a new one Refer to Page 8 Brush Height Adjustment for adjustment Brush Item Nos NSN02107 for Model SS 12 NSN22001 for Mo...

Page 22: ...chine off and remove the left and center covers When you remove the covers you will be able to see the four rollers that the driving belt is fitted around See Picture 22 Remove the belt with your fing...

Page 23: ...screws 4 pcs from the bottom of the body and then pull the motor out in a horizontal direction from the body See Picture 24 Reverse the procedure for removing the motor to attach the new one Note Do n...

Page 24: ...e screw in the screw hold ing groove Adjust the Timer control dial Reduce the number of screws in the scooping chamber Remove the object 2 The rail does not move back and forth An object e g screw is...

Page 25: ...oove and the brush cannot remove it A screw is stuck on the rail Use screws appropriate to the rail size Place screws into the scooping cham ber Adjust the brush Adjust the passing plate Place screws...

Page 26: ...Spring washer screws are smaller than the type specified for the rail being used There is dust dirt or grease on the rail The rail vibration is insufficient The rail touches the body Adjust the holdi...

Page 27: ...scooping chamber Adjust the holding plate position 8 The machine stops suddenly The overload protection circuit was ac tivated There are too many screws in the scooping chamber An object e g screw is...

Page 28: ...e are screws on the rail The rail is not filled with screws or a screw has been trapped somewhere on the rail The sensor is not detecting whether or not there are screws on the rail Adjust the sensor...

Page 29: ...AC adapter switching type Reference table of the specified screws el Screw size Screw shaft diameter Screw head diameter Washer diameter Screw head thickness mm Screw shaft length mm Sems Double sems...

Page 30: ...29 11 External Dimensions Unit mm DC jack 19 7 pick up position 98 8 Pick up position...

Page 31: ...ed In the following cases the purchaser shall pay for parts and labor regardless of the terms of warranty Failure due to improper handling Failure due to product modification or improper processing Fa...

Page 32: ...n in whole or in part of this manual without permission is strictly prohibited by copyright law Copyright OHTAKE ROOT KOGYO CO LTD 27 021 0902 Tel 0191 24 3144 Fax 0191 24 3145 27 Kangasaki Hagisyou I...

Reviews: