56
Sento LED Replacement
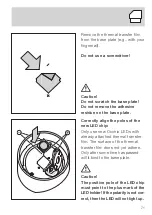
Turn around the LED holder, inclu-
ding the LED chip, and insert it in
the opening in the head. In doing
so, align it so that the opening in
the LED holder is in the correct
position.
If the gray ring has been removed,
attention must be paid to the cor-
rect alignment during installation!
Using an Allen wrench, tighten
both screws so that they are
"fingertight"
.
Twosided head, front
Opening for adjustment knob
If the gray ring has been removed,
attention must be paid to the cor-
rect alignment during installation!
Summary of Contents for io Series
Page 1: ...LED Wechsel LED Replacement Montageanleitung Mounting instructions Sento io lui lei...
Page 2: ......
Page 4: ......
Page 5: ...LED Wechsel Montageanleitung...
Page 8: ......
Page 9: ...09 Sento LED Wechsel...
Page 16: ......
Page 17: ...17 io LED Wechsel...
Page 23: ...23...
Page 24: ......
Page 25: ...25 lui LED Wechsel...
Page 32: ......
Page 33: ...33 lei LED Wechsel...
Page 39: ...39...
Page 41: ...41 Achtung Bei anhaltender Funktions st rung den Occhio Kunden service kontaktieren...
Page 42: ......
Page 43: ...43 Anhang...
Page 46: ......
Page 47: ...LED Replacement Mounting instructions...
Page 50: ......
Page 51: ...51 Sento LED Replacement...
Page 58: ......
Page 59: ...59 io LED Replacement...
Page 65: ...65...
Page 66: ......
Page 67: ...67 lui LED Replacement...
Page 74: ......
Page 75: ...75 lei LED Replacement...
Page 81: ...81...
Page 83: ...83 Caution If a malfunction persists then contact Occhio customer service...
Page 84: ......
Page 85: ...85 Appendix...


