DOC-00500 Rev. F
7–25
Eden500V/350V/350 User Guide
9. For
each
column
of
lines,
use
a
magnifying
glass
or
loupe
to
inspect
pairs
of
consecutive
rows
printed
on
the
transparency
to
see
where
the
vertical
lines
align.
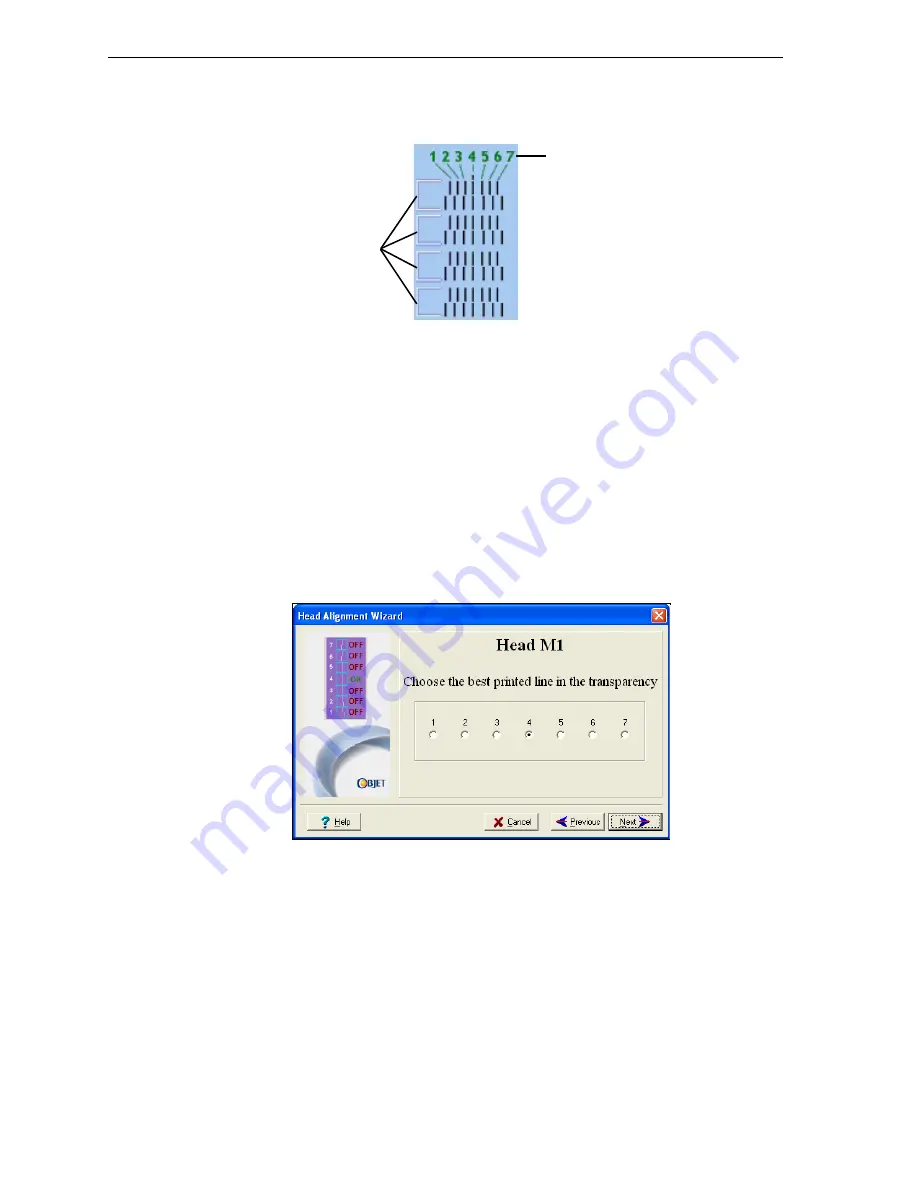
Figure 7-31: Comparing rows of alignment lines
Note:
It does not matter which pair of lines you inspect, since they were all
printed by the same head. Choose a pair of clearly printed lines for the
inspection. (Since some nozzles may not print clearly, you may have to
inspect several pairs of lines to properly inspect the alignment.)
Optimum
head
alignment
is
shown
when
the
fourth
lines
in
the
upper
and
lower
rows
are
aligned,
as
in
In
the
example
shown,
no
change
to
the
head
alignment
is
necessary.
If
other
lines
in
the
set
are
aligned,
you
need
to
change
the
alignment
of
that
head—in
the
next
wizard
screens.
10. In
the
shown
in
29,
select
the
Transparency
removed
check
box,
and
click
Next
.
The
first
in
a
series
of
alignment
screens
appears.
Figure 7-32: Head alignment screen
11. In
the
head
‐
alignment
screen,
select
the
number
that
indicates
which
lines
align
in
the
upper
and
lower
rows
of
a
pair
on
the
transparency
(counting
from
the
left)
for
this
head.
Note:
Because the alignment of the fourth lines is optimum, the number “4”
is selected, by default, in the wizard screen. This does not change the head
alignment. If you select other numbers, the wizard adjusts the head
alignment, accordingly.
12. Click
Next
to
display
the
next
head
alignment
screen,
and
again
select
the
number
representing
the
most
closely
aligned
vertical
lines
on
the
transparency
for
that
head.
Alignment-line
numbering, left-to-right
Row pairs


