Raincover
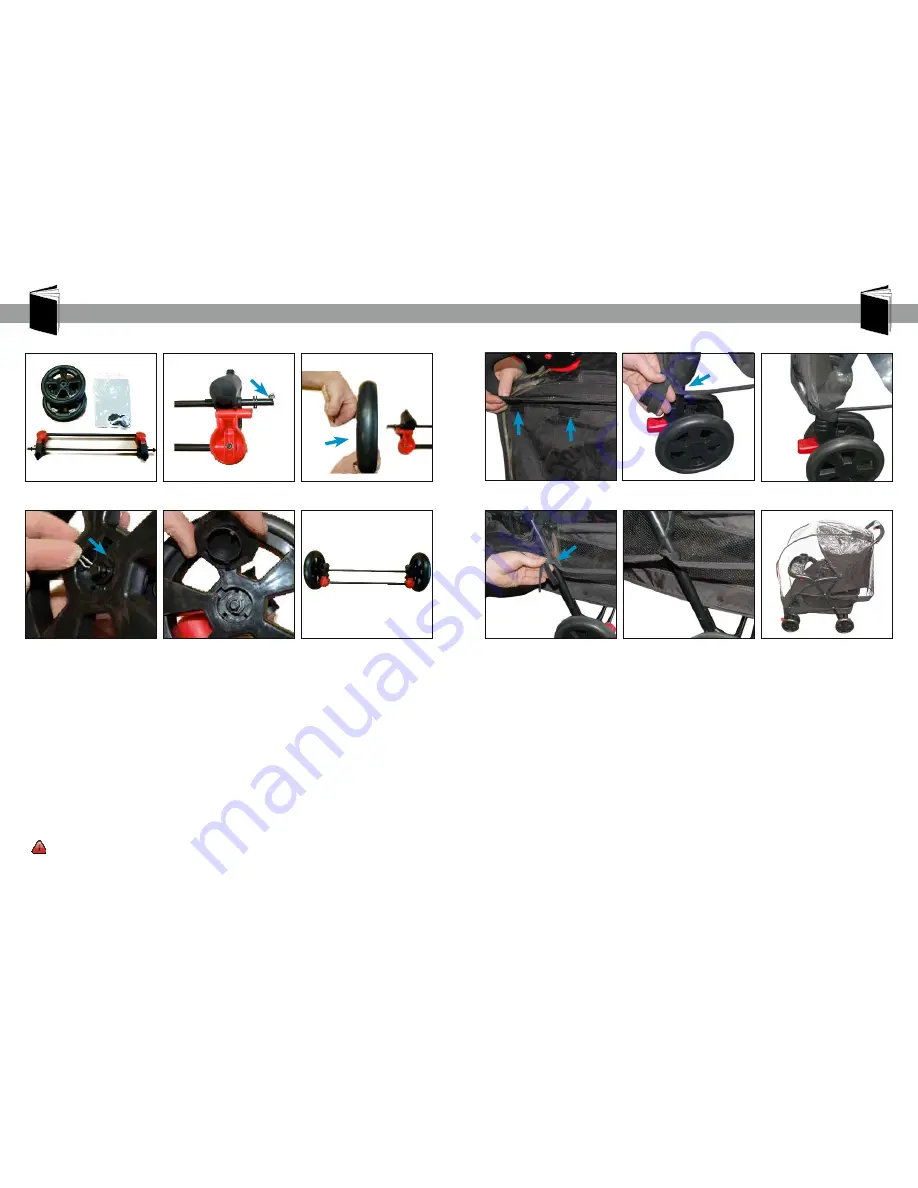
Rear Wheel Assembly
Parts Check List (fig.A)
- 2x Wheels
- 2x Hub Caps
- 1x Axle Assembly
Remove the pin from the end of the axle, along with one of the washers (fig.B).
Push wheel onto axle making sure correct side faces outward (fig.C).
Slide remaining washer over axle and insert the pin into the hole in the axle (fig.D).
Locate hubcap over the centre of the wheel, it has 3 small, unevenly distributed,
orientation locators. Push to click and secure the hubcap in place (fig.E).
Repeat for opposite wheel, complete assembly should look like (fig.F). The whole rear
axle assembly can now be clipped onto the exposed metal ends of the stroller frame.
The axle assembly has two red brake pedals, these face the rear towards the parent.
WARNING: Ensure that all pins that hold the wheels on are secured fully, before use.
The rear axle assembly should be fully inserted and securely clicked into the stroller
frame before use.
The Raincover can be attached by the following method.
Open the raincover and drape over the stroller. The raincover can be used with the car
seat in place too.
Close the back of the raincover around the hood of the stroller and secure using the
velcro tabs (fig.G).
Secure the bottom of the raincover using the velcro straps (fig.H), around the front leg of
the stroller (fig.I), and repeat for the opposite front side.
Secure the lower rear of the raincover around the rear leg of the stroller (fig.J & K).
Repeat for the opposite rear side.
Your raincover is fitted (fig.L).
fig. A
fig. D
fig. K
fig. J
fig. E
fig. L
fig. G
fig. B
fig. F
fig. H
fig. C
fig. I
Remove Pin
Insert Pin
6
7
www.obaby.co.uk
www.obaby.co.uk
Summary of Contents for Monty
Page 11: ......


