8
If the selection window shown in Figure 6 does not come up, but a “Confirm Configuration Parameters”
window comes up instead at this point, the wireless PC you are using has failed to locate the Device
Server.
(a) Double-check to make sure that the Device Server is physically located as explained in Step (1)
of the “What You Need for Setup” section.
(b) Double-check to make sure the Device Server is powered up and displaying the LED status
explained in Step (1) of this “Wireless Network Setup” section.
If either of these steps was missed, repeat steps (1) through (9) in this section. If you still don't see the
selection window shown in Figure 6, contact NuVo Technical Support at (866) 796-4904 for further
assistance.
Select the Device Server line as shown in figure 6, if it is not already selected. Then, left-click the
“Next” button.
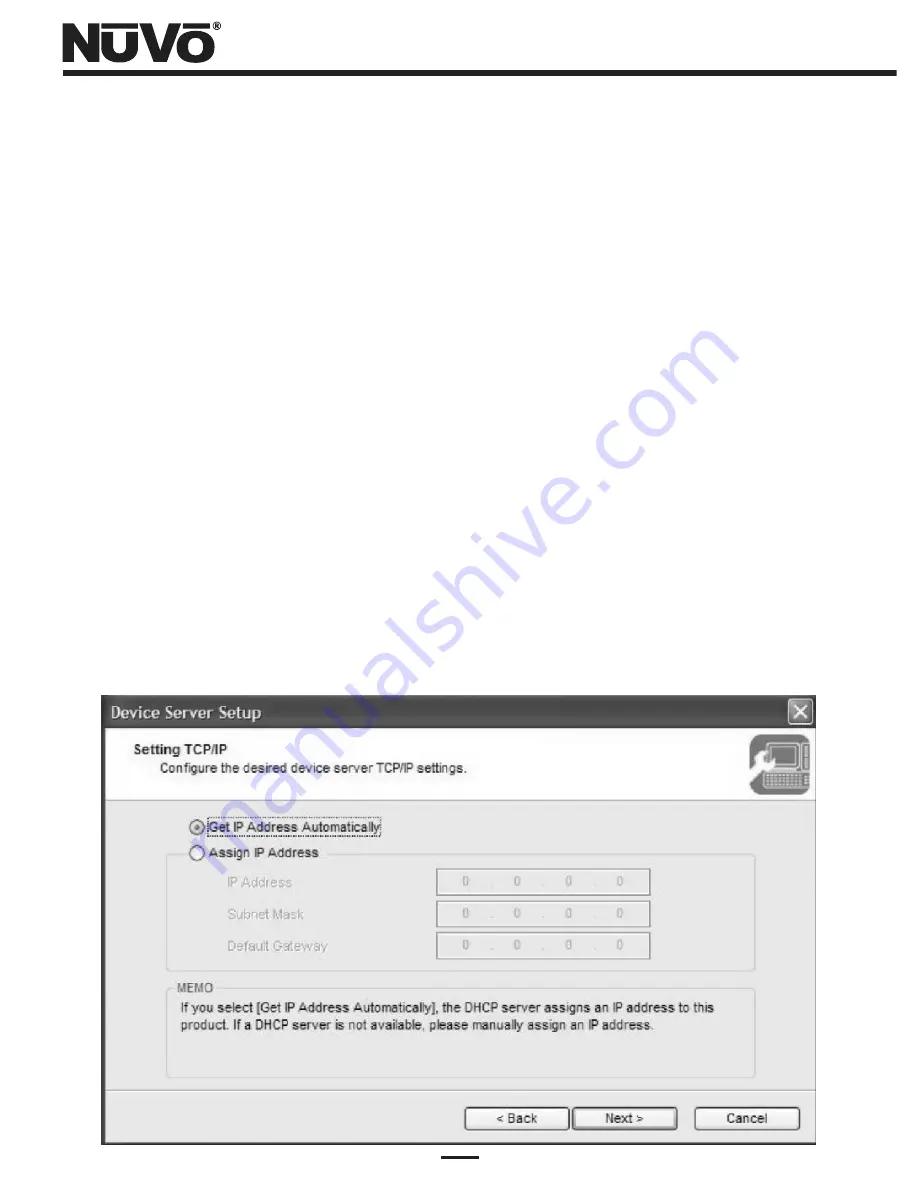
(10) Make certain that the default “Get IP Address Automatically” option is set in the “Setting
TCP/IP” window shown in Figure 7. In the unlikely event that the user's network is set up
without Dynamic Host Control Protocol (DHCP) enabled, then you will have to click Assign IP
Address, and enter the values for the three fields “grayed out” in the image below. Refer to
the Silex manuals available on the NuVo NV-USBW/SX-2000WG setup CD for details. Then,
left-click the “Next” button.
Figure 7 – “Setting TCP/IP” Window
Summary of Contents for NV-USBW
Page 1: ...NV USBW Wireless USB Extender Installation Guide...
Page 2: ......
Page 20: ...18 Figure 19 Setup Complete status window...
Page 23: ...21 Figure 22 Device Server List NV M3 connected Figure 23 Connecting to the NV M3...
Page 26: ...24 Figure 27 Connected PC Name status Figure 26 Disconnecting from the NV M3...
Page 27: ......


