NVIP
-
8SD
-
6550/32/F Quick start guide version 1.0
All rights reserved © AAT SYSTEMY BEZPIECZEŃSTWA Sp. z o.o.
24
OBJECT TRACKING
After configuring the tracking settings option, further settings are made in the image analysis function
menu, in this example the intrusion detection menu.
In the "Detection Config" tab, enable the function and configure the required options,
but do not yet
enable the "Trigger Track" option
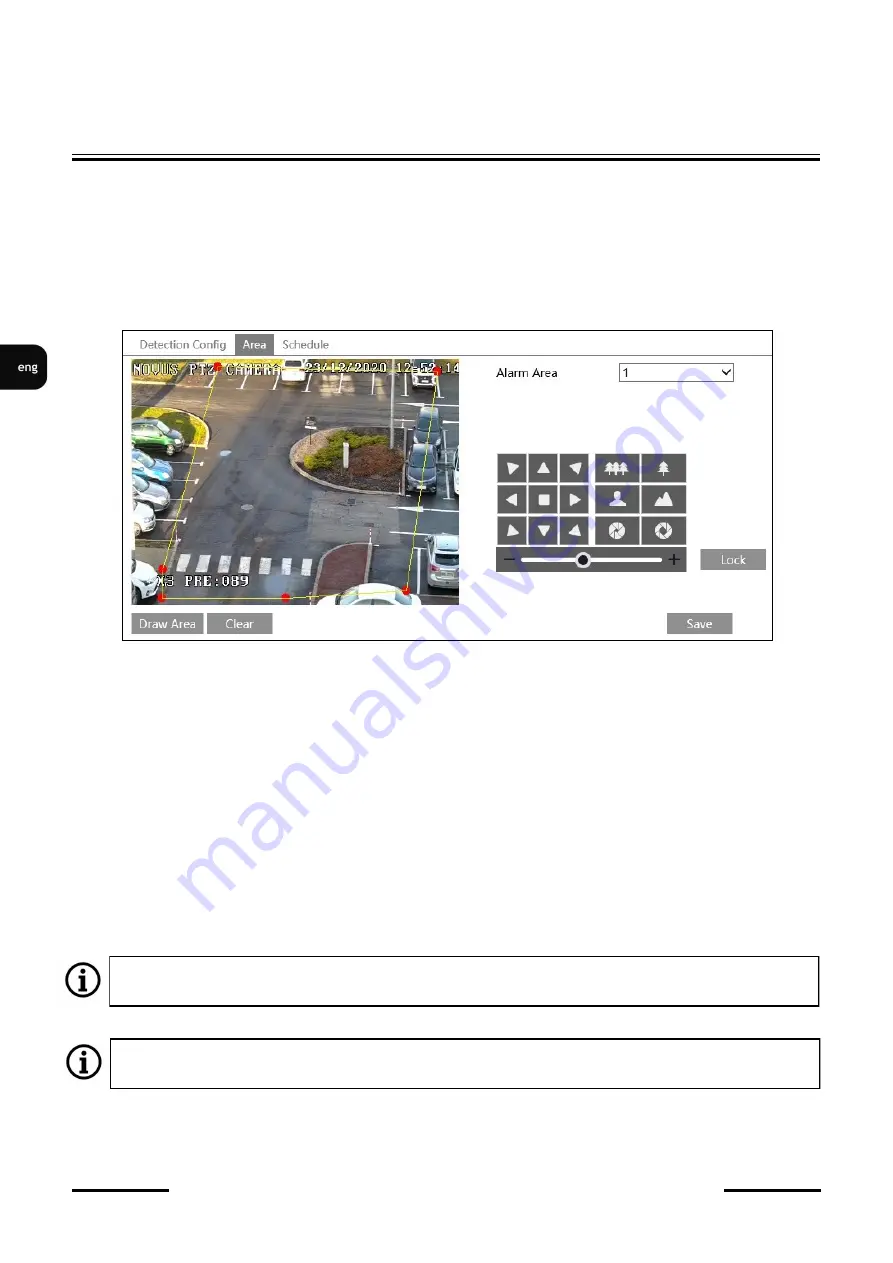
. Then go to the "Area" tab where, using the PTZ control buttons,
set the appropriate field of view, and then, in the preview window, define the detection area and save
the changes.
After completing the above steps, press the "Lock" button. Pressing this button saves the current PTZ
position as the start position for tracking (the start position for tracking is saved as special preset
number 89). Then go back to the "Detection Config" tab, enable the "Trigger Track" option and save
the changes. From this moment on, the camera starts tracking objects in the detection area.
The "Lock" button changes its function to "Unlock" when pressed. Unlocking tracking is needed in two
cases:
•
when the "PTZ Auto Tracking Priority" option is selected in the "Settings
-
> Alarm
-
> Smart
Tracking" menu (when manual PTZ control is disabled), pressing the "Unlock" button enables
manual PTZ control.
•
when we want to change the area of observation
Pressing the "Unlock" button suspends object tracking until you press the "Lock" button.
Please note that each press of the "Lock" button, saves the current position of the PTZ dome as a
new start position for tracking.


