Northern Industrial ST 80 i Operating Manual Download Page 8

Northern Industrial Welding 


Operating Instructions and Parts Manual 

ST80i 

-Always have power disconnected 

when working on internal 
components. 

- Do not touch or handle PC board 

without being properly grounded 

with a wrist strap. Put PC board in 
static proof bag to move or ship.  

-Do not put hands or fingers near 

moving parts such as fan. 


Assembly 

This unit is assembled when out of  
factory. 
 

Installation 

1. Power requirement 

AC single phase 120v (110-120V), 
60HZ fused with a 20amp time 
delayed fuse or circuit breaker is 
required. DO NOT OPERATE THIS 
UNIT if the ACTUAL power source 
voltage is less than 105 volts ac or 
greater than 132 volts ac.  


• High voltage danger from power 
source! Consult a qualified 
electrician for proper installation of 
receptacle. This welder must be 
grounded while in use to protect 
the operator from electrical shock. 
• Do not remove grounding prong 
or alter the plug in any way.  Do 
not use any adapters between the 
welder’s power cord and the power 
source receptacle. Make sure the 
POWER switch is OFF when 
connecting your welder’s power 
cord to a properly grounded 
120Vac, 60Hz, single phase, 20 
amp power source. 
2. Extension cord 

During normal use an extension cord 
is not necessary. It is strongly 
recommended that an extension cord 
should not be used because of the 
voltage drop they produce.  This drop 
in voltage can affect the performance 
of the welder.  If you need to use an 

extension cord it must be a #12 
gauge cord at the smallest.  
-Do not use an extension cord over 
25 ft. in length. 

3. Setting up the work piece  
3.1 Welding positions 

There are two basic positions, for 
welding: Flat and Horizontal. Flat 
welding is generally easier, faster, 
and allows for better penetration. If 
possible, the work piece should be 
positioned so that the bead will run on 
a flat surface. 

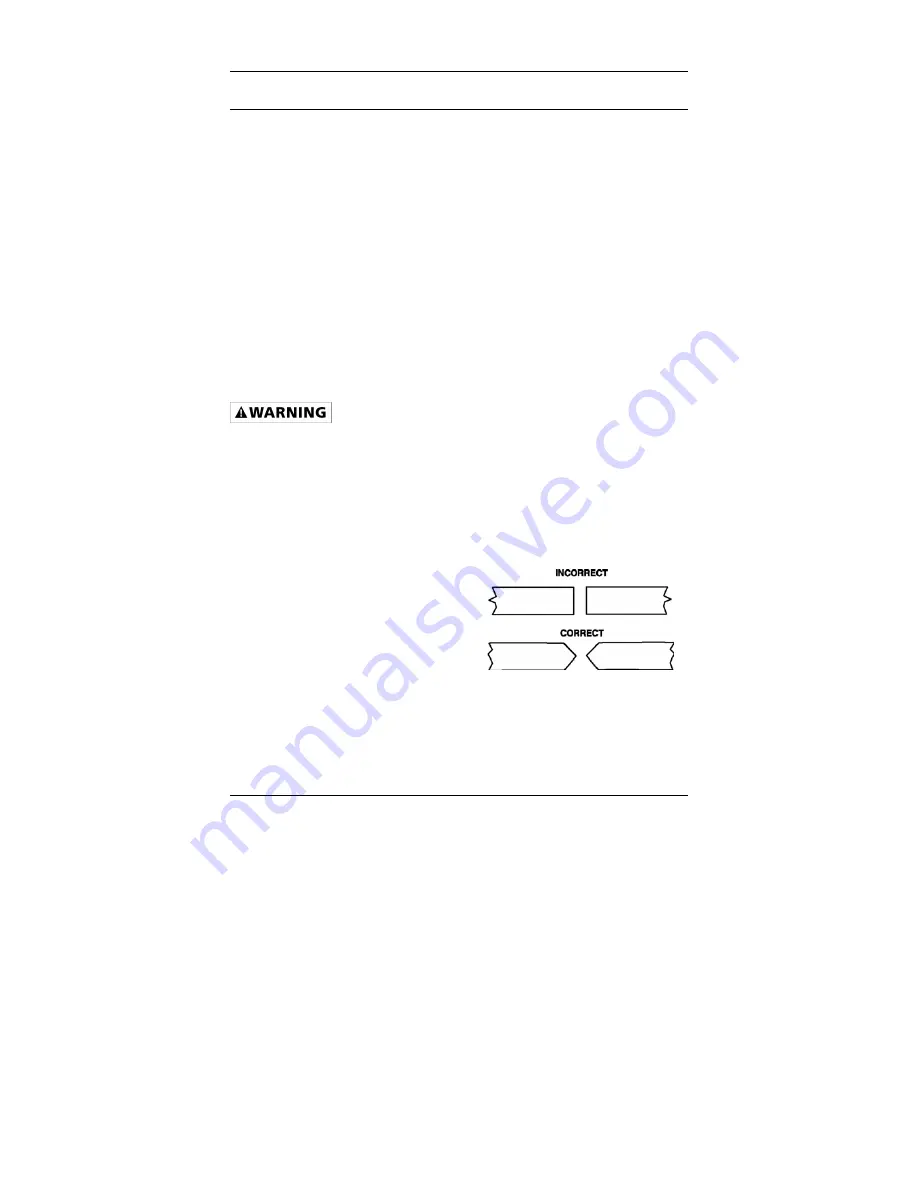
3.2 Preparing the Joint 

Before welding, the surface of work 
piece needs to be free of dirt, rust, 
scale, oil or paint. Or it will create 
brittle and porous weld. If the base 
metal pieces to be joined are thick or 
heavy, it may be necessary to bevel 
the edges with a metal grinder. The 
correct bevel should be around 60 

degrees. See following 

picture:  


Based on different welding position, 
there are different welding joint, see 
following images for more information 

Summary of Contents for ST 80 i

Page 1: ...67 L 23 5 7 1 0 18...

Page 2: ...10 120V 60HZ 20 amp time delayed fuse or circuit breaker is recommended Overload protection An ideal stick unit to weld all sorts of carbon steel stainless steel and DIY jobs Tig torch option availabl...

Page 3: ...he machine is overloaded working and the internal temperature is too high The machine will turn off automatically but the fan will still be working When the internal temperature is decreased the machi...

Page 4: ...ode is clamped in the electrode holder for welding Output Connector This is the connector for grounding cable when STICK welding When this machine is used for TIG welding this connector is for the TIG...

Page 5: ...output cable electrode or any part of the system is wet Do not immerse them in water These components and the welder must be completely dry before attempting to use it Follow the instructions in this...

Page 6: ...tilator respirator with air supply or remove the coating from the material in the weld area The fumes emitted from some metals when heated are extremely toxic Refer to the material safety data sheet f...

Page 7: ...g Debris Welding creates hot sparks that can cause injury Chipping slag off welds creates flying debris Wear protective apparel at all times ANSI approved safety glasses or shield welder s hat and ear...

Page 8: ...when connecting your welder s power cord to a properly grounded 120Vac 60Hz single phase 20 amp power source 2 Extension cord During normal use an extension cord is not necessary It is strongly recom...

Page 9: ...trength Used for out of position and tacking 6 Selecting the proper electrode There is no golden rule that determine the exact rod or heat setting required for every situation The type and thickness o...

Page 10: ...t your practice welds are of good appearance and free of slag or gas inclusions 2 1 Holding the electrode The best way to grip the electrode holder is the way that feels most comfortable to you To Pos...

Page 11: ...tion 2 4 Welding position Flat position is the easiest of the welding positions and is most commonly used It is best if you can weld in the flat position if at all possible as good results are easier...

Page 12: ...hands or exposed portions of the body Wear goggles or eye glasses with side shields and protect the hands and other exposed parts of the body with protective garments or if possible work with a shiel...

Page 13: ...or is on Using over the rated duty cycle Will automatically recover when the temperature lowers 2 The adjustment knob on the front panel didn t work Potentiometer broken current regulation Replace the...

Page 14: ...uirement Socket loosen 5 Electrode Holder and Cable getting hot polar sockets becoming hot High resistance between the electrode holder and the cable Remove the oxide coating and tighten it Resume pow...

Page 15: ...return it to the place of purchase and it will be replaced free of charge Incidental or consequential damages are excluded from this warranty Repair Parts List Reference number Description Part number...

Page 16: ...nsformer fixed board 1 1 02 01 0750 1 18 Fan wiring harness ROHS 1 2 07 02 0614 1 19 Plastic back panel 2 05 05 702 1 20 Powerline with plug RoHS 2 03 05 133 1 21 Wave switch ROHS 2 07 80 213 1 Other...

Page 17: ...0 3000 Fax 617 770 0700 www nfpa org OSHA Standard 29 CFR Part 1910 Subpart Q WELDING CUTTING AND BRAZING obtainable from your state OSHA office or from U S Dept of Labor OSHA Office of Public Affairs...

Reviews: