


14
15
Alterations which serve the technological progress as well as errors excepted!
ORIGINAL MANUAL
NORSUP
WWW.NORSUP.EU
Alterations which serve the technological progress as well as errors excepted!
CONTROLLER & LOW SALT ELECTROLYSE UNIT TYPE NORSUPONE
CONTROLLER & LOW SALT ELECTROLYSE UNIT TYPE NORSUPONE
EN
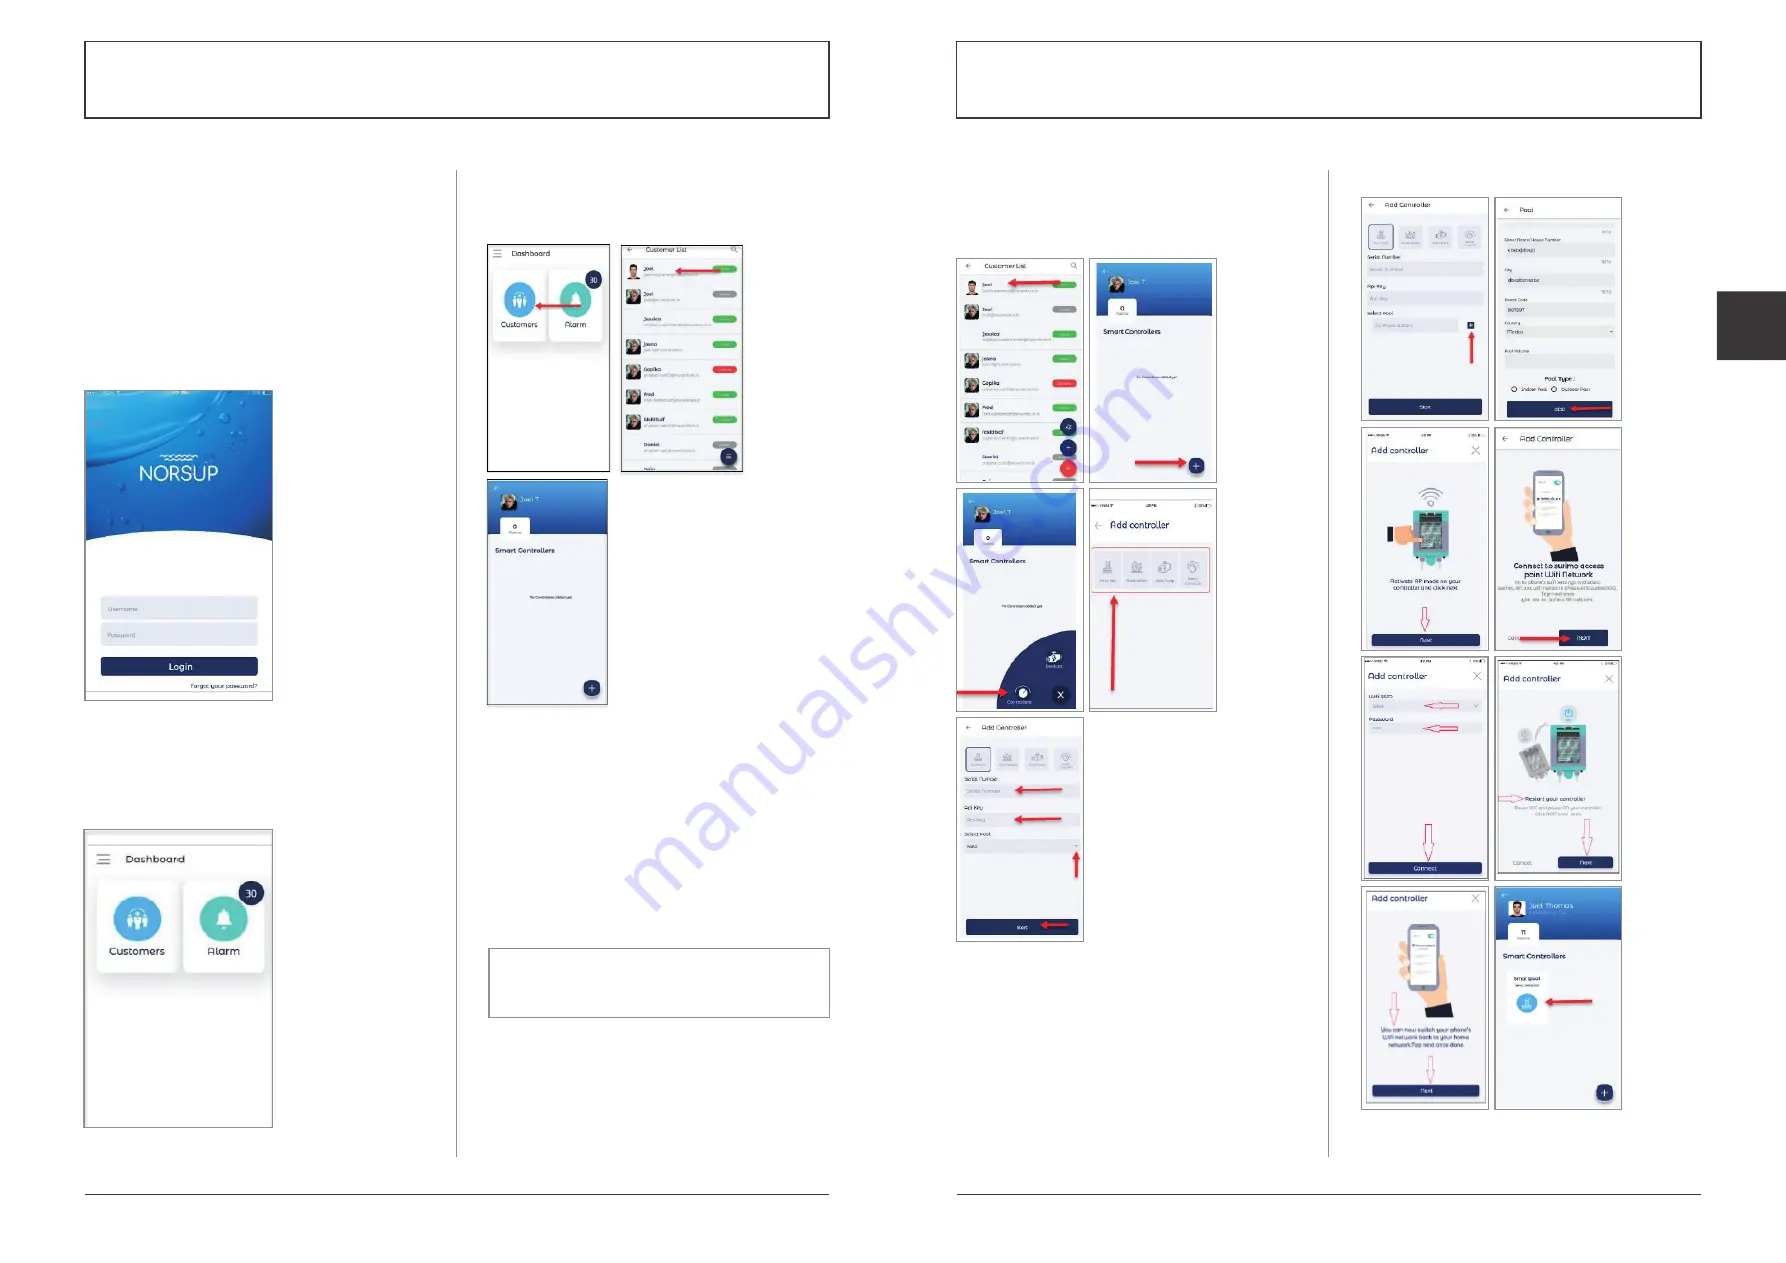
To add pool
Fig. 35: Shows the steps of add a controller under a
customer
C. NORSUPONE IOT APPLICATION
NorsupOne is a common platform to manage IoT,
Warranty information and Chemical subscription.
The customer can control the devices and sensors
under the Smartpool option, they will get the
warranty information under the Product option and
can subscribe the chemicals need for the pools under
the Store option.
C.1 INSTALLER LOGIN
The installer can log into the application using their
Username and Password.
To create installer (Refer B.2)
Fig. 32: Shows the login page
C.2 DASHBOARD
Once the installer has logged in, the dashboard will be
displayed. The dashboard contains the following options.
• Customers
• Alarms
Fig. 33: Shows the Dashboard of installer
C.3 CUSTOMER
Under this option the list of customers will be shown. On
tapping the customer name, the details of the controllers,
products etc added under the customer, will be displayed.
Fig. 34: Shows the customer list and page come
under a customer
C.3.1 TO ADD CONTROLLERS UNDER A CUSTOMER
IN INSTALLER LOGIN
The installer can add controllers and products under a
specific customer. To add controller or products:
• Select the customer under whom you would like to
add new controller
• Tap on the add icon at the bottom
• Choose controller option, available controllers will be shown
• Select one controller from the given controllers
• Enter the Serial number, API key (find it on the control
box) and Pool. The installer should add at least one pool,
If he has not added the pool:
• Tap on the
ADD icon given at the right side of
the select pool option, enter the pool details
• Tap on the
ADD option at the bottom
• Tap on Start option at the bottom
• Activate the AP mode (refer 2.7) of the controller and
then tap on next option
• Connect to swimo access point Wi-Fi network on your
mobile phone, then tap on next option
• Enter the Wi-Fi SSID and Password (swimo000), then
tap on Connect option at the bottom
• Restart the controller (power off and power on) then
tap on next option
• Connect your phone with home Wi-Fi network, then
tap next
• The controller will be added


