


46
47
Alterations which serve the technological progress as well as errors excepted!
ORIGINAL MANUAL
NORSUP
WWW.NORSUP.EU
Alterations which serve the technological progress as well as errors excepted!
CONTROLLER & LOW SALT ELECTROLYSE UNIT TYPE NORSUPONE
CONTROLLER & LOW SALT ELECTROLYSE UNIT TYPE NORSUPONE
EN
E.5.7 DEVICES
• From the home page click on the Devices option to
view the list
Fig. 211: Shows Devices option
Fig. 212: Shows Devices list
E.6 MOBILE APPLICATION LOGIN
The customer has access to the mobile application and
have the options to add the pools and subscription,
shop and order are included in the mobile application.
The login page contains the following details to enter:
• Email id – You will receive an activation email once the
installer adds you as a customer.
• Password: Need to set a password before login in
through App.
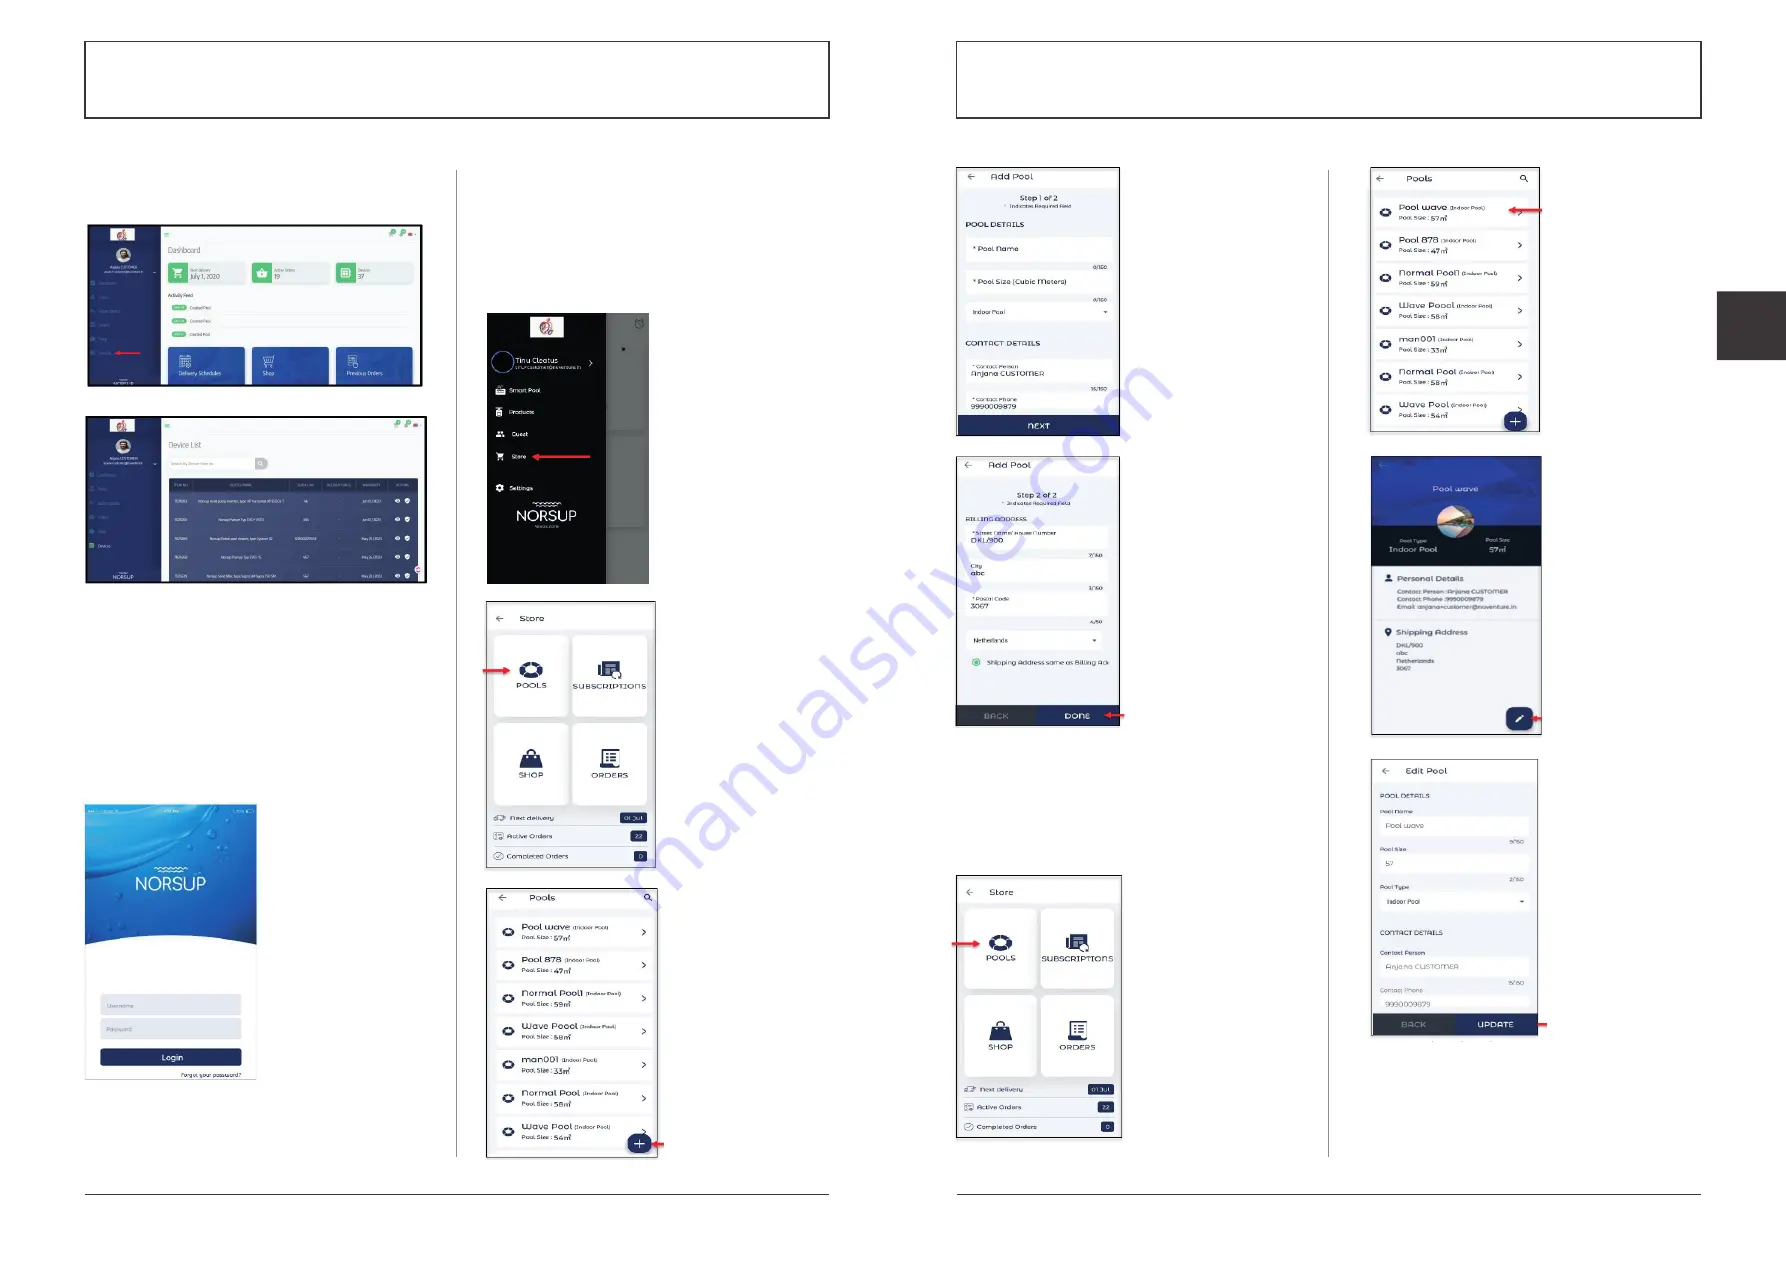
E.6.1 TO ADD POOL
• Log into the application and go to the navigation drawer
• Tap on the Store option, pool, subscription, shop and
orders will be displayed
• Tap on the Pools option on the dashboard
• Tap on the add icon at the right bottom of the screen
• Enter the pool details and tap on Done, the pool will
be added
Fig. 213: Shows the mobile
app login screen
Fig. 214:
Shows the Store option
Fig. 217:
Shows the field to add
the pool details
Fig. 220:
Shows the Pools list
Fig. 221:
Shows the Edit icon
Fig. 222:
Shows the Update option
Fig. 218:
Shows the Done option
Fig. 219:
Shows the Pools option
Fig. 215:
Shows the Pools option
Fig. 216:
Shows the Add icon
E.6.2 TO EDIT POOL
• Tap on the Pools option on the dashboard, the pool list
will be displayed, choose the pool you would like to edit
• Edit icon has been given at the right bottom of the
page, tap on that editing field will be displayed
• After the edit tap on the Update option


