21
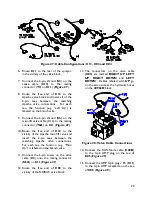
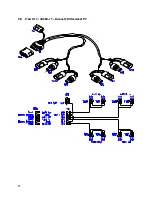
Figure 26: Cable Configurations: C10 and C11
2.
Connect the UC4+ power cable (
C10
)
to the UC4+ control panel in the
sprayer cab. Ensure both plugs (
P16
and
P4)
are connected to the panel
Figure 26
.
Ensure the UC4+ Panel’s power
is OFF for the remaining
installation (Bottom of switch
pressed IN).
3.
Connect the 3-pin AMP plug (
P3
) on
C10
to the 3-pin AMP receptacle (
R3
)
on the power pigtail interface cable
(
C14
). Connect the pigtails on
C14
to
a 12V power connection. Cable C14
may not be needed if there is an
auxiliary power connector to connect
the 3-pin AMP plug (
P3
) of
C10
to.
4.
Route the receptacle end (
R16
) of
C10
out of the cab.
5.
Connect the 16-pin AMP plug (
P16
) of
the valve extension cable (
C11
) to
R16
of
C10
(
Figure 26
).
Summary of Contents for UC4+ Apache 1010 2005+
Page 9: ...6 Figure 3 Hydraulic Plumbing Schematic ...
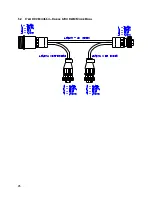
Page 27: ...24 5 ELECTRICAL REFERENCE CABLE DRAWINGS 5 1 ITEM C02 44668 CABLE SENSOR BRANCH ...
Page 28: ...25 5 2 ITEM C02B 44664 CABLE UC4 CAN NODE DUAL ...
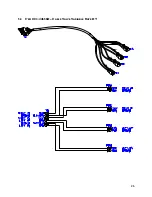
Page 29: ...26 5 3 ITEM C03 44656D CABLE VALVE VARIABLE RATE DT ...
Page 30: ...27 5 4 ITEM C05 44674 CABLE UC4 SENSOR ROLL BIAS ...
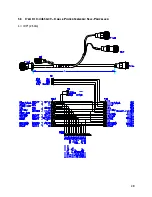
Page 31: ...28 5 5 ITEM C10 44650 39 CABLE POWER GENERIC SELF PROPELLED L 100 2 54m ...
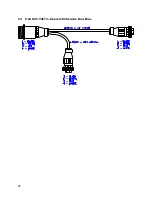
Page 32: ...29 5 6 ITEM C11 44651 03 CABLE VALVE EXTENSION GENERIC 365 9 27m ...
Page 33: ...30 5 7 ITEM C12 44658 18 CABLE UC4 VALVE AP2 MAIN ...
Page 34: ...31 5 8 ITEM C13 44658 17 CABLE UC4 SENSE AP2 ...
Page 35: ...32 5 9 ITEM C14 44658 99 CABLE UC4 INTERFACE POWER PIGTAIL FUSED ...


