24
Step 1 — Turn the Scanner On
Step 1 — Turn the Scanner On
Before turning on the scanner for the fi rst time, make sure that Nikon Scan is installed on the
computer and that the power and USB cables are connected. For information on installing
Nikon Scan and connecting the cables, see “Setup” (
7).
1
Turn the computer on
Turn the computer on and wait for the operating system to start up.
2
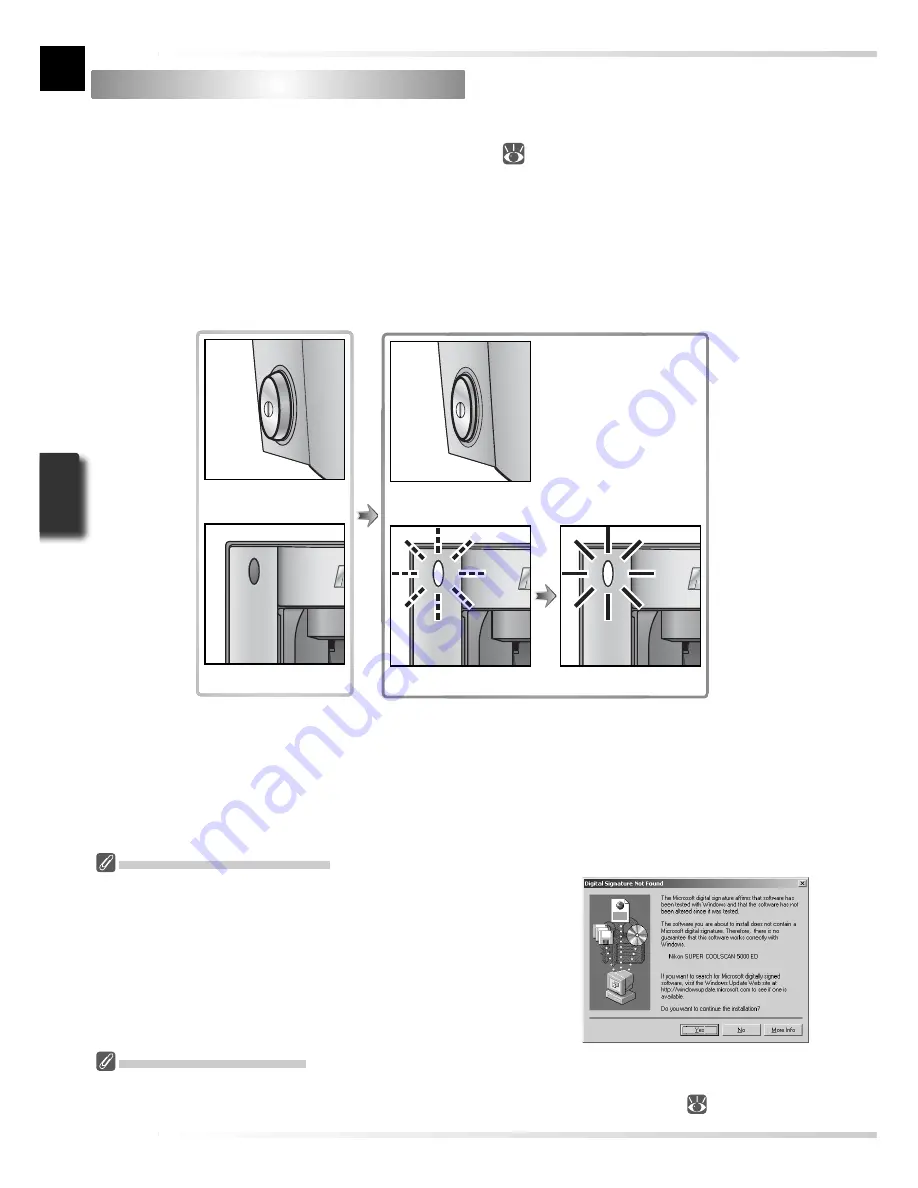
Turn the scanner on
The status LED will blink for about 30 seconds (5000 ED) or 20 seconds (COOLSCAN V
ED) while the scanner initializes. The status LED will stop blinking when initialization is
complete.
Status LED off
Scanner off
Scanner on
Status LED blinks
Status LED on
Windows 2000 Professional
A “Digital Signature Not Found” dialog will be displayed the fi rst
time the scanner is connected and turned on following installation
of Nikon Scan. Click
Yes
to register the scanner with Windows.
If the Status LED Flickers
If the status LED fl ashes quickly (about fi ve times a second), turn the scanner off, wait at least fi ve sec-
onds, and turn the scanner on again. If the problem persists, see “Troubleshooting” (
56).


