DRAFT
3
RHINO
™
6000+
User Guide
Inserting and Removing the Label Cartridge
Your label maker comes with a starter IND label cartridge. Visit
information about purchasing additional label cartridges.
Each time you insert a label cartridge into the printer, you are prompted to set the
label width so the printer knows what size label you are currently using. Some of
the features you use to design labels are dependent on the width of the label.
However, to create a label for a width different than what is currently in the printer,
you can set the label width from the Settings menu. See
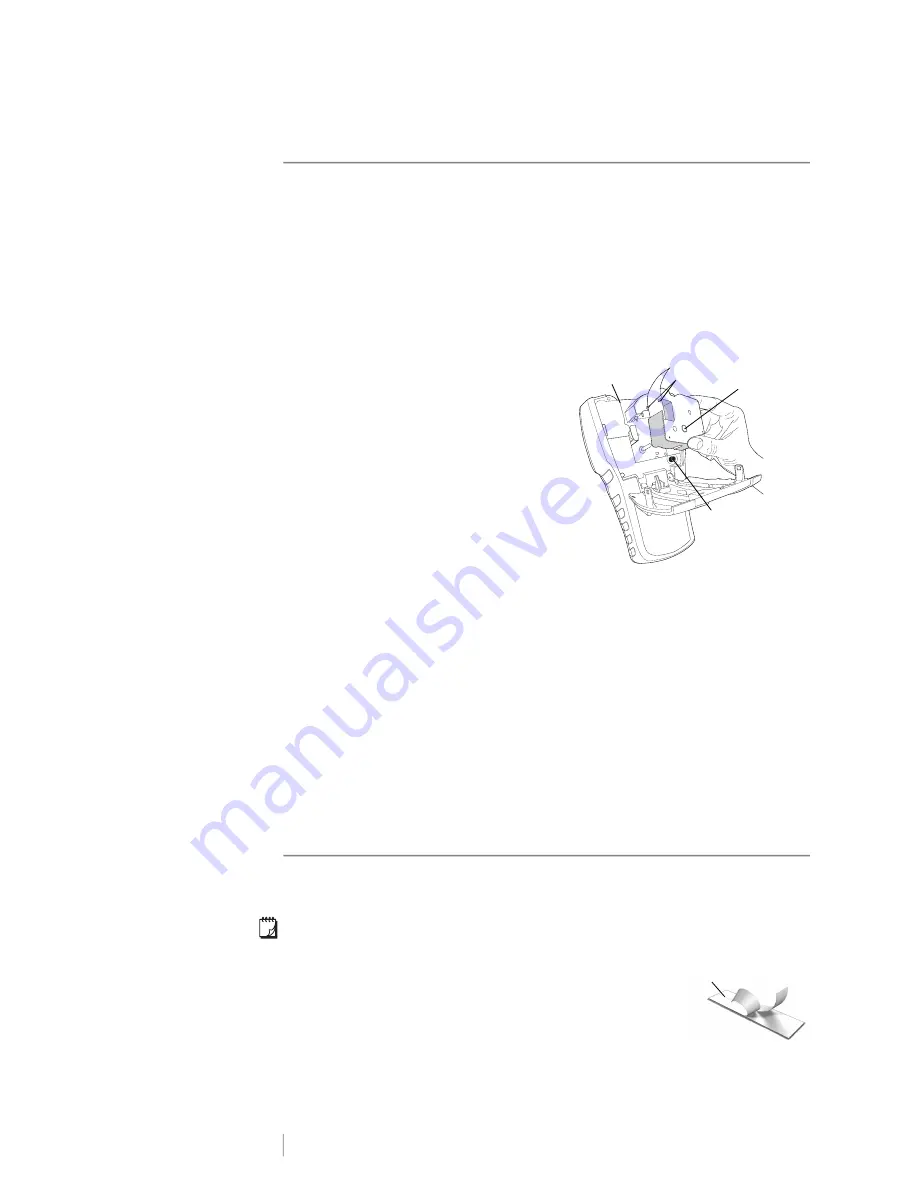
To insert the label cartridge
1
Gently lift the label cartridge door on
the back of the printer.
2
Make sure the tape and ribbon are
taut across the mouth of the
cartridge and that the tape passes
between the guides. If necessary,
turn the ribbon rewind spool
clockwise to tighten the ribbon.
3
Insert the cartridge with the tape and
ribbon positioned between the
guideposts.
4
Press gently on the cartridge until the cartridge moves into place. The
insertion mechanism will guide the cartridge into place.
5
Close the label cartridge door.
6
Set the label width when prompted.
To remove the label cartridge
1
Gently lift the label cartridge door on the back of the printer.
2
Press the cartridge eject button. See Figure 4. The label cartridge is lifted from
the printer.
3
Gently remove the label cartridge.
4
Insert a new label cartridge as described above.
5
Set the label width when prompted.
Removing the Label Backing
DYMO IND continuous labels have an easy-to-peel split back for easy removal of
the label backing.
Does not apply to heat-shrink tubing.
To remove the label backing
1
Locate the split on the label backing.
2
Gently pinch the label lengthwise, folding toward the
printed side of the label. The label backing separates.
3
Carefully peel away the backing from the label.
Eject Button
Lift
Guide posts
Ribbon
rewind
spool
Figure 4
Split backing


