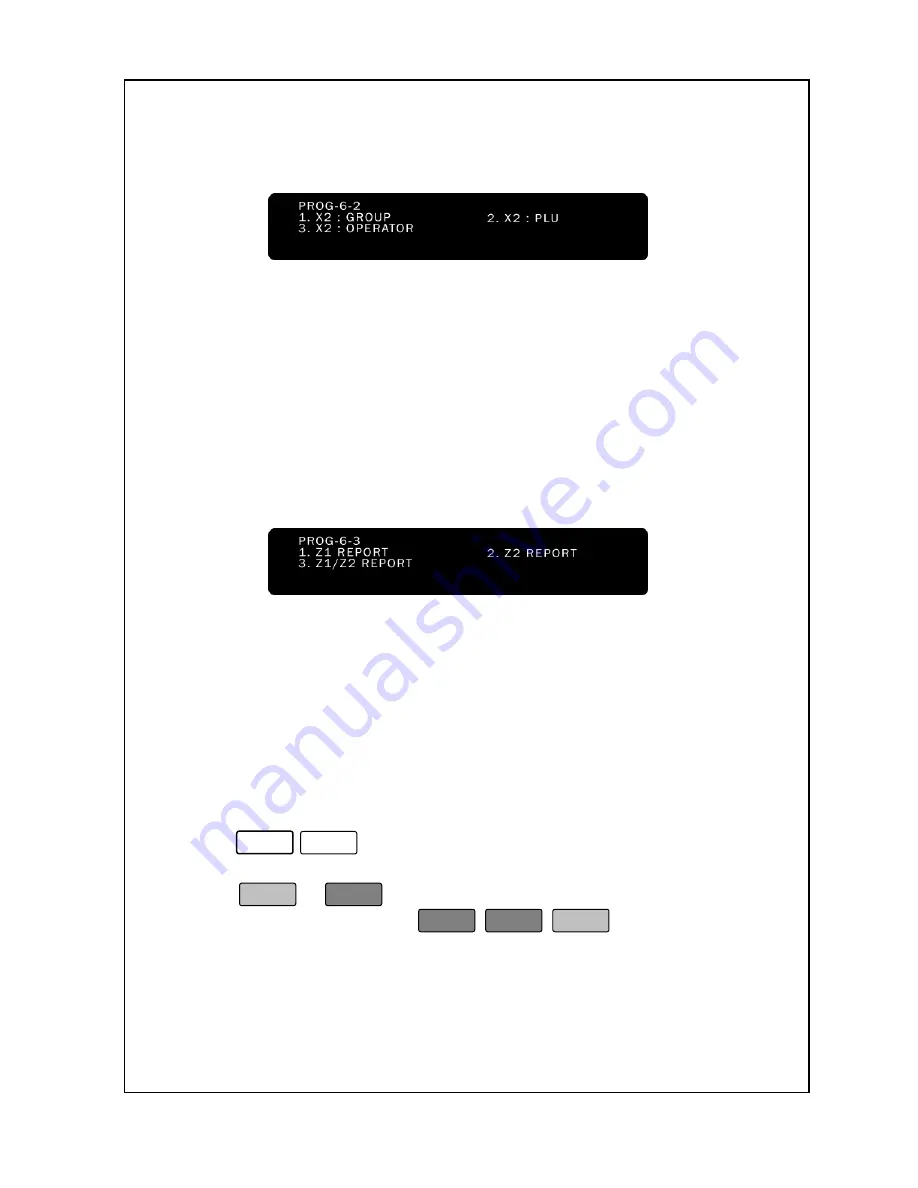
background image


56 


6-2. X2-Report 


In case of X2-Report. 
Has a same procedure to print out with X1-Report. 

 
6-3. Z-Report 


When you perform a Z Report, the scale can print a Z Report and then 
can clear all sales data.  Once you do this report you cannot do any of 
the X reports until you generate some sales. 


< Z# Report > 

 
When  you  perform  a  Z#  Report,  the  scale  will  print  a  report  the  one 
you specify. This report is an Z report because you can choose “print & 
clear”  is  performed  the  sales  data.  Reports  can  print  on  any  style 
labels; however, some labels may require the use of more than 1 label 
per Z reported. 

 
To generate the Z# Sales Report: 

1. Enter ‘Main menu’, and follow 2 steps below. 
2. Press


-


.  

3. Enter the Z Report number you want a report for (1 to 2).  

4.  Press 


PRINT 

 or 


Enter 

.  The  scale  will  print  the  report.  When  the 

scale  is  done  printing  press 


ESC 


ESC 


SET 

 to  return  to  the 

Initial State


or,

 go to step 3 if you want a report for another group. 

 
When  you  press  each  1.  Z1  Report    2.  Z2  Report    3.  Z1/Z2  Report, 
display will be showed  

Summary of Contents for LABEL PRINTING SCALE

Page 1: ...LABEL PRINTING SCALE NETS OPERATING MANUAL FULL GRAPHIC VER 1 00...

Page 2: ...omputing Label Receipt Printing Scale We are committed to create high quality with low maintenance products and are supplying diligent customer service with our valuable customers This manual contains...

Page 3: ...Installation 8 Numeric Keypad 11 Speed Keys 12 Alpha Keypad 12 Proper Operation Do s Don ts 14 Location Environment 15 Maintenance 15 Power Requirements 17 Set Up Quick Start 18 Password 20 Program M...

Page 4: ...0 1 Year 2 Month 3 Day 4 Hour 5 Minute 6 Second 5 Scale Settings 40 Scale function 40 Scale Assignment 42 Network Settings 45 6 Account Report 50 X1 Report 50 X2 Report 56 Z Report 56 7 Label Settings...

Page 5: ...Label 81 Set Key 82 Label Receipt Key 82 REFUND Esc Key 82 ADD Key 83 X Sub Total Key 84 For Key 85 Clear Key 85 Feed Key 86 Print Key 87 Void Function 88 Discount Function Receipt 88 Change Tender P...

Page 6: ...000 Counts minimum A D Conversion Rate 9 Updates second Direct PLU Keys 60 Direct PLUs Speed Keys PLU Memory 1000 PLUs Standard Group Memory 100 groups 20 characters per group Communications RS 232 TC...

Page 7: ...ay output RS 232 Scale to Scale Cable 600 10007 00001M NETS Software Package Contact your local ACOM dealer For any type of service or troubleshooting please contact your nearest ACOM dealer Only lice...

Page 8: ...4 2 STYROFOAM EA 2 4 3 BODY POLY BAG EA 1 4 4 MANUAL POLY BAG EA 1 4 5 AC CORD EA 1 4 6 MANUAL EA 1 4 7 PAN SCREWS EA 4 4 8 CAL SEALING EA 2 4 9 FUSE EA 1 4 10 CAL PLATE EA 1 4 11 BRACKET COVER EA 1...

Page 9: ...e to the bracket 4 Finally attach the bracket plate to the bracket and fasten it with the 4 smaller screws Pan Screw M3x6 Note Make certain that none of the wires are being crimped when you are instal...

Page 10: ...s where all of the Speed Keys are located During programming this keypad is also used to navigate menus enter special functions and typing text data The Numeric Keypad is where all numeric data is ent...

Page 11: ...d cleaning from time to time however you must remove the platter from the scale platform whenever you clean it Left Side View The Display Bracket is where the display pole is attached to during instal...

Page 12: ......

Page 13: ...a high speed thermal printer that prints at 100 mm per second 4 per second It has a heavy duty removable cassette drawer that is used to load the thermal labels into the scale Make sure that the Power...

Page 14: ...d the instructions for removing labels you can install a new label roll by taking the new label roll and remove about 30 cm approx 12 of labels from the backing paper of the new label roll and then do...

Page 15: ...is aligned with the Platen d When done make sure that the lever located on top of the Pick up Clamp f is folded down against the Pick up Clamp f 9 Finally slide the cassette drawer back into the scale...

Page 16: ...nu programming mode You may be required to enter a password to access programming mode Numeric Keys 0 to 9 are used to enter numeric data like tares prices pieces etc Label Receipt Key is used to choo...

Page 17: ...an Enter key during programming Speed Keys The Alpha Keypad functions as Speed keys whenever you are in sales mode The NETS has 60 Speed keys that are programmable to select any 60 PLUs you desire By...

Page 18: ...nt key is used to access the Quick Account Report S1 to S2 Keys are reserved for future use Del Key is used to delete characters like on a PC Ins Key is used to switch between Insert and Overwrite typ...

Page 19: ...or any other liquid on the scale Do not use any solvents to clean the scale Do not remove the safety ground on the power cord Do not store thermal labels where they may be subject to direct sunlight h...

Page 20: ...e following hostile environments Temperatures exceeding 10 C to 40 C 14 F to 104 F Excessive vibration or instability Unstable or flimsy surfaces to use the scale on Dusty dirty or excessively wet env...

Page 21: ...ke sure that the platter is COMPLETELY dry before attaching to the scale platform Also do not use excessive force when reattaching the platter to the scale The printer bay also requires cleaning howev...

Page 22: ...nd test the print quality using the FEED key Make sure that the TPH and the Peel Sensor are COMPLETELY dry of the alcohol before plugging the scale into an AC outlet You may also need to clean the Gap...

Page 23: ...e display Note Make certain that none of the wires are being crimped when you are installing the pole display a Connect the display connectors together b Place the Pole Display properly into the brack...

Page 24: ...ce must be 85V 240V DC 50 60 Hz 2 7 Turn the power switch to the ON position The scale will do the display test and then go to zero 8 Press the FEED key 2 or 3 times collecting the labels as they are...

Page 25: ...this screen will always be skipped For a new scale you would simply press 77559 PRINT or Enter and then the scale will proceed to the next screen The scale manager must use 1111 However this number po...

Page 26: ...nt 12 Input Scale Counter 13 Sale Function Setting 6 Account Report 1 X1 Report 2 X2 Report 3 Z Report 7 Label Settings 1 Select Label or Receipt 2 Set Label Length 3 Set Label Gap 4 Select Peel off S...

Page 27: ...to quickly access specific menu items For example if you are at the Main Menu and want to change the scale number you would simple press 5 and then 3 To enter Main Menu 1 Start From the Initial State...

Page 28: ...eys allows you to lower the keystroke count to 1 no matter how long the PLU number is Careful consideration should be taken when deciding on PLU numbers This can be especially true when you require th...

Page 29: ...t be greater than or equal to zero An example of a price per piece is 1 for 3 49 A common misconception is that you can simply price something let s say fixed price and then sell it like that The real...

Page 30: ...The default value is usually the next available new PLU number 4 Press PRINT or Enter to go step 5 or press ESC SET to exit PLU Create Edit and go back to the Initial State 5 The next screen is PLU T...

Page 31: ...Enter to continue to step 10 10 The next screen is the Group Code This is where you assign the PLU to a group Enter the group number you want it must be from 1 to 99 As you type the number will appea...

Page 32: ...0 00 to 999 99 If you enter 0 00 then you will be able to change price during sales if not you may not be able to change the price see Advanced Programming PLU Price Change section The price will appe...

Page 33: ...store the PLU as is or you can press PRINT or Enter to continue to step 18 18 The next screen is the PLU Shelf Life This is where you assign a Shelf Life in days that is used to compute the expiratio...

Page 34: ...he PLU as is or you can press PRINT or Enter to continue to step 24 24 The next screen is the Label Number This is based on setting label format If label number is selected of PLU the selected label n...

Page 35: ...s will appear in the Alpha Display The screens appear as follows 29 You can press SAVE to store the PLU as is or you can press PRINT or Enter to continue to step 30 30 The next screen is the PLU Nutri...

Page 36: ...press SAVE to store the PLU as is and you can press PRINT or Enter 34 The scale will store the PLU and then return to step 3 Note1 You can also use the and keys to navigate through PLU programming Pre...

Page 37: ...gn Operator Keys 5 1 Follow Steps 1 to 4 of assigning Speed keys 5 2 Press 5 3 Enter the Operator Number you want It must be from 1 to 25 Go back to step 3 to view or assign another key or Type a PLU...

Page 38: ...racters per line however these can change depending on your label format As you type you will see the text in the Alpha Display 4 You can type the data you want from 1 3 line press PRINT or Enter 5 Pr...

Page 39: ...next group number which is displayed in the Total Price display 8 If you wish to program the next group name then you can go back to step 5 otherwise press ESC 9 You can go back to step 3 to specify a...

Page 40: ...ck to step 5 otherwise press ESC 9 You can go back to step 3 to specify another operator number you may wish to edit or you can press ESC ESC SET to finish 10 You are back in the Initial State 3 4 Sal...

Page 41: ...number which is displayed in the Total Price display 8 If you wish to program the next sale message name then you can go back to step 5 otherwise press ESC 9 You can go back to step 3 to specify anoth...

Page 42: ...ress PRINT or Enter 5 Type a scroll message name that you wish to use for this scroll message As you type the name you will see it displayed in the Alpha Display 6 Press PRINT or Enter 7 The scroll me...

Page 43: ...ay 6 Press PRINT or Enter 7 The tax name was stored and the scale automatically moves on to the next sale message number which is displayed in the Total Price display 8 If you wish to program the next...

Page 44: ...39 PLU data Account Store name Group Operator Sale MSG Tax...

Page 45: ...ay 4 Hour 5 Minute 6 Second You will see the date you typed in the Total Price Display 4 Press PRINT or Enter 5 Press PRINT ESC SET 6 You are back in the Initial State 5 Scale Setting 5 1 Scale Functi...

Page 46: ...To modify Price Rounding Settings 1 Enter Main menu and follow 3 steps below 2 Press 5 1 2 3 Press 1 for Normal or 2 for Dime or 3 for Half or 4 for Quarter The default setting is 1 4 Press PRINT ESC...

Page 47: ...steps below 2 Press 5 1 4 3 If you do not want to use this function press 0 No If you want to use this function press 1 Yes 4 Press PRINT ESC SET to save the setting and return to the Initial State 5...

Page 48: ...Enter Main menu and follow 3 steps below 2 Press 5 2 2 3 Enter the ID number you wish to assign the scale to This number must be from 0 to 99 4 Press PRINT ESC SET 5 You are back in the Initial State...

Page 49: ...message number in P3 4 Edit Sale Message 0 is default Thank you very much To Scroll Assignment 1 Enter Main menu and follow 3 steps below 2 Press 5 2 4 3 You can use to move 4 Enter the Sales Massage...

Page 50: ...y the Date Format 1 Enter Main menu and follow 3 steps below 2 Press 5 2 6 3 Press 1 for Y M D 2 for M D Y or 3 for D M Y The default setting is 2 4 Press PRINT ESC SET to save the setting and return...

Page 51: ...s 5 3 2 3 Press 0 for off or 1 for M S Master Slave or 2 for Server PC The default setting is 2 4 Press PRINT ESC SET to save the setting and return to the Initial State If you have multiple NETS scal...

Page 52: ...1 Enter Main menu and follow 3 steps below 2 Press 5 3 4 or 5 3 5 or 5 3 6 3 You can use to move 4 Enter the Input scale counter number you wish to assign the scale to For example you have 5 scales If...

Page 53: ...d use its number as 5000 5 Press PRINT ESC SET 6 You are back in the Initial State To set Scale Network Server IP 1 Enter Main menu and follow 3 steps below 2 Press 5 3 8 3 You can use to move 4 This...

Page 54: ...his is for network transaction You can input and use its number as 5005 5 Press PRINT ESC SET 6 You are back in the Initial State To set Scale Network Server Transact To Server 1 Enter Main menu and f...

Page 55: ...X2 report is a week It can keep sales records based on group sales PLU sales operator and scale sales 6 1 X1 Report 1 X1 Group When you perform a Group Sales Report the scale will print a report the...

Page 56: ...Group by count The 7th line contains the dollar amount sold for this group The 8th line contains the date of the last time the Z report was taken The Z report clears the sales records Group Reports e...

Page 57: ...r 4 The scale will print the report When the scale is done printing press ESC ESC SET to return to the Initial State or go to step 3 if you want a report for another PLU Below is an example of a PLU S...

Page 58: ...dollar amount sold for this PLU 3 X1 Operator When you perform an Operator Report the scale will print a report the ones you specify This report is an X report because it does not clear the sales data...

Page 59: ...line contains the number of void by this operator The 13th line contains the dollar amount of void for this operator The 14th contains the number of the reference The 15th line contains the dollar amo...

Page 60: ...eport and today s date The 4th line contains the number of transactions for this scale The 5th line contains the total weight sold for this scale By weight The 6th line contains the total pieces sold...

Page 61: ...t because you can choose print clear is performed the sales data Reports can print on any style labels however some labels may require the use of more than 1 label per Z reported To generate the Z Sal...

Page 62: ...eipt mode the gap sensor and the peel off sensor will not perform And the receipt is printed by operator in sub total view Enter Main menu and follow 2 steps below 1 Press 7 1 2 Press 1 for Label or 2...

Page 63: ...T 5 You are back in the Initial State To set Label Gap 1 Enter Main menu and follow 3 steps below 2 Press 7 2 2 3 Enter the Label Length number you wish to assign the scale to This number must be from...

Page 64: ...ndent of the LFS number and can range from 0 to 40 20 being the default value The higher the number the lower things will print on the label the lower the number the higher things will print To set th...

Page 65: ...inted too high too low or incorrectly This problem occurs most often when you do not use ACOM Certified Labels Here is a sample blank of the label that new NETS come with and some sample prints of lab...

Page 66: ...l Format Setting tells the scale what label you are using and how you want it to print on that label The LFS is a number from 1 to 999 however the scale will only accept those values listed in the Lab...

Page 67: ...Press PRINT ESC SET 5 You are back in the Initial State The NETS can use the Gap Sensor or the Peel Sensor to Sense gaps between labels If you constantly get the error message Gap Sensor Error you may...

Page 68: ...r Main menu and follow 3 steps below 2 Press 7 3 1 3 Enter level of the receipt head format and press Print key levels 30 120 are available 4 Press PRINT ESC SET 5 You are back in the Initial State To...

Page 69: ...menu and follow 2 steps below 2 Press 7 4 3 Enter level of the barcode number and press Print key levels 0 9 are available 4 Press PRINT ESC SET 5 You are back in the Initial State To set Barcode typ...

Page 70: ...re are a few simple rules to follow to minimize barcode errors First read the PLU Creation Guidelines in PLU Programming PLU Create Edit section Keeping PLU numbers equal to UPC Codes equal to ECR POS...

Page 71: ...your software supplier publisher for support regarding further scanning errors In closing we would like to mention that most if not all scanning troubles are due to improper scale programming and impr...

Page 72: ...ose mentioned below your barcodes may not function properly See next page for format characters Script Characters Definition 0 to 9 Will print the actual numbers 0 to 9 I UPC Code acquired from the PL...

Page 73: ...a Weight Label Number This number must be from 1 to 240 4 Press PRINT ESC SET 5 You are back in the Initial State 7 6 Total Label Register the number of the printing label that uses in the grand total...

Page 74: ...in fields from printing on your labels You may want to not print barcodes store names group codes etc Print Field Suppression allows you to do this To suppress the printing of certain fields 1 Follow...

Page 75: ...d then the Store Name will not print if 1 then only Line 1 of the Store Name will print if 2 then lines 1 and 2 will print if 3 then lines 1 2 and 3 will print Currently there are no 3 line Store Name...

Page 76: ...int 24 The last field is Print SUB and GST If 1 is selected then they will print if 0 then they will not print 25 Press PRINT ESC SET You are at the Initial State Note Although you may select things t...

Page 77: ...the PLU list you want to make sure that your scale is loaded with enough labels to complete the job The scale will print a verification label for every PLU in the range that you specify so it is reco...

Page 78: ...not peel off When you are ready to start printing press PRINT or Enter 5 The scale will sequentially go through every PLU in the range that you specified and print out a verification label for those...

Page 79: ...ng paper feed out with the labels as they are printed so that they do not peel off When you are ready to start printing press PRINT or Enter 5 The scale will sequentially go through every PLU in the r...

Page 80: ...o exit and return to the Initial State 8 5 Password Change You can change the password to any 4 digit number you want The initial password is 1111 Changing this feature is only permitted by licensed i...

Page 81: ...ture This can be very useful when you have a large number of PLUs or if you are constantly adding PLUs without deleting unused PLUs To check PLU Memory Status 1 Enter Main menu and follow 2 steps belo...

Page 82: ...ter is empty and you can type numeric key and FOR key Press PRINT or Enter Remove the item from the scale and apply the label In By Weight Receipt Single User Start at the Initial State Select a PLU C...

Page 83: ...basic blueprint All of these features will be covered in the sections to follow You may have realized that this basic blueprint can work for By Count PLUs although By Count PLUs need not be weighed y...

Page 84: ...roblem Sometimes small crumbs or debris may accumulate on the platter The scale s AZTM Automatic Zero Tracking Mechanism will automatically press the ZERO key for you so that you can continue to use t...

Page 85: ...u can use the SAVE key to prevent the Auto Clear Function ACF from working The ACF automatically clears a PLU tare or unit price whenever the scale returns to gross zero Auto Clear Function By Weight...

Page 86: ...Unit Price 6 Press PRINT or Enter 7 Optional Remove the item from the platter 8 The PLU and or the unit price and tare if any are not cleared Steps 2 thru 5 can be done in any order To turn the Save...

Page 87: ...the Password request screen to the Initial State or to back up from any submenus within the Main Menu until you get to the Main Menu Once you are at the Main Menu you can use the SET key to go to the...

Page 88: ...e assigned key 6 The Alpha Display is show the dollar amount of refund The ADD Key You can use the key to add the sold item Using ADD key In receipt mode by only single user 1 Start at the Initial Sta...

Page 89: ...ccumulated total price is printed on label Remove the item from the scale and apply the label The X Sub Total Key The key acts like a label copier In other words it allows you to repeat the same sales...

Page 90: ...n called up in Sales mode The Clear key with PLUs 1 Start from the Initial State 2 Call up a PLU 3 If you press the C key 4 The PLU is cleared You are at the Initial State In other words pressing the...

Page 91: ...y you should always use the FEED key to align the labels after you securely replace the cassette drawer mechanism You should always press the FEED key 2 or 3 times to align the labels The labels issue...

Page 92: ...ean the TPH see Maintenance section and any of these problems persist then it is possible that the platen may be damaged or that the TPH has been scratched or damaged Call your ACOM Dealer for service...

Page 93: ...the number of the void will appear in the Unit Price Display The Total Price will appear in the Total Price Display 4 Select the sold item you want to void by Pressing key Press SAVE 5 When you finish...

Page 94: ...cale To use multi user 1 Start from the Initial State 2 Press for choosing the receipt mode PRINT or Enter 3 Press SET 4 Press Password 5 Press 5 7 6 Choose the Multi user Press 2 PRINT 7 Press 2 for...

Page 95: ......

Page 96: ...ransfer data from PC to Scale 1 Place the PC and the scale together 2 Make sure that the Power Switch is off on both the PC and the NETS 3 Connect the PC to Scale cable the female side goes to the PC...

Page 97: ......

Page 98: ...ACOM Inc Head Office Factory 679 1 Yugyo Ri Gunnae Myun Pocheon Si Kyunggi Do 487 872 Korea Tel 82 31 531 2205 Fax 82 31 531 9199 Homepage www acominc co kr E mail acominc hitel net Printed in Korea...

Reviews: