background image

Store Files

64

ReadyNAS Duo, NV+, and 1100 

Access a Share

Depending on how you set up your share, you can access it from many different kinds of 
devices. Not only can you access it from a Mac, Windows, UNIX, or Linux device, you can 
also access it from any device with a web browser, including smart phones and tablet 
computers. You can even access a share when you are not using the same local network as 
the ReadyNAS system. 

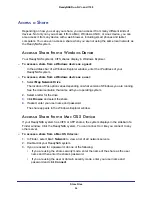
Access a Share from a Windows Device

Your ReadyNAS system’s CIFS shares display in Windows Explorer. 

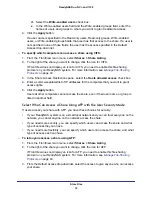
To access a share from a Windows device as a guest:

In the address bar of a Windows Explorer window, enter the IP address of your 
ReadyNAS system.

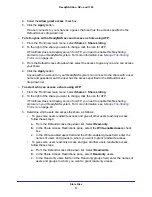
To access a share from a Windows device as a user:

1. 

Select 

Map Network Drive

.

The location of this option varies depending on what version of Windows you are running. 
See the documentation that came with your operating system.

2. 

Select a letter for the drive.

3. 

Click 

Browse

 and select the share.

4. 

If asked, enter your user name and password.

The share appears in the Windows Explorer window.

Access a Share from a Mac OS X Device

If your ReadyNAS system has CIFS or AFP shares, the system displays in the sidebar of a 
Finder window. Click the ReadyNAS system. You can connect to it like you connect to any 
other server.

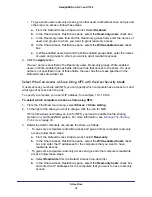
To access a share from a Mac OS X device:

1. 

In Finder, select 

Go > Network

 to view a list of all network servers. 

2. 

Double-click your ReadyNAS system. 

3. 

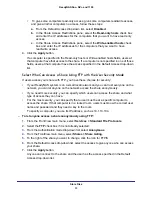
If you are asked for a password, do one of the following:

•     

If you are using the share security mode, enter the name of the share as the user 

name and then enter the share’s password.

•     

If you are using the user or domain security mode, enter your user name and 

password and click 

Connect

.

Summary of Contents for ReadyNAS 1100 RNR4000

Page 1: ...350 East Plumeria Drive San Jose CA 95134 USA December 2011 202 10926 02 ReadyNAS RAIDiator 4 1 Software Manual Models Duo NV 1100...

Page 2: ...ist of phone numbers at http support netgear com app answers detail a_id 984 Trademarks NETGEAR the NETGEAR logo and Connect with Innovation are trademarks and or registered trademarks of NETGEAR Inc...

Page 3: ...acing All Disks 18 Manage Your Storage Space with Flex RAID 19 Change to Flex RAID 19 Create a Volume 20 Add a Disk to a Volume 21 Replace a Disk in a Volume 22 Use USB Storage Devices 23 Manage a USB...

Page 4: ...olders 61 Broaden Rename and Delete Privileges 62 Reset Ownership and Permissions On Any Share 62 Access a Share 64 Access a Share from a Windows Device 64 Access a Share from a Mac OS X Device 64 Acc...

Page 5: ...Account Used to Send Email Alerts 95 Change Who Receives Alerts 95 Determine When to Send Alerts 96 Turn the ReadyNAS System On and Off 96 Turn the ReadyNAS System Off Now 96 Restart the ReadyNAS Sys...

Page 6: ...describes how to use RAIDiator 4 1 firmware for the ReadyNAS Duo ReadyNAS NV and 1100 storage systems This chapter includes the following topics System Requirements Additional Documentation Get Starte...

Page 7: ...e Get Started This section describes the steps to get your ReadyNAS storage system up and running To get started with your ReadyNAS system 1 Before you start your ReadyNAS system set it up according t...

Page 8: ...n page 101 Global Settings Change the name for the ReadyNAS system and its DNS settings You might want to change the name to something more descriptive The DNS settings are standard and do not need to...

Page 9: ...formation about ReadyNAS Photos see Share Photos With ReadyNAS Photos on page 75 For more information about ReadyNAS Remote see Access a Share Using ReadyNAS Remote on page 66 Share List and Add Share...

Page 10: ...he bottom perform actions on the systems as shown in the following figure 1 2 3 4 5 6 Figure 1 RAIDar icons 1 Overall status 2 Volume status 3 Disk status 4 UPS status 5 Fan status 6 Temperature Hover...

Page 11: ...tact NETGEAR technical support for help If the volume went into life support mode because you accidentally removed more functional disks NETGEAR technical support might be able to help you recover the...

Page 12: ...tem About Displays information about RAIDar Help Displays help about RAIDar Exit Closes RAIDar About FrontView FrontView is the web based management interface for your ReadyNAS system FrontView makes...

Page 13: ...ent time and the status of the ReadyNAS system s components It uses the same status lights as RAIDar as described in About RAIDar on page 10 Hover your pointer over a status light to display more info...

Page 14: ...r Name admin Password netgear1 You should have changed your password when you used the Setup Wizard This is an important step in safeguarding your data If you changed your password enter the password...

Page 15: ...of storage space and how to choose between X RAID and Flex RAID You can also attach a USB storage device to your ReadyNAS system to increase storage space This chapter includes the following topics B...

Page 16: ...ce Another RAID level might increase storage space but reduce system performance Your ReadyNAS storage system supports X RAID a proprietary single volume RAID architecture that is easy to administer a...

Page 17: ...set is best for you depending on the number of disks in your ReadyNAS system protecting your data against disk failure whenever possible With one disk installed X RAID uses all its capacity for stora...

Page 18: ...t you can continue to use your system as normal Increase Storage Space By Replacing All Disks If all the disk bays in your ReadyNAS system are filled you can expand your storage space by replacing all...

Page 19: ...ty information about each disk If one disk fails RAID 5 technology uses the parity information about the remaining disks to reconstruct the data that was on the failed disk and the volume continues to...

Page 20: ...he Next button You are prompted to confirm the volume creation command 9 Confirm the command The volume is formatted This can take quite a while depending on the size of your hard disk drives 10 Optio...

Page 21: ...to a volume you must delete the volume and then recreate it with the additional disk To add a disk to a volume 1 Back up the data in the volume For more information see Back Up Files on page 78 2 Fro...

Page 22: ...w compatible disk For a list of compatible disks see http www readynas com hard_disk_hcl For best performance use disks that are the same make model and size If you use disks of different sizes your s...

Page 23: ...ge alerting you that a new disk was inserted 7 Create a new volume including the new disk For more information see Create a Volume on page 20 8 Restore your backed up data to the new volume Use USB St...

Page 24: ...isconnect Prepares the device for disconnection This writes out any data in the write cache to the device to ensure that you do not lose the data 4 Click Go Automatically Copy a USB Device s Contents...

Page 25: ...ce 25 ReadyNAS Duo NV and 1100 5 In the Copy as owner field enter the name of the user you want to own the copied files on the ReadyNAS system The default owner is admin 6 Click the Apply button Your...

Page 26: ...eed to select a security mode to protect those files Then depending on the mode you select you need to create user accounts to specify who can access the files This chapter includes the following topi...

Page 27: ...an create any number of users and select how much access to give each one You can let the user just read files or you can let the user read create and modify files Each user must enter a password befo...

Page 28: ...dyNAS NV and 1100 To set up a domain server 1 From the Domain Type drop down list select ADS Active Directory server or Domain 2 Enter the name of the domain 3 If you select ADS enter the address of t...

Page 29: ...able private home shares if you want to use only public shares Manage Users With FrontView you can add new users modify existing users and choose how to handle the users private home shares Add Users...

Page 30: ...ess or quota 1 From the FrontView main menu select Security User Group Accounts 2 From the drop down list at the top of the screen select Manage users 3 Click the All tab 4 Do any of the following To...

Page 31: ...hares 2 If asked log in with your user name and password 3 Click Password 4 Enter the current password and then enter the new password twice 5 Click the Apply button Your settings are saved Customize...

Page 32: ...t select a volume When you create new users their home shares are created on that volume The home shares for existing users remain where they are 4 Click the Apply button Your settings are saved Manag...

Page 33: ...a number of days in the Remove Recycle Bin files older than this many days field enter a number of days 5 Optional To automatically delete files when the contents of the Recycle Bin reach a certain si...

Page 34: ...d c Optional To set a limit on the amount of total amount of data that the primary users in this group can copy to all the ReadyNAS system s shares enter a quota When the quota is approached the group...

Page 35: ...roup can copy to all the ReadyNAS system s shares edit the Quota field 6 Click the Apply button Your settings are saved Import and Export Users You can export and import information about the users an...

Page 36: ...contains the same fields used in the Add Users or Add Groups screen The fields are separated by commas and spaces around the commas are ignored If a field is blank the default is used instead User Tex...

Page 37: ...e and click the Open button The dialog box closes 6 Click the Import Users button The specified users are added to your user list To import groups 1 Create a text file containing a comma separated lis...

Page 38: ...ssword recovery answer field enter a new answer 5 If you want to change the email address where the password is sent after you answer the security question in the Password recovery email address field...

Page 39: ...AS system how users can access them who can access them and other options This chapter also describes how users can access your shares This chapter includes the following topics Basic Share Concepts M...

Page 40: ...ant to group your data by type for example Photos Music Videos Documents Another option is to group your data by user Tom Rick Mary Organizations might choose to group data by department Accounting Sa...

Page 41: ...rs Your ReadyNAS system supports NFS v3 over UDP and TCP If Linux or Unix users will access your storage system enable this protocol AFP Apple File Protocol Used by Mac OS 9 and Mac OS X computers You...

Page 42: ...col Read only with exceptions Unless otherwise specified users can only read files on this share using this protocol At least one of the following exceptions exists Access to this share using this pro...

Page 43: ...By default the CIFS and HTTPS file sharing protocols are enabled on your ReadyNAS storage system If users access a share with another protocol enable it in the Standard File Protocols screen which is...

Page 44: ...FS file sharing protocol 1 From the FrontView main menu select Services Standard File Protocols 2 Select or clear the NFS check box 3 Optional If access to NFS shares is slow adjust the NFS thread cou...

Page 45: ...from where it left off 4 Click the Apply button Your changes are saved To enable or disable the HTTP file sharing protocol 1 From the FrontView main menu select Services Standard File Protocols 2 Sel...

Page 46: ...create files on the share Create a Share with the Share Security Mode With the share security mode you can create a share with a name a password and a limit on the amount of data it can contain The sh...

Page 47: ...screen After you create a share it is available to some users by default If you use the user or domain security mode it is available to all Windows and Mac users who have an account on your ReadyNAS s...

Page 48: ...etwork you can let anyone on the network access the share If you need more security you can specify that only users with accounts on your ReadyNAS server can access the share and give them all the sam...

Page 49: ...le Sharing Protocols on page 43 3 Determine which users can access the share as follows To give some users read write access and give all other users read only access follow these steps a From the Def...

Page 50: ...er a comma separated list of IP addresses for the computers that you want to grant access rights 5 Click the Apply button Users at other computers cannot access the share even if their user name or gr...

Page 51: ...are using AFP 1 From the FrontView main menu select Shares Share Listing 2 To the right of the share you want to change click the icon for AFP If FrontView does not display an icon for AFP you need to...

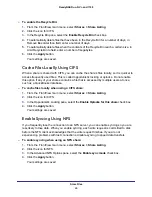
Page 52: ...ss your share with NFS you can specify which computers have access to it and what type of access each one has To specify a computer you use its IP address for example 10 1 10 104 To select which compu...

Page 53: ...oices for security If your ReadyNAS system is on a small local network and you can trust everyone on the network you can let anyone on the network access the share anonymously If you need more securit...

Page 54: ...elect Read write b In the Share Access Restrictions pane select the Read only hosts check box c In the Read only users field and the Read only groups field enter the user names and group names to whom...

Page 55: ...heck box b In the Write enabled hosts field enter a comma separated list of the network addresses for the computers Users at other computers cannot access the share even if their user names or groups...

Page 56: ...To specify that users must be at specified computers to access the share in the Hosts allowed access field enter a comma separated list of the IP addresses for the computers Users at other computers c...

Page 57: ...6 Click the Apply button Your settings are saved Manage Share Access with the Share Security Mode To choose who can access a share with the share security mode you need to specify what type of access...

Page 58: ...select the type of access you want to give all users as follows To give all users read only access select Read only To give all users read write access select Read write To prevent all users from acc...

Page 59: ...to hide a share completely you can prevent it from appearing in listings and users must enter its full path name to access it After you select this option file sharing protocols that do not support h...

Page 60: ...of your shares contains a file that is accessed by multiple users at once such as a QuickBooks database To cache files locally when using a CIFS share 1 From the FrontView main menu select Shares Sha...

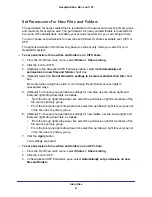
Page 61: ...ox Be careful when using this option It can change file and folder access rights in unexpected ways 5 Optional To choose group permission settings for new files use the Group rights and Everyone right...

Page 62: ...share to delete or rename files in it To broaden rename and delete privileges 1 From the FrontView main menu select Shares Share Listing 2 To the right of the share for which you want to change privil...

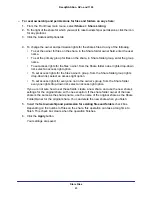
Page 63: ...ght option To set access rights for the files owner s group from the Share folder group rights drop down list select an access right option To set access rights for everyone not in the owner s group f...

Page 64: ...of this option varies depending on what version of Windows you are running See the documentation that came with your operating system 2 Select a letter for the drive 3 Click Browse and select the sha...

Page 65: ...TTP or HTTPS you can access it from any device with a web browser including smart phones and tablet computers You can view and download the files on a share And if you have read write access you can a...

Page 66: ...ReadyNAS system Before you can remotely access a share from Mac OS X or Windows devices you must ensure that you can access the share using CIFS of AFP file sharing protocols Select Who Can Access a...

Page 67: ...reated and click the Find button 6 In the Found list select the user name for the account your created and click the Add button The user name is added to the Allowed list 7 Click the Apply Settings bu...

Page 68: ...t to ReadyNAS Windows Explorer displays a list of the remote ReadyNAS systems you can access 4 Double click the ReadyNAS system you want to access Windows Explorer displays a list of the shares on tha...

Page 69: ...hem to computers televisions and other devices You can also store images and photos that you can share with others This chapter includes the following topics Stream Multimedia Files for iTunes with Fi...

Page 70: ...ontView main menu select Services Streaming Services 2 Select iTunes Streaming Server 3 Click the Apply button 4 Open the share named media on your computer and copy your music files to the Music fold...

Page 71: ...new playlist 4 Enter a name in the Name field 5 Click Wizard and select your criteria 6 Click Create To edit a smart playlist 1 From the FrontView main menu select Services Streaming Services and the...

Page 72: ...are listed in iTunes edit the list of file extensions in Extensions 4 Click Save 5 From the Firefly main menu click Server status 6 Click Start Full Scan Change the Server Name and Password You can ch...

Page 73: ...in menu select Services Streaming Services and click the Connect to the Firefly setup link 2 Click Configuration 3 Do any of the following To choose how accurately to calculate data about media files...

Page 74: ...n Your media files are scanned automatically To select which media files to stream 1 From the FrontView main menu select Services Streaming Services 2 Do any of the following To change the location fo...

Page 75: ...ou do not have an account click Sign Up and fill out the form including a user name and password 3 Enter your user name and password and click the right arrow 4 If you see a list of ReadyNAS systems c...

Page 76: ...photos on a computer and share them with anyone with an email address To view photos 1 In ReadyNAS Photos click the photo album If you do not see any photo albums click Photos Home and click the phot...

Page 77: ...Mac OS X In other operating systems it is used by some applications such as iTunes UPnP Universal Plug and Play is used by many devices to find multimedia files To enable or disable discovery service...

Page 78: ...with Time Machine you can back up your ReadyNAS system to a remote location with ReadyNAS Vault or you can create other backup jobs on your ReadyNAS system with FrontView This chapter includes the fol...

Page 79: ...aximum size in GB for the Time Machine share If you leave this field blank or enter zero your Time Machine backup can use all available space on your ReadyNAS system If you enter a size the backup can...

Page 80: ...a free temporary account 4 Enter your email address and password and click Register 5 Click Manage ReadyNAS Vault A website opens that lets you set your ReadyNAS Vault options Back Up to or from a Re...

Page 81: ...the data you are backup up is remote choose a location on the ReadyNAS system for the destination For more information see Select a Location on Your ReadyNAS System on page 81 5 In the Choose backup s...

Page 82: ...indows or NAS server It is available only in the Source drop down list When performing an incremental backup the ReadyNAS system uses a file s archive bit to determine whether to back up the file In t...

Page 83: ...ote system In the Path field enter the path name for the remote system In the Login and Password fields enter the user name and password for the remote system if the remote Rsync server requires login...

Page 84: ...delete all items in the backup destination before performing a full backup select the Remove the contents of the backup destination before a full backup is performed check box All items in the backup...

Page 85: ...er button for the backup job 3 Edit the job the same way that you would create one For more information see Create a Backup Job on page 81 4 Click the Apply button Your settings are saved Recover Back...

Page 86: ...le if a user moves a file that has not been backed up into a folder that has already been backed up that file will not appear in the backup and will be lost You can schedule the backup to occur when n...

Page 87: ...to last Because using a snapshot can slow your ReadyNAS system you might want it to last just long enough for the backup to finish Make sure the snapshot is available for the full duration of the bac...

Page 88: ...schedule if you want to start a long backup or if you want to set up a backup that uses snapshots To take a snapshot now 1 From the FrontView main menu select Volumes Volume Settings 2 Click the Snaps...

Page 89: ...ices This chapter explains how you can use your ReadyNAS system to host a local website or to share a USB printer with others This chapter covers the following topics Create and Access a Local Website...

Page 90: ...lect the name of the share 9 Click the Apply button Your settings are saved To access the local website 1 Launch a web browser 2 Enter the IP address for your ReadyNAS system Set Up a Printer After yo...

Page 91: ...S Duo NV and 1100 To view and manage print jobs 1 From the FrontView main menu select Printers Print Queue Service 2 To delete some jobs select the check box beside the jobs that you want to delete an...

Page 92: ...ous options for your ReadyNAS system This chapter includes the following topics Set the Time and Time Zone Set the Language Send Alerts Turn the ReadyNAS System On and Off Back Up and Restore Settings...

Page 93: ...in menu select System Clock 2 In the Select Current Time pane use the drop down lists to select the correct time If the drop down lists are dimmed the time is being set automatically Clear the Synchro...

Page 94: ...nd shares To disable this option later you must perform a factory reset which erases all the data on your ReadyNAS system 4 If you enabled the FTP protocol and your FTP client uses a different charact...

Page 95: ...rom Email Provider drop down list in the SMTP server SMTP port From and Use TLS fields enter your email provider s information If you are not sure what to enter in these fields contact your email prov...

Page 96: ...to receive alerts tab 3 In the Alert Events pane select the check boxes for the conditions that you want to trigger an email alert message You cannot turn off alerts for some conditions These events...

Page 97: ...n can take up to an hour to complete depending on the size of your disk 5 Click the Apply button Your ReadyNAS system shuts down and restarts If you selected any scans they are performed when your sys...

Page 98: ...ceeds safe levels check box 4 Click the Apply button Your settings are saved Back Up and Restore Settings You can back up the settings and preferences you have set on your ReadyNAS system in case you...

Page 99: ...ity to use a type third party backup software with your ReadyNAS system or the ability to stream multimedia files to different types of devices To see what add ons are available visit http www readyna...

Page 100: ...the following options If you do not mind losing some data in the case of power failure select Enable disk write cache This option allows the disk to acknowledge disk write requests before the data is...

Page 101: ...on about the ReadyNAS system s TCP IP address including the Domain Name Server to use Generally the default settings do not need to be changed To set the TCP IP address information 1 From the FrontVie...

Page 102: ...twork configuration settings For more information see Set TCP IP Address Information on page 101 To set your ReadyNAS system to work as a DHCP server 1 From the FrontView main menu select Network DHCP...

Page 103: ...efault value in the MTU field enter a new packet size 4 Click the Apply button Your settings are saved Enable WINS Support When you enable Windows Internet Name Service WINS support even users who are...

Page 104: ...ly button Your settings are saved View Log Files You can view and download the ReadyNAS system s log files to diagnose problems Viewing the log files in FrontView shows an overview of the most importa...

Page 105: ...the United States FCC Information to User This product does not contain any user serviceable components and is to be used with approved antennas only Any product changes or modifications will invalid...

Page 106: ...uarantee that interference will not occur in a particular installation If this equipment does cause harmful interference to radio or television reception which can be determined by turning the equipme...

Page 107: ...following test methods and standards EN55022 2006 A1 2007 EN55024 1998 A1 2001 A2 2003 EN60950 1 2005 2nd Edition EN 61000 3 2 2006 EN 61000 3 3 1995 w A1 2001 A2 2005 GPL License Agreement GPL may be...

Page 108: ...ling 43 hiding other shares 59 printing 90 Recycle Bin 59 clock setting 93 compliance 105 copying external disk drives 24 creating groups 34 users 29 volumes 20 D DHCP server 101 disconnecting disk dr...

Page 109: ...y 29 H hiding shares 59 HTTP access control 55 enabling 43 website 90 I importing groups 37 users 37 incremental backup 84 IP address 101 IPP printing 90 IPv4 assignment 101 iTunes streaming password...

Page 110: ...X RAID 18 resetting admin password 38 file and folder ownership 62 permissions 62 restarting 97 restoring backup jobs 85 settings 98 Rsync enabling 43 S scanning iTunes 73 ReadyDLNA 74 TiVo 74 Xbox 7...

Page 111: ...control 48 creating shares 46 overview 27 users creating 29 exporting 36 importing 37 share access control 47 V volumes 16 adding disks 21 creating 20 replacing disks 22 W website setting up 90 Windo...

Reviews: