background image

Administration 

108

Trek N300 Travel Router and Range Extender PR2000 

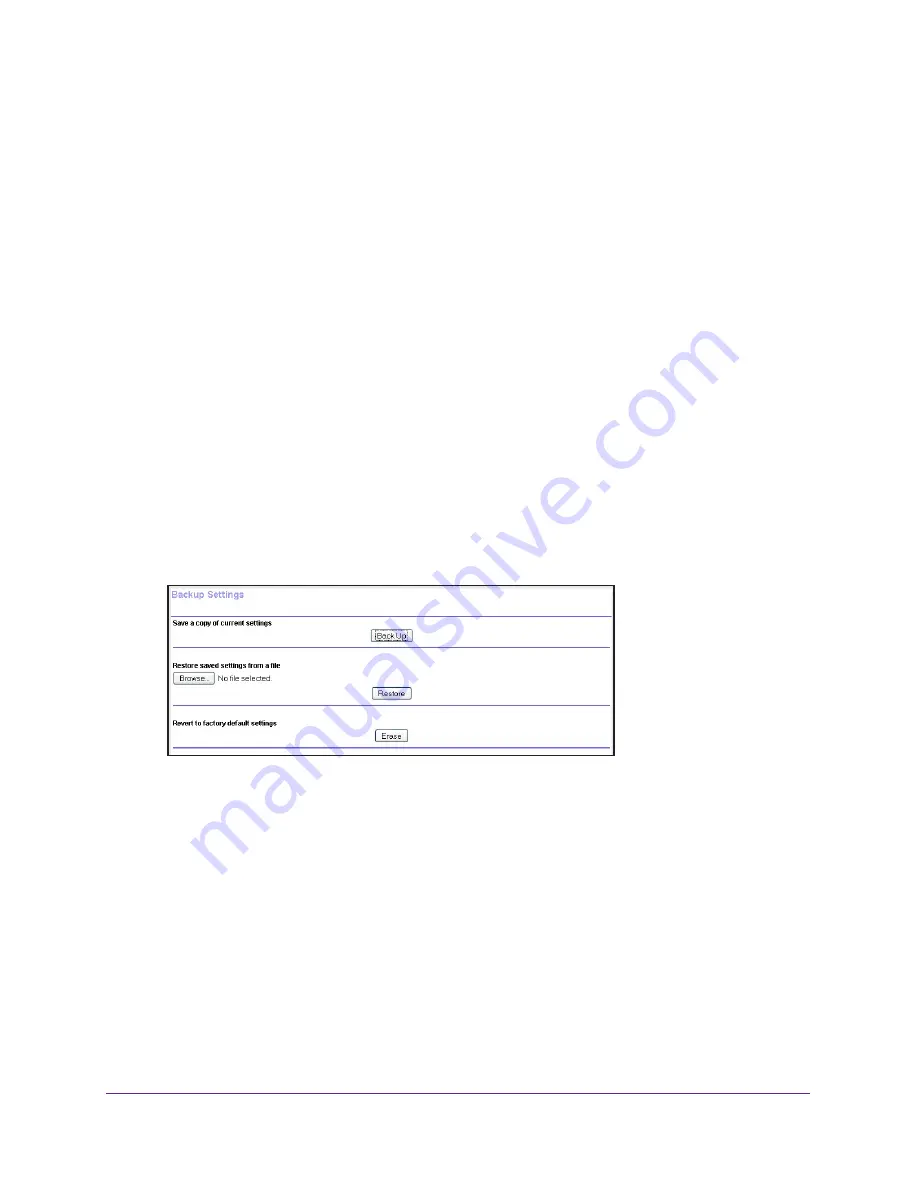
Manage the Configuration File

The configuration settings of the Trek are stored within the Trek in a configuration file. You 
can back up (save) this file to your computer, restore it, or reset it to the factory default 
settings.

Back Up Settings

To back up the Trek’s configuration settings:

1. 

Launch your browser from a computer or wireless device that is connected to the Trek.

2. 

Enter 

www.routerlogin.net

 or 

www.routerlogin.com

 in the web browser address bar.

The login screen displays.

3. 

Enter the Trek user name and password.

The user name is 

admin

. The default password is 

password

. The user name and 

password are case-sensitive.

4. 

Click the 

OK

 button.

The BASIC Home screen displays.

5. 

Select 

ADVANCED > Administration >


Backup Settings

.

6. 

Click the 

Back Up 

button.

A screen displays asking you where you want to store your settings.

7. 

Choose a location to store the 

.cfg

 file that is on a computer on your network.

8. 

Click the 

OK

 button.

A copy of the current settings is saved.

Restore Configuration Settings

To restore configuration settings that you backed up:

1. 

Launch your browser from a computer or wireless device that is connected to the Trek.

2. 

Enter 

www.routerlogin.net

 or 

www.routerlogin.com

 in the web browser address bar.

Summary of Contents for PR2000

Page 1: ...st Plumeria Drive San Jose CA 95134 USA April 2014 202 11343 02 NETGEAR Trek N300 Travel Router and Range Extender Model PR2000 User Manual WiF i USB USB LAN Internet LAN Reset N E T G E A R Powe r Intern et ...

Page 2: ...support visit http support netgear com Phone US Canada only 1 888 NETGEAR Phone Other Countries Check the list of phone numbers at http support netgear com general contact default aspx Compliance For regulatory compliance information visit http www netgear com about regulatory See the regulatory compliance document before connecting the power supply Trademarks NETGEAR the NETGEAR logo and Connect ...

Page 3: ...ction Setup 23 Chapter 2 Get Started with NETGEAR genie Trek Setup Preparation 26 Use Standard TCP IP Properties for DHCP 26 Gather ISP Information 26 Wireless Devices and Security Settings 26 Types of Logins and Access 26 NETGEAR genie Setup 27 Use NETGEAR genie After Installation 28 Upgrade the Trek Firmware 29 Change the Password 29 Password Recovery 30 Add Wireless Devices or Computers to Your...

Page 4: ...nhance Your Local Network 71 Set Up Network Storage 72 Connect or Safely Remove a USB Drive 72 View or Configure a USB Drive 73 Configure the USB Storage Device and Access Settings 74 Configure the Available Network Folders 76 Specify Approved USB Devices 80 Access and Share Your Network Storage 81 Common Uses of Network Sharing 81 Access Your USB Storage Device Locally 83 Access Your USB Storage ...

Page 5: ...pter 9 Troubleshooting Quick Tips 131 Sequence to Restart Your Network 131 Check Ethernet Cable Connections 131 Wireless Settings 131 Network Settings 131 Troubleshoot with the LEDs 131 Power LED Is Off 132 LEDs Never Turn Off 132 Internet Port LED is Off 132 WiFi LED is Off 133 Cannot Log In to the Trek 133 Cannot Access the Internet 134 Troubleshoot PPPoE 135 Troubleshoot Internet Browsing 136 C...

Page 6: ...6 Trek N300 Travel Router and Range Extender PR2000 Index ...

Page 7: ...he devices computers gaming consoles and so on that you connect to your local network Note For more information about the topics covered in this manual visit the support website at support netgear com If you have not already set up your new Trek using the installation guide that comes in the box this chapter walks you through the hardware setup Chapter 2 Get Started with NETGEAR genie explains how...

Page 8: ...om virtually anywhere within the operating range of your wireless network However the operating distance or range of your wireless connection can vary significantly depending on the physical placement of your Trek For example the thickness and number of walls the wireless signal passes through can limit the range Position your Trek according to the following guidelines Place your Trek near the cen...

Page 9: ... other surfaces such as these Solid metal door Aluminum studs Fish tanks Mirrors Brick Concrete Prepare Your Trek To prepare your Trek for installation 1 Carefully peel off the protective film covering the end of your Trek Pow er Intern et USB LAN Internet LAN Reset N E T G E A R 2 Place your Trek in an area suitable for installation near a power outlet and accessible to the Ethernet cables for yo...

Page 10: ...h Select your Internet mode NETGEAR NETGEAR PR2000 Power Internet WiFi USB Internet via Wired Power Off Wireles Internet via Wired Power Off Wireles Figure 2 Internet via switch Put the switch in one of the following positions Wired Connect to the Internet with an Ethernet cable Power Off Turn off the Trek Wireless Connect to the Internet with a wireless link ...

Page 11: ...r Trek using the following LEDs Table 1 Status LEDs Power LED Green The Trek is powered on Off The Trek is powered off Internet LED Green Either the Internet LAN port is connected physically or a wireless channel is associated successfully Blinking green One of the following occurred The Reset button was pressed longer than five seconds A firmware upgrade is in progress The bandwidth limit was exc...

Page 12: ...ings on page 143 for information about restoring factory settings Internet LAN port When the Internet via switch is set to Wired this port becomes an Internet port When the switch is set to Wireless this port becomes a LAN port for any Ethernet enabled device LAN port A LAN port for any Ethernet enabled device USB port A USB port for USB storage or a USB printer When the Trek is plugged into the w...

Page 13: ...f the following methods to power your Trek AC power connection Fold out the power prongs and plug the unit into an AC wall outlet NETGEAR Power Internet WiFi USB Wired Power Off Wireles NETGEAR In te rn et vi a W ire d Po w er O ff W ire le s Power plug varies by county Figure 5 AC power connection Micro USB connection Connect a micro USB cable to the unit and to a USB port on another device NETGE...

Page 14: ... E T G E A R Power Internet N E T G E A R L A N In te rn e t L A N R e s e t U S B WiFi USB Power Internet Figure 7 Antenna orientation For best performance keep the cover vertical when you use your Trek Product Label The device login information URL user name and password SSID and wireless password are printed on the product label Device login information Preset wireless network name SSID and wir...

Page 15: ...ion Use the Trek for any of the following situations Add a WiFi router to your home network Do you want to connect your wireless devices to your network Convert your home network into a home WiFi network For more information see Internet Connection at Home Setup on page 19 Extend the range of your home WiFi network Do you want to use your wireless devices at a greater distance from your WiFi route...

Page 16: ...see Power Inputs on page 13 2 Turn on power to the Trek by moving the Internet via switch from the Power Off position to the Wireless position 3 Rotate the Trek s cover clockwise to orient the antenna For more information see Antenna Orientation on page 14 4 Connect your computer or wireless device to the Trek s SSID or connect your computer or wireless device to the Trek s LAN port with an Ethern...

Page 17: ...iFi hotspot after a two minute setup process 11 Optional Connect your wireless devices to the Trek For more information see Add Wireless Devices or Computers to Your Trek on page 32 12 Optional To use a USB device connect it to the USB port of the Trek A USB device can be a USB storage drive or a USB printer When the Trek is plugged into the wall the USB port can also be used as a cell phone charg...

Page 18: ...o the Trek by moving the Internet via switch from the Power Off position to the Wireless position 4 Rotate the Trek s cover clockwise to orient the antenna For more information see Antenna Orientation on page 14 5 Connect your computer or wireless device to the Trek s SSID or connect your computer or wireless device to the Trek s LAN port with an Ethernet cable 6 Open a web browser on your compute...

Page 19: ...t it to the USB port of the Trek A USB device can be a USB storage drive or a USB printer When the Trek is plugged into the wall the USB port can also be used as a cell phone charger For more information see Enhance Your Local Network on page 71 Internet Connection at Home Setup Connect to the Internet with an Ethernet cable NETGEAR Power Internet WiFi USB Wired Powe r Off Wireles DSL or cable mod...

Page 20: ...case sensitive Then click the OK button The Setup Wizard screen displays 6 Click the Next button and follow the prompts of the Setup Wizard When you are done the Congratulations screen displays The Trek is connected to the Internet 7 Optional Connect your wireless devices to the Trek For more information see Add Wireless Devices or Computers to Your Trek on page 32 8 Optional To use a USB device c...

Page 21: ... connectivity To use the Trek as a WiFi bridge 1 Connect the Trek to a power source For more information see Power Inputs on page 13 2 Turn on power to the Trek by moving the Internet via switch from the Power Off position to the Wireless position 3 Rotate the Trek s cover clockwise to orient the antenna For more information see Antenna Orientation on page 14 4 Connect your computer or wireless de...

Page 22: ...enter them select the To save a name for profile check box 10 In the field provided enter a name for the profile 11 Click the Apply button The Trek is configured as a WiFi bridge after a two minute setup process 12 Optional Connect your wireless devices to the Trek For more information see Add Wireless Devices or Computers to Your Trek on page 32 13 Optional To use a USB device connect it to the U...

Page 23: ... your cellular service 1 Insert the 3G 4G USB dongle into the USB port of the Trek You must use a supported 3G 4G USB dongle For a list of supported 3G 4G USB dongles see the following table Table 2 Supported 3G 4G USB dongles Supplier Model Country ISP Technology Huawei EC122 China China Telecom CDMA2000 1xEV DO Huawei EC189 China China Telecom CDMA2000 1xEV DO GU e U8 China China Telecom CDMA200...

Page 24: ...ct your computer or wireless device to the Trek s LAN port with an Ethernet cable 7 Open a web browser on your computer type www routerlogin net in the address field and press the Enter key If a login screen displays enter admin for your user name and password for your password The user name and password are case sensitive Then click the OK button The Setup Wizard screen displays 8 Click the Next ...

Page 25: ...abling as described in the installation guide The chapter contains the following sections Trek Setup Preparation Types of Logins and Access NETGEAR genie Setup Use NETGEAR genie After Installation Upgrade the Trek Firmware Change the Password Password Recovery Add Wireless Devices or Computers to Your Trek NETGEAR genie App and Mobile genie App ...

Page 26: ...h the ISP login program on your computer to access the Internet When you start an Internet application your Trek automatically logs you in You might need the following information to set up your Trek The ISP configuration information for your DSL account ISP login name and password Fixed or static IP address settings special deployment by ISP Wireless Devices and Security Settings Make sure that t...

Page 27: ...information see Internet Connection at Home Setup on page 19 3 Make sure that your device is connected with an Ethernet cable to your Trek You can also connect your device wirelessly to your Trek For more information see Add Wireless Devices or Computers to Your Trek on page 32 4 Launch your Internet browser in one of the following ways The first time you set up the Internet connection for your Tr...

Page 28: ...set up your Trek NETGEAR genie automatically starts when you launch an Internet browser on a computer that is connected to the Trek You can use NETGEAR genie again to view or change settings for the Trek To view or change the settings for the Trek 1 Launch your browser from a computer or wireless device that is connected to the Trek 2 Enter www routerlogin net or www routerlogin com in the web bro...

Page 29: ...he latest firmware After the upgrade the Trek restarts CAUTION Do not try to go online turn off the Trek shut down the computer or do anything else to the Trek until the Trek finishes restarting and the Power LED has stopped blinking for several seconds Change the Password The default password that you use to log in to the Trek is password NETGEAR recommends that you change this default password t...

Page 30: ...nsitive 4 Click the OK button The BASIC Home screen displays 5 Select ADVANCED Administration Set Password 6 Type the old password and type the new password twice in the fields on this screen 7 If you want to be able to recover the password select the Enable Password Recovery check box For more information see Password Recovery on page 30 8 Click the Apply button Password Recovery NETGEAR recommen...

Page 31: ...user name and password are case sensitive 4 Click the OK button The BASIC Home screen displays 5 Select ADVANCED Administration Set Password 6 Select the Enable Password Recovery check box 7 Select two security questions and provide answers to them 8 Click the Apply button To recover your password 1 In the address field of your browser type www routerlogin net A login screen displays 2 Click the C...

Page 32: ...s antenna properly For more information see Antenna Orientation on page 14 Manual Method To connect WiFi devices manually to your Trek 1 From your wireless device view the available wireless networks For more information see the manual that came with your device 2 From the list of available wireless networks select the wireless network name SSID of the Trek The SSID is printed on the product label...

Page 33: ... so that every device in the network has the same security settings To connect WiFi devices to your Trek with WPS 1 Launch your browser from a computer or wireless device that is connected to the Trek 2 Enter www routerlogin net or www routerlogin com in the web browser address bar The login screen displays 3 Enter the Trek user name and password The user name is admin The default password is pass...

Page 34: ...ttempts to add the WPS capable wireless device The WiFi LED on the Trek blinks green When the Trek establishes a WPS connection the LED is solid green and the Trek WPS screen displays a confirmation message 8 Repeat Step 7 for each wireless device that you want to connect to the Trek NETGEAR genie App and Mobile genie App The genie app is the easy dashboard for managing monitoring and repairing yo...

Page 35: ...features like Live Parental Controls guest access Internet traffic meter speed test and more The genie mobile app works on your iPhone iPad or Android phone Log in to the router Information about genie mobile app Phone status Search NETGEAR support and the connected router Figure 14 genie mobile app home screen ...

Page 36: ...c features of the Trek The chapter contains the following sections Internet Setup Basic Wireless Settings Change the Wireless Security Option Attached Devices Profile Settings ReadySHARE allows you to enhance your local network with the Trek s USB port For more information see Chapter 5 USB Port ...

Page 37: ...e information see Wireless WAN Connection WiFi Mode on page 42 The 3G 4G cellular mode allows your Trek to connect to the Internet with your cellular data service this feature is available only in certain regions For more information see Wireless WAN Connection 3G 4G Cellular Mode on page 43 For information about setting up the hardware see Different Ways You Can Connect to the Internet on page 15...

Page 38: ...on page 49 9 Under Does your Internet connection require a login select one of the following radio buttons Yes Select the encapsulation method and enter the login name If you want to change the login time out enter a new value in minutes No Enter the account and domain names only if needed These fields display when no login is required Account Name If required Enter the account name provided by yo...

Page 39: ...your DNS servers Your ISP automatically assigns this address Use These DNS Servers If you know that your ISP requires specific servers select this radio button Enter the IP address of your ISP s primary DNS server If a secondary DNS server address is available enter it also Router MAC Address The Ethernet MAC address that the Trek uses on the Internet port Some ISPs register the MAC address of the...

Page 40: ...ch your browser from a computer or wireless device that is connected to the Trek 2 Enter www routerlogin net or www routerlogin com in the web browser address bar The login screen displays 3 Enter the Trek user name and password The user name is admin The default password is password The user name and password are case sensitive 4 Click the OK button The BASIC Home screen displays 5 Select BASIC I...

Page 41: ...hat you do not use this feature 10 In the fields provided enter the following information about your Internet connection IP Address The IP address that your ISP assigned IP Subnet Mask The IP subnet mask that your ISP assigned Gateway IP Address The gateway IP address that your ISP assigned The gateway IP address is the ISP s gateway to which your Trek will connect Primary DNS The IP address of yo...

Page 42: ...k user name and password The user name is admin The default password is password The user name and password are case sensitive 4 Click the OK button The BASIC Home screen displays 5 Select BASIC Internet The Wireless as WAN screen displays the WiFi networks that are available in your area 6 If you want to connect to a public WiFi network select the Extend my current wireless router s range check b...

Page 43: ...tton Wireless WAN Connection 3G 4G Cellular Mode You can view or change basic ISP information Use the Setup Wizard to detect the Internet connection and automatically set up the Trek See Setup Wizard on page 52 This feature is available only in certain regions To view or change the Internet setup 1 Launch your browser from a computer or wireless device that is connected to the Trek 2 Enter www rou...

Page 44: ...ame SSID network key password and security option encryption protocol are preset in the factory You can find the preset SSID and password on the label of the unit Note The preset SSID and password are uniquely generated for every device to protect and maximize your wireless security NETGEAR recommends that you do not change your preset security settings If you do decide to change your preset secur...

Page 45: ... you experience interference shown by lost connections or slow data transfers If this happens experiment with different channels to see which is the best When you use multiple access points it is better if adjacent access points use different radio frequency channels to reduce interference The recommended channel spacing between adjacent access points is five channels for example use Channels 1 an...

Page 46: ...ork selection in your computer or wireless device to match the current settings for your network Change the Wireless Security Option A security option is the type of security protocol applied to your wireless network The security protocol in force encrypts data transmissions and ensures that only trusted devices receive authorization to connect to your network Wi Fi Protected Access WPA has severa...

Page 47: ...t for all wireless clients WPA2 PSK clients get higher speed and security and WPA PSK clients get decent speed and security For help with WPA settings on your wireless computer or device see the instructions that came with your product To change the WPA settings 1 Launch your browser from a computer or wireless device that is connected to the Trek 2 Enter www routerlogin net or www routerlogin com...

Page 48: ... computers or devices that are currently connected to your network To view the attached devices 1 Launch your browser from a computer or wireless device that is connected to the Trek 2 Enter www routerlogin net or www routerlogin com in the web browser address bar The login screen displays 3 Enter the Trek user name and password The user name is admin The default password is password The user name...

Page 49: ...reless Access List by MAC Address on page 117 Profile Settings If you want to use your Trek in more than one type of Internet connection a saved profile lets you make your connections more quickly Save the profiles when you configure an Internet connection Up to 10 profiles can be saved For more information see Internet Setup on page 37 You can view or delete your profiles after you saved them To ...

Page 50: ...IC Profile Settings Your saved Internet connection profiles are displayed 6 To delete a profile select the radio button that is next to the profile that you want to delete and click the Delete Profile button The profile is deleted 7 Repeat Step 6 for each profile that you want to delete ...

Page 51: ...rtcut to the same Internet Setup screen that you can access from the dashboard on the BASIC Home screen See Internet Setup on page 37 Wireless Setup This is a shortcut to the same Wireless Setup screen that you can access from the dashboard on the BASIC Home screen See Basic Wireless Settings on page 44 WPS Wizard See Wi Fi Protected Setup Method on page 33 USB Storage See Chapter 5 USB Port Secur...

Page 52: ...wireless device that is connected to the Trek 2 Enter www routerlogin net or www routerlogin com in the web browser address bar The login screen displays 3 Enter the Trek user name and password The user name is admin The default password is password The user name and password are case sensitive 4 Click the OK button The BASIC Home screen displays 5 Select ADVANCED Setup Wizard 6 Select either the ...

Page 53: ...outer and Range Extender PR2000 7 If you selected the Yes button click the Next button The Setup Wizard searches your Internet connection for servers and protocols to determine your ISP configuration 8 Click the Take me to the Internet button ...

Page 54: ...Trek user name and password The user name is admin The default password is password The user name and password are case sensitive 4 Click the OK button The BASIC Home screen displays 5 Select ADVANCED Setup WAN Setup 6 Enter the following settings Disable Port Scan and DoS Protection DoS protection protects your LAN against denial of service attacks such as Syn flood Smurf Attack Ping of Death Tea...

Page 55: ...well with the Session Initiation Protocol SIP Application Layer Gateway ALG Selecting the check box to turn off the SIP ALG might enable connected VoIP devices to create and accept a VoIP call through the Trek By default this check box is cleared Disable IGMP Proxying IGMP proxying allows computers on the LAN to receive the multicast traffic they are subscribed to from the Internet By default this...

Page 56: ...d of discarding this traffic you can forward it to one computer on your network This computer is called the default DMZ server To set up a default DMZ server 1 Launch your browser from a computer or wireless device that is connected to the Trek 2 Enter www routerlogin net or www routerlogin com in the web browser address bar The login screen displays 3 Enter the Trek user name and password The use...

Page 57: ...et service and technical support of either the ISP or NETGEAR recommends changing the MTU setting These web based applications might require an MTU change A secure website that does not open or displays only part of a web page Yahoo email MSN portal America Online s DSL service You use VPN and have severe performance problems You used a program to optimize MTU for performance reasons and now you h...

Page 58: ...n The default password is password The user name and password are case sensitive 4 Click the OK button The BASIC Home screen displays 5 Select ADVANCED Setup WAN Setup 6 In the MTU Size field enter a new size from 64 through 1500 7 Click the Apply button LAN Setup You can configure LAN IP services such as Dynamic Host Configuration Protocol DHCP and Routing Information Protocol RIP 1436 Used in PP...

Page 59: ...N Setup screen Note If you change the LAN IP address of the Trek while connected through the browser you are disconnected You must open a new connection to the new IP address and log in again To change the LAN settings 1 Launch your browser from a computer or wireless device that is connected to the Trek 2 Enter www routerlogin net or www routerlogin com in the web browser address bar The login sc...

Page 60: ...ly clear the Use Router as DHCP Server check box NETGEAR recommends that you do not do this For more information see Use the Trek as a DHCP Server on page 60 8 To reserve an IP address for a computer or device on the LAN in the Address Reservation section click the Add button For more information see Set Up Address Reservation on page 62 9 Click the Apply button Use the Trek as a DHCP Server By de...

Page 61: ...o the Trek 2 Enter www routerlogin net or www routerlogin com in the web browser address bar The login screen displays 3 Enter the Trek user name and password The user name is admin The default password is password The user name and password are case sensitive 4 Click the OK button The BASIC Home screen displays 5 Select ADVANCED Setup LAN Setup 6 Clear the Use Router as DHCP Server check box 7 Cl...

Page 62: ...s to computers or servers that require permanent IP settings To reserve an IP address 1 Launch your browser from a computer or wireless device that is connected to the Trek 2 Enter www routerlogin net or www routerlogin com in the web browser address bar The login screen displays 3 Enter the Trek user name and password The user name is admin The default password is password The user name and passw...

Page 63: ...9 Click the Apply button The reserved address is entered in the table The reserved address is not assigned until the next time the computer contacts the Trek s DHCP server Reboot the computer or access its IP configuration and force a DHCP release and renew To edit or delete a reserved address entry 1 Launch your browser from a computer or wireless device that is connected to the Trek 2 Enter www ...

Page 64: ...f traffic ahead of others The Trek can provide QoS prioritization over the wireless link and on the Internet connection Wi Fi Multimedia Quality of Service for Wireless Traffic The Trek supports Wi Fi Multimedia Quality of Service WMM QoS to prioritize wireless voice and video traffic over the wireless link WMM QoS prioritizes wireless data packets from different applications based on four access ...

Page 65: ...ny common applications and online games that can benefit from QoS handling By default QoS is disabled for Internet traffic The default QoS rules and any custom QoS rules that you created are not activated and no traffic is prioritized To set up QoS 1 Launch your browser from a computer or wireless device that is connected to the Trek 2 Enter www routerlogin net or www routerlogin com in the web br...

Page 66: ...button 11 Enter the maximum bandwidth that you want to allow and select either Kbps or Mbps 12 To manage the preconfigured and custom QoS rules click the Set Up QoS rule button Scroll down All preconfigured QoS rules are displayed in a table along with their priority Highest High Normal or Low and a description 13 Select the radio button next to the QoS policy that you want to and click the Delete...

Page 67: ...ming The Online Gaming list lets you select existing games but scroll down to the bottom to select Add a new game 18 In the QoS Policy for field type a descriptive name for the new application or game 19 From the Priority list select the priority that this traffic should receive relative to other applications and traffic when accessing the Internet Select Highest High Normal or Low 20 In the Conne...

Page 68: ...isplay you must complete these fields manually 27 From the Priority list select the priority that this traffic should receive relative to other applications and traffic when accessing the Internet Select Highest High Normal or Low 28 Click the Apply button The rule is saved in the QoS policy table on the QoS Setup screen 29 To edit or delete a MAC address on the MAC Device List in the Priority Cat...

Page 69: ... information is saved or removed from the MAC Device List 32 To allocate half of the WAN bandwidth to a special host in heavy traffic situations select the Enable Trusted IP address check box In the field that is provided enter the IP address of the trusted host 33 Click the Apply button You settings are saved ...

Page 70: ...ribes how to use the USB port on your Trek to enhance your local network This chapter contains the following sections Enhance Your Local Network Set Up Network Storage Access and Share Your Network Storage Set Up a Network Printer Power or Recharge a USB Device ...

Page 71: ... more information see Access and Share Your Network Storage on page 81 ReadySHARE Printer Send the files on your computers and digital devices to a network printer For more information see Set Up a Network Printer on page 85 ReadySHARE Mobile Connect your local network to your cellular data service this feature is available only in certain regions For more information see Cellular Connection Setup...

Page 72: ...n access the USB device Such USB devices do not work with the Trek To physically disconnect a USB drive from the Trek USB port first log in to the Trek and then safely remove it To connect a USB storage device 1 Insert your USB storage device into the USB port of the Trek For information about how to locate the USB port see Enhance Your Local Network on page 71 2 If your USB device has a power sup...

Page 73: ...ups and network folders View or change the network folders For more security share only approved USB devices To view basic information about the USB storage device 1 Launch your browser from a computer or wireless device that is connected to the Trek 2 Enter www routerlogin net or www routerlogin com in the web browser address bar The login screen displays 3 Enter the Trek user name and password T...

Page 74: ... USB Storage Advanced Settings screen displays For more information see Configure the USB Storage Device and Access Settings on page 74 Configure the USB Storage Device and Access Settings You can set up the device name workgroups and network folders for your USB device To view or change the USB storage advanced settings 1 Launch your browser from a computer or wireless device that is connected to...

Page 75: ...used to access the USB device connected to the Trek Workgroup If you are using a Windows workgroup rather than a domain the workgroup name displays here The name works only in an operating system that supports NetBIOS such as Microsoft Windows Access Method Select the check boxes for the access methods that you want Network Neighborhood MacShare Enabled by default HTTP Enabled by default You can t...

Page 76: ... feature supports both downloading and uploading of files 8 If you changed the settings click the Apply button Your changes are saved Configure the Available Network Folders You can view or change the network folders on the USB storage device To view network folders 1 Launch your browser from a computer or wireless device that is connected to the Trek 2 Enter www routerlogin net or www routerlogin...

Page 77: ...e network folder All no password the default allows all users to access the network folder The password for admin is the same one that you use to log in to the Trek Folder Name Full path of the network folder Volume Name Volume name from the storage device either USB drive or HDD Total Space and Free Space Show the current utilization of the storage device To add a network folder 1 Launch your bro...

Page 78: ...USB Port 78 Trek N300 Travel Router and Range Extender PR2000 5 Select BASIC ReadySHARE 6 Click the Edit button 7 Click the Create Network Folder button ...

Page 79: ... name for All no password is guest The password for admin is the same one that is used to log in to the Trek By default it is password 11 Click the Apply button The folder is added on the USB device To edit a network folder 1 Launch your browser from a computer or wireless device that is connected to the Trek 2 Enter www routerlogin net or www routerlogin com in the web browser address bar The log...

Page 80: ...proved USB Devices For more security you can set up the Trek to share only approved USB devices To set up approved USB devices 1 Launch your browser from a computer or wireless device that is connected to the Trek 2 Enter www routerlogin net or www routerlogin com in the web browser address bar The login screen displays 3 Enter the Trek user name and password The user name is admin The default pas...

Page 81: ... remove the device Connect the other USB device and repeat this process For more information see Connect or Safely Remove a USB Drive on page 72 Access and Share Your Network Storage You can share files on the USB drive for a wide variety of business and recreational purposes The files can be Windows Mac or Linux file types NTFS FAT32 HFS Ext 3 Ext 4 including text Word PowerPoint Excel MP3 pictur...

Page 82: ...a print server A family member has photos on a Macintosh computer and wants to print them The photo capable color printer is directly attached to a Windows computer but not shared on the network The Mac and the Windows computer are not visible to each other on the network To print high quality photos from a nonshared printer do one of the following On the Mac access the USB drive by typing readysh...

Page 83: ... you connect the USB device to the Trek USB port it might take up to two minutes before it is ready for sharing By default the USB storage device is available to all computers on your local area network LAN To access the USB device from a local Mac computer 1 Select Go Connect to Server 2 Enter smb readyshare as the server address 3 Click the Connect button To access the USB device from a local Wi...

Page 84: ...ady for sharing You can access your USB storage device remotely To access the USB drive from a remote computer 1 Launch a web browser 2 Connect using the Trek s Internet port IP address If you are using Dynamic DNS you can type the DNS name rather than the IP address You can view the Trek s Internet IP address on the BASIC Home screen see Internet Setup on page 37 To use remote FTP access make sur...

Page 85: ...r For more information about ReadySHARE access for USB storage devices visit www netgear com readyshare Set Up a Network Printer The ReadySHARE Printer utility allows you to control from your computer a shared USB printer that is connected to the USB port on your Trek You can share this USB printer among the Windows and Mac computers on your network You must install this utility before you can use...

Page 86: ...version and a Windows version which you can access in two different ways From the ReadySHARE Printer area of the page you access from www netgear com readyshare From the ReadySHARE section of the desktop NETGEAR genie For more information see NETGEAR genie App and Mobile genie App on page 34 Note You must install this utility before you can use the ReadySHARE Printer feature For the ReadySHARE Pri...

Page 87: ...N300 Travel Router and Range Extender PR2000 5 After you install the utility select a language If this setup is the first time you are accessing the utility you are asked to select the printer 6 Click the Connect button ...

Page 88: ...onnect and Disconnect buttons once the utility automatically handles the printing queue The status of the printer displays as Available on all the computers Here are the rules of operation When the status is Available you can use the USB printer When the status is Manually connected by xxx only the xxx computer can use the printer Other network devices must wait until the xxx computer has released...

Page 89: ...f you exit the utility printing does not work Some firewall software such as Comodo blocks the ReadySHARE Print utility from accessing the USB printer If you do not see the printer in the utility you can disable the firewall temporarily to allow the utility to work 8 If your printer supports scanning make sure that the printer is in the Available state and click the Network Scanner button This ste...

Page 90: ...rmation about how to locate the USB port see Enhance Your Local Network on page 71 When the Trek is powered from a micro USB cable you cannot use the Trek s USB port as an auxiliary power source For more information about your choices of providing power to the Trek see Power Inputs on page 13 The maximum power that is supplied by the Trek s USB port is a current of 900 mA at 5 volts To find out ho...

Page 91: ...w to use the basic firewall features of the Trek to prevent objectionable content from reaching the computers and other devices connected to your network The chapter includes the following sections Port Filtering to Block Services Schedule Blocking Security Event Email Notifications ...

Page 92: ...authors of other applications typically choose service numbers for those applications from the range 1024 65535 Although the Trek already holds a list of many service port numbers you are not limited to these choices You can often find port number information by contacting the publisher of the application by asking user groups or newsgroups or by searching You can add and block specific Internet s...

Page 93: ...e application or service to block The list displays several common services but you are not limited to these choices To add any additional services or applications that do not already appear select User Defined 10 If you know that the application uses either TCP or UDP select the appropriate protocol If you are not sure select TCP UDB both 11 Enter the starting and ending port numbers If the appli...

Page 94: ... routerlogin com in the web browser address bar The login screen displays 3 Enter the Trek user name and password The user name is admin The default password is password The user name and password are case sensitive 4 Click the OK button The BASIC Home screen displays 5 Select ADVANCED Security Schedule 6 Set up the schedule for blocking keywords and services Here is what you can choose Days to Bl...

Page 95: ...nnected to the Trek 2 Enter www routerlogin net or www routerlogin com in the web browser address bar The login screen displays 3 Enter the Trek user name and password The user name is admin The default password is password The user name and password are case sensitive 4 Click the OK button The BASIC Home screen displays 5 Select ADVANCED Security E mail 6 Select the Turn E mail Notification On ch...

Page 96: ...Complete the User Name and Password fields for the outgoing email server 11 To have alerts sent immediately select the Send Alerts Immediately check box Email alerts are sent immediately when someone attempts to visit a blocked site 12 Enter the information in the fields in the Send logs according to this schedule section of the screen Logs are sent automatically If the log fills up before the spe...

Page 97: ...k and local network are described in separate chapters For information about setting and recovering your password see Change the Password on page 29 and Password Recovery on page 30 For information about the devices that are connected to your network see Attached Devices on page 48 For information about upgrading or checking the status of your Trek over the Internet see also Remote Management on p...

Page 98: ... and password The user name is admin The default password is password The user name and password are case sensitive 4 Click the OK button The BASIC Home screen displays 5 Click the ADVANCED tab Note The Router Status screen also displays when you select ADVANCED Advanced Home or ADVANCED Administration Router Status Router Information Pane To display the Router Information pane 1 Launch your brows...

Page 99: ...firmware It changes if you upgrade the Trek firmware GUI Language Version The localized language of the Trek user interface LAN Port MAC Address The Media Access Control address for the LAN port This address is the unique physical address that the Ethernet LAN port of the Trek uses IP Address The IP address that the Ethernet LAN port of the Trek uses The default is 192 168 168 1 DHCP Server Identi...

Page 100: ...he unique physical address that the Internet WAN port of the Trek uses IP Address The IP address that the Internet WAN port of the Trek uses If no address is shown or the address is 0 0 0 0 the Trek is not connected to the Internet Connection Shows whether the Trek is using a fixed or dynamic IP address on the Internet port If the value is DHCP the Trek obtains an IP address dynamically from the I...

Page 101: ... in the web browser address bar The login screen displays 3 Enter the Trek user name and password The user name is admin The default password is password The user name and password are case sensitive 4 Click the OK button The BASIC Home screen displays 5 Click the ADVANCED tab 6 In the Internet Port pane click the Show Statistics button The following information displays System Up Time The time el...

Page 102: ...en 7 To change the polling frequency enter a time in seconds in the Poll Interval field and click the Set Interval button 8 To stop the polling entirely click the Stop button Connection Status The content of this screen depends on the type of connection For example different information is shown for a PPPoE connection than for a DHCP connection To view and manage the connection status 1 Launch you...

Page 103: ...creen DHCP connection The following information displays for a DHCP connection IP Address The IP address that is assigned to the Trek Subnet Mask The subnet mask that is assigned to the Trek Default Gateway The IP address for the default gateway that the Trek communicates with DHCP Server The IP address for the Dynamic Host Configuration Protocol server that configures the TCP IP for all the compu...

Page 104: ...tions a To establish the PPPoE connection manually click the Connect button b To terminate the PPPoE connection manually click the Disconnect button c To close the Connection Status screen click the Close Window button PPTP connection The following information displays for a PPTP connection Connection Status The status of the connection Connected or Disconnected IP Address The IP address that is a...

Page 105: ...reless port The default channel is Auto When Auto is selected the Trek finds the best operating channel available Mode The wireless communication mode Up to 54 Mbps Up to 150 Mbps the default or Up to 300 Mbps Wireless AP Indicates whether the radio of the Trek is enabled If the radio is not enabled the WiFi LED is off Broadcast Name Indicates whether the Trek is broadcasting its SSID Wireless Iso...

Page 106: ...er from a computer or wireless device that is connected to the Trek 2 Enter www routerlogin net or www routerlogin com in the web browser address bar The login screen displays 3 Enter the Trek user name and password The user name is admin The default password is password The user name and password are case sensitive 4 Click the OK button The BASIC Home screen displays 5 Select ADVANCED Administrat...

Page 107: ...in screen displays 3 Enter the Trek user name and password The user name is admin The default password is password The user name and password are case sensitive 4 Click the OK button The BASIC Home screen displays 5 Select ADVANCED Administration Logs 6 Select the following check boxes for the events that you want to include in the log Attempted access to allowed sites Attempted access to blocked ...

Page 108: ...displays 3 Enter the Trek user name and password The user name is admin The default password is password The user name and password are case sensitive 4 Click the OK button The BASIC Home screen displays 5 Select ADVANCED Administration Backup Settings 6 Click the Back Up button A screen displays asking you where you want to store your settings 7 Choose a location to store the cfg file that is on ...

Page 109: ...t Configuration Settings You can use the Erase button to erase the configuration and restore the factory default settings You might want to erase the settings if you move the Trek to a different network You can also use the Reset button of the Trek to erase the configuration and restore the factory settings For more information see Factory Settings on page 143 To erase the configuration settings 1...

Page 110: ... might see a message at the top of the genie screens when new firmware is available for your product You can check and update to the latest firmware for your product when new firmware is available To check for new firmware and update your Trek 1 Launch your browser from a computer or wireless device that is connected to the Trek 2 Enter www routerlogin net or www routerlogin com in the web browser...

Page 111: ...ate to the firmware file the file ends in img and select the firmware file b Click the Upload button A progress bar shows the progress of the firmware upload process WARNING When uploading firmware to the Trek do not interrupt the web browser by closing the window clicking a link or loading a new page If the browser is interrupted the firmware might be corrupted When the upload is complete your Tr...

Page 112: ...to set up the Trek for unique situations such as remote access from the Internet by IP or domain name The chapter includes the following sections Advanced Wireless Settings Dynamic DNS Static Routes Remote Management Universal Plug and Play Traffic Meter For added security you can set up the Trek to share only approved USB devices For more information see Specify Approved USB Devices on page 80 ...

Page 113: ...ou can turn the wireless radio on or off in the Advanced Wireless Settings screen When the wireless radio is off you can still use an Ethernet cable for the WAN and LAN connections to the Trek To turn the wireless radio on or off 1 Launch your browser from a computer or wireless device that is connected to the Trek 2 Enter www routerlogin net or www routerlogin com in the web browser address bar T...

Page 114: ...mode 8 Click the Apply button Your changes take effect Set Up a Wireless Schedule You can turn off the wireless signal from your Trek at times when you do not need a wireless connection For example you could turn it off for the weekend if you leave town You can turn the wireless radio off only when the Trek is operating in wired WAN mode To configure and enable the wireless schedule 1 Launch your ...

Page 115: ...e Add a new period button 8 Use the lists radio buttons and check boxes to set up a period during which you want to turn off the wireless signal 9 Click the Apply button The Advanced Wireless Settings screen displays 10 Click the Apply button Your changes are saved View or Change WPS Settings To specify WPS settings 1 Launch your browser from a computer or wireless device that is connected to the ...

Page 116: ...gh WPS 7 Optional Select or clear the Disable Router s PIN check box The PIN function might temporarily be disabled when the Trek detects suspicious attempts to break into the Trek s wireless settings by using the Trek s PIN through WPS You can manually enable the PIN function by clearing the Disable Router s PIN check box 8 Optional Select or clear the Keep Existing Wireless Settings check box By...

Page 117: ... on the label of the wireless card or network interface device If you do not have access to the label you can display the MAC address using the network configuration utilities of the computer You might also find the MAC addresses in the Attached Devices screen To restrict access based on MAC addresses 1 Launch your browser from a computer or wireless device that is connected to the Trek 2 Enter ww...

Page 118: ... field of this screen To do this use each wireless computer to join the wireless network The computer then appears in the Attached Devices screen For more information about the attached devices see Attached Devices on page 48 9 Click the Add button The screen changes back to the list screen 10 Add each computer or device that you want to allow to connect wirelessly 11 Select the Turn Access Contro...

Page 119: ...ommercial Dynamic DNS service This type of service lets you register your domain to their IP address and forwards traffic directed at your domain to your frequently changing IP address If your ISP assigns a private WAN IP address such as 192 168 x x or 10 x x x the Dynamic DNS service does not work because private addresses are not routed on the Internet Your Trek contains a client that can connec...

Page 120: ...S org select www DynDNS org 9 Type the host name or domain name that your Dynamic DNS service provider gave you 10 Type the user name for your Dynamic DNS account Enter the name that you use to log in to your account not your host name 11 Type the password or key for your Dynamic DNS account 12 Click the Apply button Your changes are saved Static Routes Static routes provide more routing informati...

Page 121: ...at 134 177 0 0 should be accessed through the ISDN Trek at 192 168 168 100 This example assumes the following settings The Destination IP Address and IP Subnet Mask fields specify that this static route applies to all 134 177 x x addresses The Gateway IP Address field specifies that all traffic for these addresses should be forwarded to the ISDN Trek at 192 168 168 100 A metric value of 1 works be...

Page 122: ... IP address which must be a Trek on the same LAN segment as the Trek 13 Type a number from 1 through 15 as the metric value This value represents the number of Treks between your network and the destination Usually a setting of 2 or 3 works but if this link is a direct connection set it to 1 14 Click the Apply button The route is added to the table on the Static Routes screen To edit or delete a s...

Page 123: ...ets you access your Trek over the Internet to view or change its settings Note Before you enable remote management be sure to change the Trek s default login password to a secure password The ideal password contains no dictionary words from any language and contains uppercase and lowercase letters numbers and symbols It can be up to 30 characters For more information see Change the Password on pag...

Page 124: ... radio button Enter the IP address that will be allowed access To allow access from a range of IP addresses on the Internet select the IP Address Range radio button Enter a beginning and ending IP address to define the allowed range To allow access from any IP address on the Internet select the Everyone radio button 8 Specify the port number for accessing the web management interface Normal web br...

Page 125: ...in net or www routerlogin com in the web browser address bar The login screen displays 3 Enter the Trek user name and password The user name is admin The default password is password The user name and password are case sensitive 4 Click the OK button The BASIC Home screen displays 5 Select ADVANCED Advanced Setup UPnP 6 Select the Turn UPnP On check box By default this check box is selected If the...

Page 126: ...t type of port is open and whether that port is still active for each IP address 10 To refresh the information in the UPnP Portmap Table click the Refresh button Traffic Meter Traffic metering allows you to monitor the volume of Internet traffic that passes through the Trek Internet port You can set limits for traffic volume Traffic metering is available only when the Trek is operating in wired WA...

Page 127: ... to both incoming and outgoing traffic Select the Connection time control radio button and enter the allowed hours in the Monthly limit field 8 Optional If your ISP charges for extra data volume when you make a new connection enter the extra data volume in MB in the Round up data volume for each connection by field 9 In the Traffic Counter section set up the traffic counter to begin at a specific ...

Page 128: ... browser from a computer or wireless device that is connected to the Trek 2 Enter www routerlogin net or www routerlogin com in the web browser address bar The login screen displays 3 Enter the Trek user name and password The user name is admin The default password is password The user name and password are case sensitive 4 Click the OK button The BASIC Home screen displays 5 Select ADVANCED Advan...

Page 129: ...00 6 In the Internet Traffic Statistics section monitor the data traffic 7 To update the Traffic Statistics section click the Refresh button 8 To display more information about the data traffic on your Trek and to change the poll interval click the Traffic Status button ...

Page 130: ...on here visit the NETGEAR support site at support netgear com for product and contact information The chapter contains the following sections Quick Tips Troubleshoot with the LEDs Cannot Log In to the Trek Cannot Access the Internet Changes Not Saved Incorrect Date or Time Wireless Connectivity Restore the Factory Settings and Password Troubleshoot Your Network Using the Ping Utility ...

Page 131: ...n the computer and Trek match exactly For a wirelessly connected computer the wireless network name SSID and wireless security settings of the Trek and wireless computer must match exactly If you set up an access list in the Advanced Wireless Settings screen you must add each wireless computer s MAC address to the Trek s access list Network Settings Make sure that the network settings of the compu...

Page 132: ... the fault is within the Trek If all LEDs are still lit one minute after power up do the following Cycle the power to see if the Trek recovers Press and hold the Reset button to return the Trek to its factory settings See Factory Settings on page 143 If the error persists you might have a hardware problem Contact technical support at www netgear com support Internet Port LED is Off If the Internet...

Page 133: ...generated addresses are in the range of 169 254 x x If your IP address is in this range check the connection from the computer to the Trek and reboot your computer If your Trek s IP address was changed and you do not know the current IP address clear the Trek s configuration to factory defaults This sets the Trek s IP address to 192 168 168 1 For more information see Factory Settings on page 143 M...

Page 134: ...cted to the Trek 2 Enter www routerlogin net or www routerlogin com in the web browser address bar The login screen displays 3 Enter the Trek user name and password The user name is admin The default password is password The user name and password are case sensitive 4 Click the OK button The BASIC Home screen displays 5 Select Administration Router Status 6 Check that an IP address is shown for th...

Page 135: ... server is a host on the Internet that translates Internet names such as www addresses to numeric IP addresses Typically your ISP provides the addresses of one or two DNS servers for your use If you entered a DNS address during the Trek s configuration reboot your computer and verify the DNS address You can configure your computer manually with DNS addresses as explained in your operating system d...

Page 136: ...to reconnect by clicking the Renew button The Trek continues to attempt to connect indefinitely If you cannot connect after several minutes you might be using an incorrect service name user name or password Or your ISP might have a provisioning problem Note Unless you connect manually the Trek does not authenticate using PPPoE until data is transmitted to the network Troubleshoot Internet Browsing...

Page 137: ...ght need to go to Internet Explorer and select Tools Internet Options click the Connections tab and select the Never dial a connection radio button Changes Not Saved If the Trek does not save the changes you make in the Trek interface do the following When entering configuration settings always click the Apply button before moving to another screen or tab or your changes are lost Click the Refresh...

Page 138: ...sense daylight saving time In the Schedule screen select the Automatically adjust for daylight savings time check box Wireless Connectivity If you are having trouble connecting wirelessly to the Trek check the following to try to isolate the problem Does the wireless device or computer that you are using find your wireless network If not check to see of the WiFi LED is lit If it is not you can che...

Page 139: ...or too close Place your computer near the Trek but at least 6 feet away and see whether the signal strength improves Is your wireless signal blocked by objects between the Trek and your computer Restore the Factory Settings and Password To restore the factory settings erasing the current configuration and changing the Trek s administration password back to password you can do either of the followi...

Page 140: ...one of the following problems Wrong physical connections For a wired connection make sure that your computer is connected to the correct Ethernet port on the Trek Wrong network configuration Verify that the Ethernet card driver software and TCP IP software are both installed and configured on your computer Verify that the IP address for your Trek and your computer are correct and that the addresse...

Page 141: ...ecified by the subnet mask is different from the network address of the remote device Check that your cable or DSL modem is connected and functioning If your ISP assigned a host name to your computer enter that host name as the account name in the Internet Setup screen Your ISP might be rejecting the Ethernet MAC addresses of all but one of your computers Many broadband ISPs restrict access by all...

Page 142: ...142 A A Supplemental Information View the Trek specs This appendix covers the following topics Factory Settings Technical Specifications ...

Page 143: ... on product label Internet connection WAN MAC address Use default hardware address WAN MTU size 1500 Port speed 10 100 Mbps Autosensing Local network LAN LAN IP 192 168 168 1 printed on product label Subnet mask 255 255 255 0 DHCP server Enabled DHCP range 192 168 168 2 to 192 168 168 200 Allow a registrar to configure this router Enabled DHCP starting IP address 192 168 168 2 DHCP ending IP addre...

Page 144: ...tes in the US otherwise varies by region RF channel 2 4 GHz Auto Operating mode Up to 300 Mbps Data rate Best Output power Full Table 5 PR2000 Trek specifications Feature Description Data and routing protocols TCP IP RIP 1 RIP 2 DHCP PPPoE PPTP Bigpond Dynamic DNS UPnP and SMB Power adapter No power adapter Input alternating current 100 240V 50 60 Hz 0 3A Dimensions 3 39 in x 3 31 in x 1 30 in 86 ...

Page 145: ... Data encoding standards IEEE 802 11n version 2 0 IEEE 802 11n IEEE 802 11g IEEE 802 11b 2 4 GHz Maximum computers per wireless network Limited by the amount of wireless network traffic generated by each node typically 50 70 nodes Operating frequency range 2 4 GHz 2 412 2 462 GHz US 2 412 2 472 GHz Japan 2 412 2 472 GHz Europe ETSI 802 11 security WPA PSK WPA2 PSK WEP and WPA WPA2 PSK Table 5 PR20...

Page 146: ...ing 52 crossover cable 132 CTS RTS Threshold 113 D data packets fragmented 57 date and time 138 daylight saving time 138 default DMZ server 55 default factory settings list of 143 restoring 109 default gateway 103 denial of service DoS attacks 54 denial of service DoS protection 91 devices attached 48 DHCP server 60 103 DMZ server 55 DNS addresses primary 39 41 secondary 39 41 troubleshooting 135 ...

Page 147: ...it unit MTU size 57 metric values static routes 122 mixed mode security options 47 mobile broadband connection 23 MTU maximum transmit unit size 57 multicasting 60 N NAT Network Address Translation 55 NETGEAR genie setup initial 27 using after installation 28 Network Time Protocol NTP 138 network correct settings checking 131 network restarting 131 O online games QoS for 67 open NAT 55 outgoing ma...

Page 148: ... 81 SIP ALG Session Initiation Protocol Application Layer Gateway 55 SMTP server 95 software version 99 SSID described 45 static routes 120 statistics traffic 101 system up time 101 T technical support 2 Temporal Key Integrity Protocol TKIP 46 time of day 138 trademarks 2 traffic prioritizing 65 statistics viewing 101 traffic metering 126 transmitted packets 102 troubleshooting 130 133 137 138 U U...

Page 149: ...reless devices adding to the network 32 wireless mode 45 wireless network name SSID 45 wireless network settings 45 wireless security options 46 wireless settings basic 44 checking for correct 131 SSID broadcast 45 viewing 104 WMM Wi Fi Multimedia 64 WPA encryption 46 WPA2 encryption 46 WPA2 PSK encryption 47 WPA PSK WPA2 PSK mixed mode 47 WPS PSK encryption 47 WPS PSK WPA2 PSK encryption 47 wrong...

Reviews: