background image

32

SuperScript Color Laser Network Guide

N

ET

W

ARE

 3.

X

Complete these basic tasks to configure NetWare 3.x bindery-
based services for your printer. Begin by:

Starting PCONSOLE

Log in to NetWare 3.x with Administrator rights and start 
PCONSOLE.

Defining the Print Queue 

1.

Select Print Queue Information from the Available 
Options menu and press 

ENTER

.

2.

Press 

INSERT

, type a name for the new queue to be 

serviced by the NIC and press 

ENTER

. Press 

ESCAPE

 to 

return to the Available Options Menu.

Defining the Print Server

1.

Select Print Server Information from the Available 
Options menu and press 

ENTER

.

2.

Press 

INSERT

, type the NIC Print Server Name and press 

ENTER

note:

The Print Server Name you enter should match 

the name shown on the Network Settings page under 
Novell Network Information. 

Defining the Printer

1.

Press 

ENTER

 with the new Print Server Highlighted, 

select Print Server Configuration and press 

ENTER

, then 

select Printer Configuration and press 

ENTER

.

2.

In the Configured Printers list, select an unused printer 
number and press 

ENTER

. In the Printer <#> 

Configuration screen, define a new name for the printer 
if desired. (The printer name is displayed in various 
NetWare printing messages.)

3.

Press 

ESCAPE

 to exit and select Yes to save the changes. 

Press 

ESCAPE

 again to return to the Printer Server 

Configuration menu.

Assigning the Print Queue

1.

Select Queues Serviced By Printer and press 

ENTER

Highlight the desired printer on the Defined Printers list 
and press 

ENTER

.

2.

Press 

INSERT

 to display the Available Queues list. Select 

the desired queue and press 

ENTER

. Assign a Priority 

level (recommended choice is 1) and press 

ENTER

.

3.

Press 

Alt-F10

 to exit PCONSOLE.

Confirming Successful Configuration

1.

Turn the printer off and on and wait for a Network 
Settings page to print. If the network is large, this may 
take several minutes. 

2.

The Novell Connection Information area on the Network 
Settings page displays the printer name, file server, 
queue, etc. If it displays Attached: Yes, this confirms that 
the NIC Print Server is ready to accept print jobs. If not, 
verify that the Print Server name matches exactly the 
Print Server name that was entered in PCONSOLE.

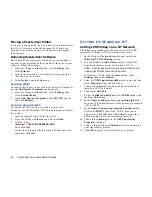
Installing and Configuring Your Printer Driver

In Windows, use the Add Printer feature to install and 
configure a SuperScript printer driver in each workstation 
that will access the network printer. 

note:

SuperScript printer drivers are on the SuperScript 

CD that came with the printer.

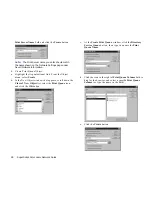
Specify that the printer will be attached as a Network Printer
and set the Port to the printer queue you just created. (The 
Windows NT 4.0 driver installs automatically to LPT1:. After 
installation, you can manually reset the port to your NetWare 
queue.)

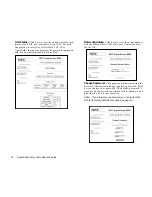
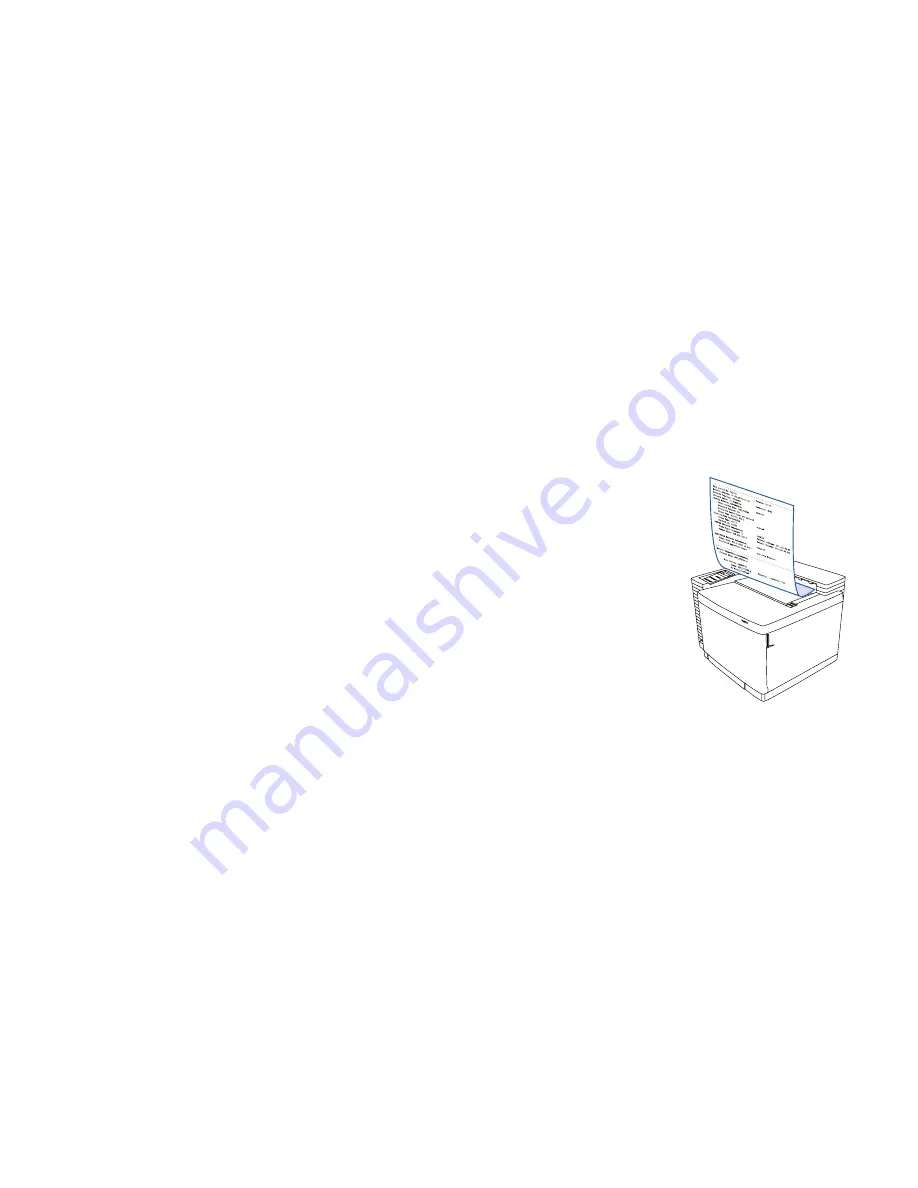
Check the Novell Connection 
Information area on the 
Network Settings page. If you 
experience difficulty call NEC 
printer tech support at 1-800-
632-4650.

Summary of Contents for SuperScript 4200

Page 1: ...S U P E R S C R I P T C O L O R L A S E R NETWORK GUIDE October 1999 703 A0368 001 ...

Page 2: ...cific product configurations and applications must be determined by the customer and is not warranted by NEC Technologies To allow for design and specification improvements the information in this document is subject to change at any time without notice Reproduction of this document or portions thereof without prior approval of NEC Technologies is prohibited NEC Technologies Inc 1999 Microsoft Win...

Page 3: ...ter 5 Windows Setup 21 Windows Peer to Peer 21 IP vs IPX Peer to Peer Printing 21 Installing Peer to Peer Software 21 Adding the Peer to Peer Printer 22 Moving a Peer to Peer Printer 24 Removing Peer to Peer Software 24 Setting Up Windows NT 24 Setting LPR Printing on an NT Network 24 Shared Printing in Windows 95 98 25 Chapter 6 NetWare Setup 27 NetWare 5 x and 4 x 27 Attaching the Printer 27 Ins...

Page 4: ...m Menus 44 PrintAgent Program Menu Commands 44 Pull Printing 46 Pull Printing from Your Desktop 46 Pull Printing User Settings 50 Setting Up a Pull Printing Server 51 Appendix A Troubleshooting 57 Network Printing Problems 57 Check the Printer Operation 57 Check the Network Settings Page 57 Check other Network Users 57 Review Recent System Changes 57 Check Hardware Connections 57 Check NIC Status ...

Page 5: ...If there is an N in the model number on the SuperScript printer such as 4600N it already has a network interface card NIC installed If it is a printer like the 4400 you can purchase a Network Interface Upgrade Kit and install a NIC yourself See Chapter 2 of this user s guide for instructions 2 Obtain the printer s IP address 3 Assign the IP address to the printer This step is not necessary if a DH...

Page 6: ...ology Printer Sharing Topology Peer to PeerTopology Peer to peer topology is the simplest way to network your printer It involves print clients a printer and a network to interconnect everything The network operating system NOS can be Microsoft NT Server Novell NetWare or UNIX Peer to peer is used primarily in smaller networks of 10 or fewer computers because peer to peer networking software limit...

Page 7: ...obs are sent to the printer in the sequence that they are received This process relieves a client from having to process the print job and allows them to focus on other computing tasks The server can also be configured for controlling access to the printer and recording all printing activity Shown below is a diagram of the printer server topology A LAN that interconnects the printer the print clie...

Page 8: ...ob while its performing other computing tasks it may slow down The network operating system NOS can be Microsoft NT Server Novell NetWare or UNIX The LAN can be any type of network that can interconnect the print clients Ethernet Corporate Intranet Printer SharingTopology Print Client Print Client Print Client Parallel Cable Printer A LAN is used to interconnect the print clients One print client ...

Page 9: ... it the ideal printer for workgroups and small offices INSTALLING THE NETWORK INTERFACE CARD NIC Order 4010 What You Will Need You will need to provide the following hardware to install the NIC in your printer and connect it to your network A phillips head screwdriver a Category 5 twisted pair cable with RJ 45 connectors for 10 100Base T Ethernet note The NIC automatically detects whether you have...

Page 10: ...lustrated on the opposite page 4 Two posts are used for fastening the NIC to the Controller Board Remove the screw from the lower one loosen the screw of the upper one and rotate the small bracket D Avoid touching the Controller Board circuitry and components 5 Remove the NIC from its protective bag E Handle the NIC only by its edges 6 Hold the NIC so that its circuitry faces inside the printer an...

Page 11: ...Installing the Network Interface Card NIC 7 NIC I NSTALLATION F G H D Installing the NIC Bracket E ...

Page 12: ... cord to the printer B plug in the printer 2 Turn on the printer C It may take up to 90 seconds to warm up and then it prints a Network Settings page with NIC status information note Keep the Network Settings page You will need this information when configuring the NIC for your network A B C Connecting the NIC The SuperScript Color Laser is now a network printer The rest of this guide gives inform...

Page 13: ...is displays the Network Administration Page 3 Click Configure Status Page then click Generate Now The Network Administration Page is described in Chapter 4 Unit Serial No 992048 Version 05 20 Network Address 00 40 af 79 19 80 Network Topology Ethernet Connector RJ45 Network Speed 10 Megabits Novell Network Information enabled Print Server Name NEC_992048 Password Defined No Preferred Server Name n...

Page 14: ...C for the new settings to take effect Turn the printer off and then on again or 1 Go to the URL Configuration Page the URL is http IP address configure html 2 Click on the Network Administration link This displays the Network Administration Page 3 Click Reset in the System column Restoring Factory Default Settings You can reset the NIC to its factory default settings This means that the NIC clears...

Page 15: ... processed and returned to the NIC A Network Settings page will print showing the printer IP address See page 16 for more information about DHCP Selecting an IP Address Assignment Method If a DHCP server is not present there are several ways to assign a TCP IP address to your printer Operator Panel Use the printer s Operator Panel to assign the IP address to the printer SuperScript MAP Utility Use...

Page 16: ...t values for each of the 12 digits in this manner First press Next to set the cursor to the first digit For the first digit press Select to increment to the correct value Then press Next to move to the next digit and press Select to increment to its correct value Continue until all twelve digits are set When the final digit is set press Next to confirm the Net Address you set and then press Select...

Page 17: ...lation Running MAP and Selecting a Printer In Windows 95 98 or Windows NT 4 0 1 Press the Start button 2 Select MAP from the program group you specified during installation 3 When MAP starts a list of all available units on the network is displayed by unit IP address or serial number The unit listing will be divided by TCP IP units and IPX SPX units See the illustration below note If a unit is ena...

Page 18: ...ox is displayed select Protocol and click Add button c When Select Network Protocol dialog box is displayed select Microsoft and TCP IP and click OK button d Then TCP IP Protocol is installed e Restart The new protocol and service will not be available until system is restarted Assigning the IP Address Use BOOTPL32 to set the IP address and other TCP IP parameters manually You can also use ARP pin...

Page 19: ...nd 3 and check the IP address on the new Network Settings page The new IP address can also be verified in BOOTPL32 by turning the printer off and on and selecting Verify from the Admin menu It should report that the Unit is Active Using ARP You can use the following procedure to set the IP address on the printer Then you can set the other IP parameters from the Network Administration page The netw...

Page 20: ...mportant If the NIC is not turned on or is not connected to the network when the DHCP server is sending requests to extend the lease the lease will not be extended The DHCP server will cancel the lease and may assign the IP address to another device Therefore it is highly recommended to explicitly specify the NIC lease as permanent or unlimited in your DHCP server configuration Verify that your pr...

Page 21: ...guration Page the URL is http IP address configure html 2 Click on the Network Administration link This displays the Network Administration page You can access the following functions through the Network Administration page System Functions Reset Click here to reset the NIC and allow new settings to take effect The NIC s connection with the network is fully reinitialized but its connection with th...

Page 22: ...abled or disabled Network Address Click here to view the serial number and the Ethernet MAC Media Access Control address for the NIC Change Password Changing any parameters using the Network Administration Page requires a password Click here to change your password The default password is sysadm Your password can contain letters numbers and punctuation and is case sensitive note If you forget your...

Page 23: ...l the way the NIC handles DHCP from the Network Administration Page To go there 1 Go to the URL Configuration Page the URL is http IP address configure html 2 Click on the Network Administration link This displays the Network Administration Page 3 Under Protocols click Setup TCP IP The two DHCP Settings are shown here The factory default is that both settings are checked When Enable DHCP is not ch...

Page 24: ...s page options In the dialog box that appears select the checkbox by Print Status Page on Startup to generate a status page the Network Settings page each time you turn on the printer or reset the NIC note We recommend that you leave this setting checked to print at power on To print out a Network Settings page immediately click Generate Now Printer Status Click here to display status information ...

Page 25: ... PeerToPeer IPX It is not necessary to have a NetWare file server on the network to use this protocol note If you use IPX peer to peer and there is no NetWare server in the network make sure that the Ethernet frame types for both printer and PC match Do not use Auto The printer s Ethernet frame type can be changed in the NetWare Configuration menu See page 19 Installing Peer to Peer Software Follo...

Page 26: ...elect Local printer and click Next 4 When the Add Printer Wizard dialog box is displayed click Have Disk and click Browse in the Install From Disk dialog box 5 When the Open dialog box is displayed select your printer s CD icon in the Drives field Then select autorun inf 6 Exit both the Open dialog box and the Install From Disk dialog box by clicking OK 7 Click Next in the Add Printer Wizard dialo...

Page 27: ... From the Windows Start button select Settings then Printers 11 Click on the printer icon and select Properties 12 Click on the Details tab 13 Click on the Spool Settings button to open the following dialog box 14 Select the Disable bi directional support for this printer radio button 15 Click OK 16 Under the General tab click on the Print Test Page button to make sure that the driver is installed...

Page 28: ...the Uninstall wizard prompts When removal is complete click OK SETTING UP WINDOWS NT Setting LPR Printing on an NT Network The following procedure can be used to set up the LPR spooler for a Windows NT 4 0 workstation server 1 In the Windows Network control panel install the Microsoft TCP IP Printing service 2 Use the Windows Add Printer wizard to install the SuperScript printer driver for Windows...

Page 29: ...OK and Click OK in the Network window 6 Next press the Windows Start button select Settings then select Printers 7 In the Printers window select the printer installed on LPT1 Click on it with the right mouse button and select Sharing from the pop up menu 8 Select Shared as and enter a name to identify the printer on the network Then click OK 9 On another PC press the Windows Start button select Se...

Page 30: ...26 SuperScript Color Laser Network Guide 13 Select the name of the shared printer and click OK 14 Proceed with normal installation as directed ...

Page 31: ...in the Directory Tree From the Object menu select Create b In the New Object window that appears scroll down the Class of New Object list select the Printer icon and click the OK button c When the Create Printer window appears type a name in the Printer Name field and click on the Create button 3 Create Print Server Object a Highlight the Organizational Unit From the Object menu select Create b In...

Page 32: ...tional Unit From the Object menu select Create b In the New Object window that appears scroll down the Class of New Object list select the Print Queue icon and click the OK button c At the Create Print Queue window click the Directory Service Queue button then type in a name for Print Queue Name d Click the icon to the right of Print Queue Volume field to display the browser and select a specific ...

Page 33: ...he Add button b In the Select Object window that appears find the print queue object just created among the choices listed in the Objects box and select it by clicking on it c Click on the OK button and the print queue is added to the Print Queues box in the Printer window Click on the OK button again 6 Assign Print Server Object a In the Directory Tree double click on the print server object you ...

Page 34: ...ick on the OK button Now the printer with its context appears in the Printers box of the Print Server window Click on the OK button 7 Check Assignments a At the Directory Tree double click on the Print Queue object you just created At the Print Queue window click on the Assignments button b If you configured the print queue and printer correctly they will appear in the proper boxes on the Print Qu...

Page 35: ... x NDS Configuration a On the Network Administration Page click on Setup NetWare in the Protocols column b In the NetWare Configuration menu that appears enter a name in the Print Server Name and Preferred File Server fields enter a name in the Preferred NDS Context field and enter a name in the Preferred NDS Tree field Leave the Preferred File Server field blank c Enter the password and click on ...

Page 36: ...Assigning the Print Queue 1 Select Queues Serviced By Printer and press ENTER Highlight the desired printer on the Defined Printers list and press ENTER 2 Press INSERT to display the Available Queues list Select the desired queue and press ENTER Assign a Priority level recommended choice is 1 and press ENTER 3 Press Alt F10 to exit PCONSOLE Confirming Successful Configuration 1 Turn the printer of...

Page 37: ...e that it is installed If it isn t use the Mac OS help system for information about installing it The standard Apple Script program must be installed and active before configuring your network configuration The NEC SuperScript PPD must be installed Hardware Requirements Hardware requirements are categorized into requirements for the Macintosh and requirements for the printer Macintosh Hardware Req...

Page 38: ... 2 as above it will automatically launch with the first installer 5 Make sure to select Install NEC SuperScript It makes no difference if you choose Custom Install or Easy Install 6 Click the Install button 7 The SuperScript printer driver will load 8 The installer will let you know when installation is complete To install other programs such as Adobe Acrobat 4 0 you must go back to the first wind...

Page 39: ...lity or you can request the Apple LaserWriter 8 5 1 driver installer disk set from Apple by calling 800 SOS APPL Then perform a custom install of the Apple Printer Utility 1 Launch the Apple Printer Utility 2 Select the zone in which your SuperScript printer resides 3 Select the printer you wish to rename and click Open Printer 4 Select the Name section of the window by clicking the arrow 5 Type y...

Page 40: ...ER Peer to peer printing allows PowerMac computers to print directly to a networked printer without an intervening file server Below are the main features of peer to peer printing Runs on PowerMacs or servers out of the box Runs on networks with or without a NetWare file server Implements peer to peer direct printing between mixed platform computers and networked printers You can configure network...

Page 41: ...ion for this job to the remote system The printer based lpd then filters the data and prints the job according to information contained in the control file and its own printcap file The following sections give specific lpd setup instructions for various systems The SuperScript 4400N printer will be used as an example You must log in as root in order to execute the commands Adding a SuperScript Col...

Page 42: ...to change printer description file etc printcap Type Y 4 Write a printer name For example type lprprinter1 5 Is lprprinter1 a remote printer or a local printer Type R 6 Enter remote host name type host name entered in printcap for the 4400N For example type lprprinter 7 Confirm the information you have entered Type Y 8 Confirm the preceding connection as your system default Type Y 9 Enter another ...

Page 43: ... Getting printer status PrintAgent features PrintAgent menus and commands NEC PrintAgent Pull Printing Pull Printing is an ideal solution for busy offices that print long complex or color rich documents With Pull Printing your job is sent to a Pull Printing server to be processed Then the Pull Printing server delivers the job to the printer This frees your computer and reduces network traffic You ...

Page 44: ...stem administrator must set the IP Address on the printer For instructions see Chapter 3 of this user s guide Second you must install the PrintAgent redipS software Go to the Printer Home page to download and install the NEC PrintAgent software and driver 1 Launch your web browser A 2 Enter the printer s IP Address as the URL to reach the printer s Home page 3 Click on the Install Driver button to...

Page 45: ...E 7 Restart your computer for the new driver to take effect note You can also install Remote Printing software from the SuperScript CD that came with your printer Simply choose NEC PrintAgent from the Select Components dialog box during Custom Network Client installation F Remote Printing From Your Desktop Now you can print as usual from your applications just select Print from the File menu and c...

Page 46: ...tions for configuring PrintAgent and managing print jobs Under File Menu Select Cancel Print Job to cancel the job currently being processed Select Print PostScript File to display a browser for selecting a PostScript file to transfer to the printer Select View Print Queue to display the Print Queue window to view and delete jobs Select Exit to quit the PrintAgent program Under View Menu Select op...

Page 47: ...s including changing the printer name password changing the reference URLs cancelling a print job or sending files to the printer To make changes in Printer Administration you must enter the Administration Password The default password is Seattle Help Button When a message is present in the PrintAgent window press the Help button for more details or instructions When no messages are present clicki...

Page 48: ...ges Keeping it running speeds print time because you won t have to wait for PrintAgent to start up every time you print In order to monitor printer status PrintAgent must be running When PrintAgent first starts a red planet icon appears in the Windows taskbar in the lower right hand corner of the screen If the planet doesn t turn green after five seconds PrintAgent did not launch properly Restart ...

Page 49: ... unable to establish communication with the printer go to the printer s home page using your Web browser If the proxy settings are correct in the browser and the Web page is not found the problem is with the printer and you should contact the network administrator Remove Printers To remove a PrintAgent printer select Remove Printer from the PrintAgent menu In the Printer Selection dialog box that ...

Page 50: ...age To pull print from your desktop you must have Microsoft s Internet Explorer 5 0 or Netscape Communicator 4 6 and above with Java 1 1 support You can print the following types of documents using the Pull Printing page Word doc Excel xls and PowerPoint ppt files Adobe Acrobat pdf files Any Web page on the Internet gif jpg jpeg txt c h java bak rtf ps html and htm files can also be printed Suppor...

Page 51: ...s not installed you will be notified To print a web page press the Print a URL button http appears in the text field Type in the desired URL Send document to printer Pull Printing Page To get this page go to your printer s home page and select Pull Printing Use the Browser text field to enter a file location or the URL of a web page Send a web page to a designated printer Logon as a different user...

Page 52: ...ccepting cookies the property settings along with any watermarks you may have created will be saved upon sending the print job The next time you pull print to that particular printer the property pages will preset to match your previous preferences View Status Monitor When you click the View Status Monitor button the PrintAgent Status Monitor appears The animated printer image shows the printer st...

Page 53: ...l a job select the job and press the cancel button Only the person who sent the job can cancel it Print jobs from other users can only be canceled by a network administrator Print Job History Clicking the Print Job Status button brings up the Print Job Status page The following information about your print jobs can be found here Job name Print status Printer name Job history Although you can track...

Page 54: ...lity to save your printer settings and any watermarks you make you must accept any cookies we set This also gives you the ability to cancel any print jobs you send that are still in the print queue A cookie is a small piece of data that the browser stores on your hard drive Each cookie has a maximum limit of 4 kilobytes Although driverless printing will work if cookies are not accepted it will not...

Page 55: ...ary File Server software 3 Configure URLs This section also provides instructions for Setting Local User s Web Browser Preferences optional Pull Printing from Your Desktop PrintAgent Core and Server Installation You must install the NEC PrintAgent Core software and the Pull Printing server software You can also install the Secondary File server software All three can be installed at once using the...

Page 56: ...he Select Components dialog box 6 When the P2P IP Setup dialog box is displayed click Next 7 When the SuperScript Color Laser Setup Information dialog box is displayed click Continue to proceed to NEC PrintAgent or click Exit to exit the SuperScript setup 8 When the Adobe PS 4 2 PostScript Printer Driver Setup dialog box is displayed click Next a When the Printer Type dialog box is displayed selec...

Page 57: ... no more printers to be installed click Exit 9 PrintAgent System Setup When the Welcome to NEC PrintAgent dialog box is displayed click Next Then the PrintAgent Setup starts When the Add RedipS Enable Printer dialog box is displayed enter the URL IP Address of the printer and click Install 10 When the SuperScript Setup Information dialog box is displayed click Continue to proceed to Pull Printing ...

Page 58: ... secondary server and then changing the URLs to point to that server This frees the printer to process print jobs When Secondary File Server installation is complete the PrintAgent core files have been copied into the htdocs directory so the Secondary File server is ready to respond to file transfer requests However if you want the Secondary File server to deliver the two server exe files you must...

Page 59: ...st in the text field not the printer s IP address 3 If you have a Secondary File server enter its IP Address as URL for the Driver Help files and PrintAgent software 4 You can also specify any URL as the Home Page for clients 5 Click on the Submit Values to Printer button note Printer URLs can use either the printer s IP Address or the printer s Domain Name if one has been assigned For example htt...

Page 60: ...find other plug ins for Internet Explore 4 01 you can add the file types supported by the plug ins to the inetpub cgi bin kickIE ini file under the Support Type tag Please remember to increase the value of the NumberOfTypes variable Starting the Pull Printing Server You can launch the Pull Printing server by pressing the Windows Start button selecting Programs selecting NEC PrintAgent Pull Service...

Page 61: ...or 10 100Base T ethernet Check that the network connector is plugged into the RJ 45 connector on the NIC Try another cable to make sure you do not have a bad cable If you are using a 10 100Base T concentrator hub that does not support the link signal use Manual Ethernet Port selection instead of the factory default Automatic Ethernet Port selection Check NIC Status Lights Check the NIC s status li...

Page 62: ... printer Use PCONSOLE to check Did you have the proper rights to configure the printer Computer Checklist Is the network loaded onto the computer See your NetWare documentation Is the application set up to print to the printer Are you using the correct driver Is the workstation connected to the correct print queue Print a file and verify that the file goes to the queue Are the print queues assigne...

Page 63: ...ection If the network printer loses its connection to the file server it will take approximately five to 10 minutes to reconnect If the connection is not made after a reasonable amount of time check the error conditions to troubleshoot the problem Unable to Print from a Different Context The NIC does not support printing from a context other than the one you specified using the MAP utility on your...

Page 64: ...60 SuperScript Color Laser Network Guide ...

Page 65: ...600 Offline gif E WebJetAD nec_super_script_4600 PaperJam gif Copying the Files Copy Files to corresponding Web JetAdmin Folders Path may vary depending on your Web JetAdmin version C Program Files HP Web JetAdmin4 0 doc devices nec_super_script_4600 glf C Program Files HP Web JetAdmin4 0 doc devices Icons Nss4600i gif C Program Files HP Web JetAdmin4 0 doc devices Images Nss4600 gif C Program Fil...

Page 66: ...min Settings 3 Click on Modify Discovery Settings on the right side under HP Web JetAdmin Global Settings 4 This displays the Discovery Mechanisms page Scroll down to the Clear Database section and click on the Clear button 5 The Success page appears At the top of the frame click the Discovery Settings button to re enter the Discovery Mechanisms page ...

Page 67: ...Discovery is still in progress by clicking on the Discovery Settings button 7 If it is done click on the Find Device button then click on Search Now 8 When the list of discovered printers is displayed select your printer based on its Network MAC Address from the Network Settings page 9 You will then see the printer s properties and status ...

Page 68: ...64 SuperScript Color Laser Network Guide ...

Page 69: ...r is directed towards the face of personnel The existing ozone filter is in poor condition Long continuous printing combined with any of the above Inspect your work environment for the operating conditions listed above if you believe ozone emissions are a problem in your area Some people may be ultra sensitive to ozone odor If these situations are encountered it is advisable to position the printe...

Page 70: ...xperienced radio or TV technician for help Use a shielded and properly grounded I O cable to ensure compliance of this unit to the specified limits of the rules If your printer is a model already equiped with a network card such as the NEC SuperScript 4600N or if you have installed the optional Network Interface Card NIC the printer meets the requirements of FCC Class A when connected to an Ethern...

Page 71: ... requirements 33 MAP installing 13 Microsoft Internet Explorer 46 Microsoft Office 97 46 Microsoft printer sharing 4 N NEC PrintAgent 39 51 NetWare 19 58 attaching printer 27 NetWare 3 x 32 assign print queue 32 configure printer driver 32 define print queue 32 define print server 32 define printer 32 print queue information 32 print server configuration 32 print server information 32 printer conf...

Page 72: ...printer sharing 4 printer status 20 printer s home page 39 printing driverless 39 peer to peer 21 shared 25 protocol address 9 protocol functions 19 Pull Printing 39 46 canceling a job 50 secondary file server 54 sending a job 47 Server installation 51 server system recommendation 51 server system requirements 51 Pull Printing page 46 Pull Printing server 46 51 56 R redipS 39 redipS icon 50 Remote...

Reviews: