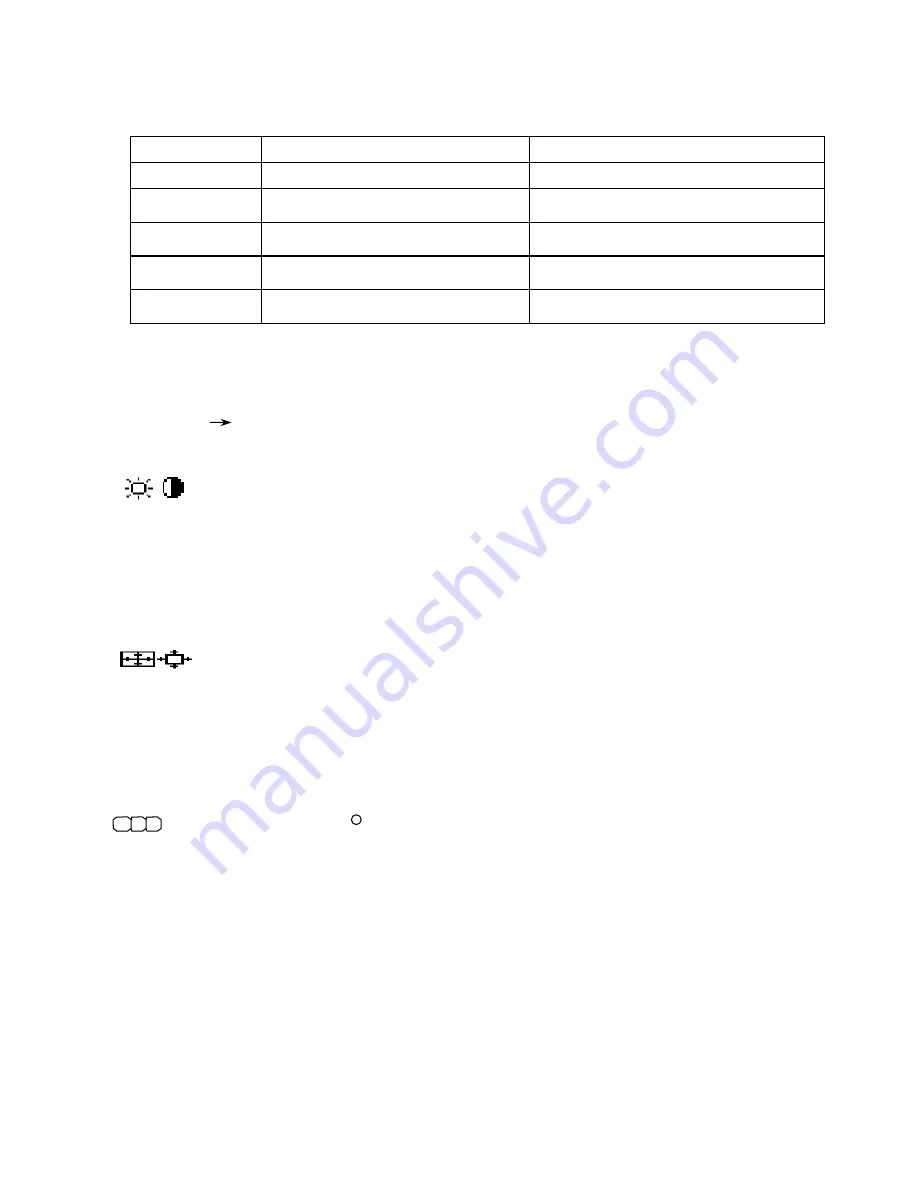
CONTROLS
OSM
TM
(ON-Screen Manager) control buttons on the front of the monitor function as follows:
Main Menu
Sub-Menu
EXIT
Exits the OSM menu.
Exits to the OSM controls main menu.
▲
▲
▲
▲
/
▼
▼
▼
▼
Moves the highlighted area up/down to
select one of the controls.
Moves the highlighted area up/down to select
one of the controls.
-
-
-
-
/
+
+
+
+
Moves the highlighted area left/right to
select one of the controls.
Moves the bar in the - or + direction to
decrease or increase the adjustment.
PROCEED
Has no function.
Only executes control or enters sub, sub-
menu.
RESET
Resets all the controls within the
highlighted menu to the factory setting.
Resets the highlighted control to the factory
setting.
NOTE : When
RESET
is pressed in the main and sub-menu, a warning window will appear allowing you to
cancel the reset function.
When OSM controls are activated, icons are displayed at the top of the menu.
If an arrow ( ) is displayed in a sub-menu, it indicates further choices are available.
To enter a sub, sub-menu, press PROCEED.
Brightness/Contrast Controls
Brightness :
Adjusts the overall image and background screen brightness.
Contrast :
Adjusts the image brightness in relation to the background.
Degauss :
Eliminates the buildup of stray magnetic fields which alter the correct scan of the electron
beams and affect the purity of the screen colors, focus, and convergence. When activated, your screen
image will jump and waver a bit as the screen is demagnetized.
Caution : Please allow a minimum of 20 minutes to elapse between uses of the Degauss Control.
Size and Position Controls
Auto Adjust :
Automatically adjusts the horizontal and vertical size and position settings for applicable
signal timings.
Left/Right :
Moves the image horizontally (left or right).
Down/Up :
Moves the image vertically (up or down).
Narrow/Wide :
Decreases or increases the horizontal size of the image.
Short/Tall :
Decreases or increases the vertical size of the image.
R G B
Color Control / AccuColor
R
Control System
Color Presets 1 through 5 selects the desired color setting. The bar is replaced by the color setting
choice from 1 to 5. Each color setting is adjusted at the factory to the stated Kelvin. If a setting is
adjusted, the name of the setting will change from Kelvin to Custom.
Red, Green, Blue :
NEC’s AccuColor Control System decreases or increases the monitor’s red, green,
or blue color guns depending upon which is selected. The change in color will appear on screen and
the direction (decrease or increase) will be shown by the bars.
2-1
Summary of Contents for MultiSync FP1370
Page 13: ...4 4 REMARK SYMBOL Mount the EMF PWB 121E REMARK SYMBOL Clamp the connector ...
Page 14: ...4 5 REMARK SYMBOL COIL FORMING UPPER SIDE REMARK SYMBOL COIL FORMING LOWER SIDE ...
Page 23: ...4 14 REMARK SYMBOL REMARK SYMBOL Clamp CN CA CN CC and CN D with CLAMPER WIRE ...
Page 26: ...4 17 REMARK SYMBOL Clamp the wires SAFETY REMARK SYMBOL Clamp the wires CN ASD CN AF 21 ...
Page 80: ...5 51 Fig 3 11 CONV PWB Fig 3 12 EMF PWB CN EMF CN LL CN RR CNEM CN CA CN D CN CCB HS8N1 ...
Page 143: ...8 18 15V 80V AFC D FOCUS Fig 3 1 HIGH VOLTAGE CIRCUIT AND PROTECTOR CIRCUIT ...
Page 260: ...10 1 ...
Page 261: ...10 2 ...
Page 262: ...10 3 ...
Page 263: ...10 4 ...
Page 264: ...10 5 ...
Page 266: ...for Human Potential ...
Page 267: ......
Page 268: ......
Page 269: ......
Page 270: ......
Page 271: ......
Page 272: ......
Page 273: ......
Page 274: ......
Page 275: ......
Page 276: ......
Page 277: ......
Page 278: ......
Page 279: ......
Page 280: ......
Page 281: ......
Page 282: ......
Page 283: ......
Page 284: ......
Page 285: ......
Page 286: ......


