background image

User's manual MobileNavigator | 5 

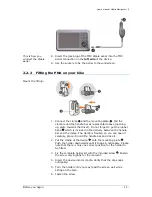
Operating the navigation software 

- 21 -  


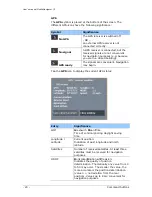
Entry 

Significance 


Speed 

Indicates your current speed. 


Position 

Indicates the address of your current 
position. 


Save 

Tap this button to add the current address to 
the F

AVOURITES


Quit 

Tap this button to quit the GPS screen. 


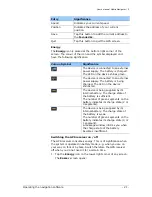
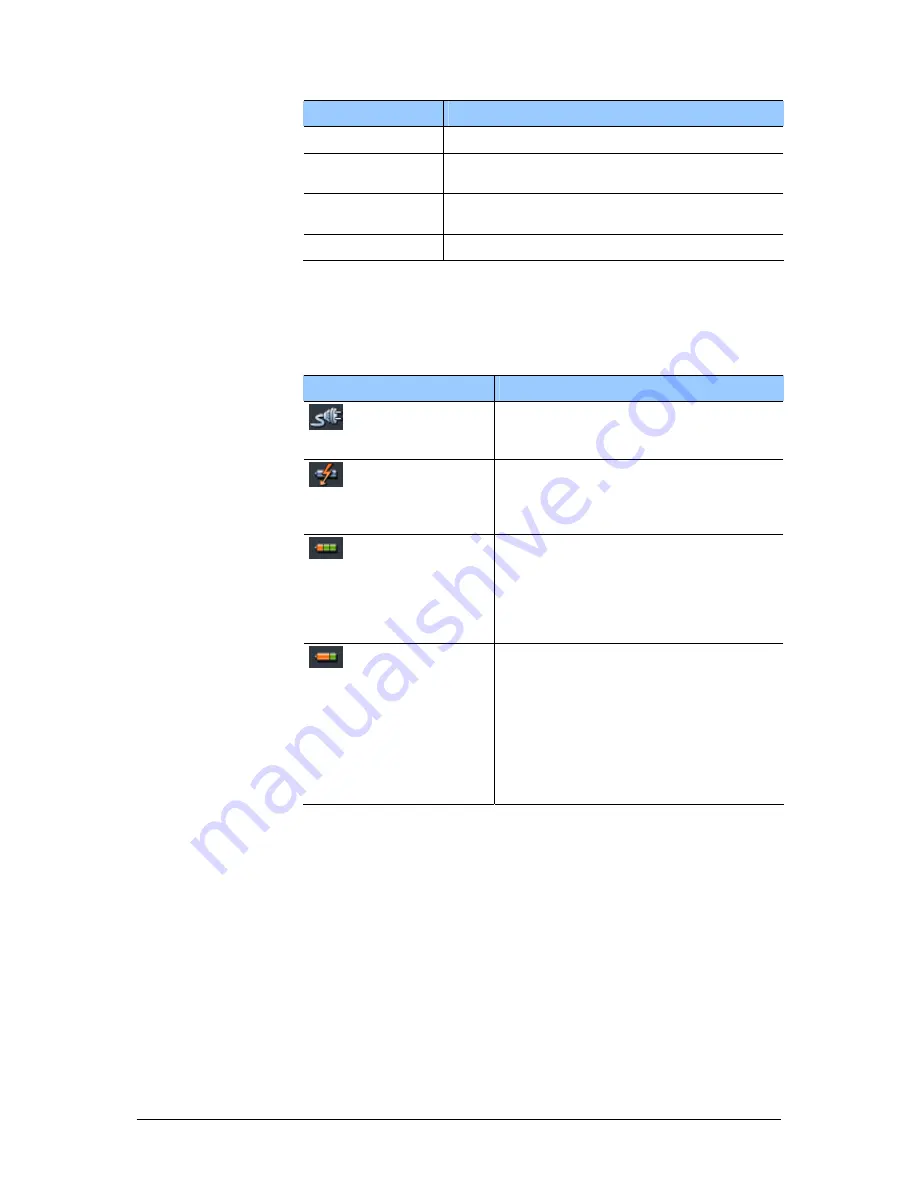
Energy 
The Energy icon is placed at the bottom right corner of the 
screen. The colour of the icon and the symbol displayed on it 

have the following significance:  


Colour/Symbol 

Significance 


The device is connected to an external 
power supply. The battery is charged. 
The LED on the device shines green.  


The device is connected to an external 
power supply. The battery is being 
charged. The LED on the device 

shines red. 


The device is being supplied by its 
internal battery. The charge state of 
the battery is sufficient. 

The number of green segments on the 
battery indicates its charge state (2 or 

3 segments).  


The device is being supplied by its 
internal battery. The charge state of 

the battery is weak. 
The number of green segments on the 

battery indicates its charge state (0 or 
1 segment). 

A message window informs you when 
the charge state of the battery 

becomes insufficient.  


Switching the GPS receiver on / off  
The GPS receiver consumes energy. This is of significance when 
the system is operated in battery mode, e.g. when you are on 

your way on foot or by bike. Switch therefore the GPS receiver 
off when you do not need it for a certain time. 
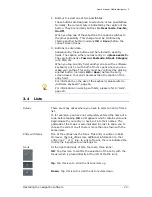
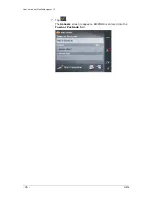
1.


Tap the Energy icon on the lower right corner of any screen. 
The E

NERGY

 screen opens: 

Summary of Contents for MobileNavigator 5

Page 1: ...User s manual MobileNavigator 5 as on June 2006...

Page 2: ...ined herein may be changed at any time without prior notification This manual nor any parts thereof may not be reproduced for any purpose whatsoever without the express written consent of NAVIGON AG n...

Page 3: ...Important safety information 13 2 4 1 Safety information on navigation 13 2 4 2 Safety information on handling the PNA 14 2 4 3 Safety information on the installation in the vehicle 14 3 Operating the...

Page 4: ...th the map 71 6 1 Selecting a map 72 6 2 Operating the map 73 6 3 Representation of the map in navigation mode 79 6 4 Displaying additional information on the map 81 7 Useful functions for navigation...

Page 5: ...User s manual MobileNavigator 5 Introduction 3 1 Introduction Topics covered in this chapter 1 1 Search facilities and conventions page 4 1 2 Liability page 4 1 3 Support page 5 1 4 Trademarks page 5...

Page 6: ...are s user interface Also used for highlighting warnings and notices bold italic Registered names and trademarks SMALL CAPITALS Window and dialogue box titles underlined italic The name of the user mo...

Page 7: ...nds and trademarks mentioned in this document are possibly registered by third party and subject to the current legislation and to the rights of their respective owners without reservation All mention...

Page 8: ......

Page 9: ...tion software Transmitting maps to a memory card Restoring the files of the memory card 2 2 Installing the hardware page 10 Installing the PNA in the vehicle Fitting the PNA on your bike 2 3 The basic...

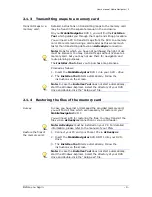
Page 10: ...e It should snap in Note The memory card must stay inserted in the device while you are using the navigation system If you remove the card while using the system it executes a soft reset and prompts y...

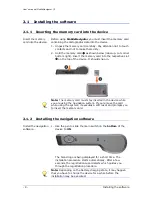
Page 11: ...e 2 The Installer Tool Starts automatically Follow the instructions on the screen Note In case the Installer Tool does not start automatically start the Windows Explorer Select the directory of your D...

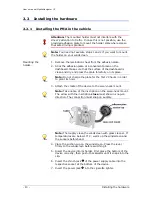
Page 12: ...forcefully on its place Note Do not charge the plate for the first 24 hours in order to grant its hold 3 Attach the cradle of the device to the swan neck mount Note Take notice of the inscription on t...

Page 13: ...orget to put the rubber band which is included in the delivery between the handle bar and the clamp The clamp is flexible so you can open it carefully place it round the handle bar and close it 2 Put...

Page 14: ...tart point to a given destination point In case your navigation system receives the signals of at least three satellites it may determine your current position and represent it on the map This positio...

Page 15: ...so Caution The road layout and the traffic signs are absolutely prior to the instructions of the navigation system Caution You must not follow the instructions of MobileNavigator except when the circu...

Page 16: ...the car parked for a long period of time Failure to do so might result in a dead battery since the internal GPS receiver constantly consumes electricity Note Do not use any harsh solvents for cleaning...

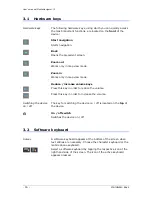
Page 17: ...on software 15 3 Operating the navigation software Topics covered in this chapter 3 1 Hardware keys page 16 3 2 Software keyboard page 16 Character keyboard Mobile phone keyboard 3 3 Command buttons p...

Page 18: ...volume keys Press this key in order to reduce the volume Press this key in order to increase the volume Switching the device on off The key for switching the device on off is located on the top of the...

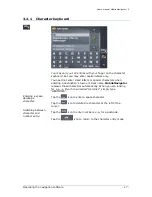
Page 19: ...entering a destination s town or street name MobileNavigator replaces these characters automatically When you are looking for e g a French town called H ro n s simply type HEROINES Entering a space de...

Page 20: ...ursor If you want to delete another character than the one to the left of the cursor position or if you want to insert a character at another place than at the end of the text you have to move the cur...

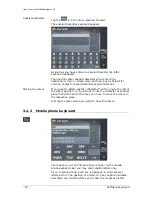
Page 21: ...ters that may be entered by this key The active character is highlighted If e g you want to type tap the MNO key repeatedly until is highlighted in the line above the software keyboard You need not en...

Page 22: ...ient Navigation may begin Tap the GPS icon to display the current GPS status Entry Significance GMT Greenwich Mean Time Time of London ignoring daylight saving time Longitude Latitude Current position...

Page 23: ...s being charged The LED on the device shines red The device is being supplied by its internal battery The charge state of the battery is sufficient The number of green segments on the battery indicate...

Page 24: ...on The TMC receiver is ready but cannot receive TMC signals This is the case when e g you are in an area where TMC is not available TMC ready TMC signals are being received TMC Tap this icon to displa...

Page 25: ...ur entry becomes then the caption of the entry field For information on the use of the keyboard please refer to Software keyboard page 16 For information on working with lists please refer to Lists pa...

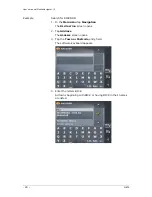
Page 26: ...1 In the MAIN MENU tap Navigation The DESTINATION screen opens 2 Tap Address The ADDRESS screen opens 3 Tap the Town or Postcode entry field The software keyboard appears 4 Enter the letters BICK All...

Page 27: ...st is very long you may enter one more letter in order to shorten the list 5 Enter N All towns beginning with BICKN or having BICKN in their names are listed 6 Tap the Down icon repeatedly until BICKN...

Page 28: ...User s manual MobileNavigator 5 26 Lists 7 Tap The ADDRESS screen reappears BICKNOR is entered into the Town or Postcode field...

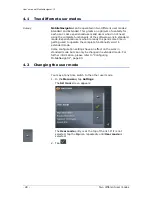
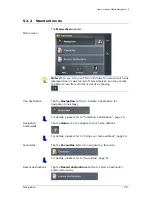
Page 29: ...manual MobileNavigator 5 User modes 27 4 User modes Topics covered in this chapter 4 1 Two different user modes page 28 4 2 Changing the user mode page 28 4 3 Standard mode page 30 4 4 Extended mode p...

Page 30: ...who are ready to spend some time in getting used to operate the complete functionality word in extended mode Some configuration settings have an effect on the work in standard mode but can only be ch...

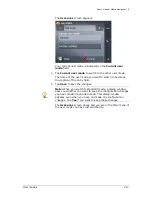
Page 31: ...h to becomes the caption of the entry field 4 Tap Save to save the changes Note When you switch to standard mode a dialog window asks you whether you want to keep the configuration changes you have ma...

Page 32: ...destinations Select a destination from the recent destinations list Change some configuration settings 4 4 Extended mode Survey In extended mode you dispose of the complete functionality of MobileNavi...

Page 33: ...an address Selecting a point of interest Indicating destinations on the map Favourites Recent destinations Using your home address 5 5 Destination management page 54 Saving a destination Renaming a de...

Page 34: ...ing so MobileNavigator will guide you to your destination even when you have gone off course from your route Obstructed GPS reception When you turn off the GPS receiver or when the reception of GPS si...

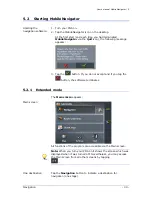
Page 35: ...appears 3 Tap the button If you do not accept and if you tap the button the software terminates 5 2 1 Extended mode The MAIN SCREEN appears Main screen All functions of the program are accessible via...

Page 36: ...ning purposes For details please refer to Indicating several destinations Itinerary with stages page 57 Display the map Tap the Show map button to display the map which is currently in use Select map...

Page 37: ...ation Tap the Navigation button to indicate a destination for navigation one stage For details please refer to Indicating a destination page 40 Navigation homewards Tap the Home icon to navigate to yo...

Page 38: ...settings of MobileNavigator For details please refer to Settings page 94 Quit Tap the Quit button to quit MobileNavigator 5 3 Basic settings Basic settings Before working with MobileNavigator we reco...

Page 39: ...egion you are currently staying in GMT without daylight saving time The indication of capitals lying in the respective time zones makes the selection easier 5 Tap Ok 6 If there is currently daylight s...

Page 40: ...art navigation homewards from anywhere Saving your home address 7 Via the arrow buttons select the HOME ADDRESS screen 8 Tap Enter your home address The DESTINATION screen opens 9 Tap the Address butt...

Page 41: ...User s manual MobileNavigator 5 Navigation 39 The address is indicated on the HOME ADDRESS screen 11 Tap Save The MAIN SCREEN opens...

Page 42: ...inations Entering an address see page 40 Selecting a point of interest see page 42 Indicating destinations on the map see page 49 Favourites see page 51 Recent destinations see page 53 Using your home...

Page 43: ...ode For information on working with lists please refer to Lists page 23 3 Enter the destination street into the Street entry field 4 Enter the house number of your destination into the Nr field if you...

Page 44: ...ngs and others belong to the special destinations Indicate a point of interest by selecting one Point of interest nearby Note You may only select Points of interest nearby when the GPS receiver is tur...

Page 45: ...nearby Standard mode 1 In the MAIN MENU tap Navigation The DESTINATION screen opens Tap the Country entry field and select the destination country if it is not yet indicated Note Only countries of wh...

Page 46: ...f points of interest to search for from the right one of the two Category list fields e g Audi VW Seat Skoda For information on working with lists please refer to Lists page 23 Note If you leave the S...

Page 47: ...N screen opens Tap the Country entry field and select the destination country if it is not yet indicated Note Only countries of which at least a part is represented on the currently loaded map may be...

Page 48: ...of interest in a certain town The POI in a town screen opens 2 Enter the name of the town in which you want to search for points of interest into the Town or postcode field 3 Select the main category...

Page 49: ...of interest of supraregional significance This function is only available in Extended mode For information on how to change the user mode please refer to Changing the user mode page 28 1 In the MAIN M...

Page 50: ...o search for from the Category list field e g Airports 3 Select the correct destination from the Point of interest list field For information on working with lists please refer to Lists page 23 Note Y...

Page 51: ...the user mode please refer to Changing the user mode page 28 Extended mode 1 In the MAIN MENU tap Navigation The DESTINATION screen opens Tap the Country entry field and select the destination countr...

Page 52: ...he following options This function is only available when GPS reception is possible The GPS symbol must be GPS ready Tap the Start navigation button to start navigation to the selected place Caution U...

Page 53: ...m destination button to make the selected point the next stage point of your itinerary Your route will be recalculated immediately 5 4 4 Favourites Survey All destinations you have saved by tapping th...

Page 54: ...n Note An asterisk behind a name indicates that a voice command for the respective destination has been stored For information on working with lists please refer to Lists page 23 3 Tap The ADDRESS scr...

Page 55: ...om the RECENT DESTINATIONS list Extended mode 1 In the MAIN MENU tap Navigation The DESTINATION screen opens Tap the Country entry field and select the destination country if it is not yet indicated N...

Page 56: ...culation is based on the settings you have configured in SETTINGS ROUTE OPTIONS For details please refer to Settings page 94 5 5 Destination management Survey Destinations may be stored in two lists t...

Page 57: ...ave opened the RECENT DESTINATIONS list tap the Edit icon The NAME OF DESTINATION screen opens 2 Enter a name for the destination For information on the use of the keyboard please refer to Software ke...

Page 58: ...screen opens 2 Select the destination you want to rename For information on working with lists please refer to Lists page 23 3 Tap the Edit icon The NAME OF DESTINATION screen opens 4 Enter the new n...

Page 59: ...ists page 23 2 Tap the Delete icon The CONFIRM screen opens 3 Tap to delete the destination from the list The destination is now deleted from the list 5 6 Indicating several destinations Itinerary wit...

Page 60: ...1 Indicating route points Planning itineraries 1 On the MAIN MENU tap Route planning The ROUTE PLANNING screen opens 2 Tap the Add route point icon to enter the first route point The DESTINATION scree...

Page 61: ...User s manual MobileNavigator 5 Navigation 59 The ITINERARY PLANNING screen opens The destination is added as stage point 1 5 Repeat steps 2 4 for every stage point you want to add to the itinerary...

Page 62: ...mes to move the selection several route points up Down Tap this icon to move the selection one route point down Tap this icon several times to move the selection several route points down Changing the...

Page 63: ...erary For information on the use of the keyboard please refer to Software keyboard page 16 3 Tap OK Note Only the route points will be saved If you load an itinerary you will have to recalculate it Lo...

Page 64: ...icon is deactivated if there is no saved itinerary available The SELECT ITINERARY screen opens For information on working with lists please refer to Lists page 23 2 Tap the Edit icon The NAME OF THE...

Page 65: ...OK to load the renamed itinerary OR Tap the Back icon to open the ROUTE PLANNING screen without loading an itinerary Delete itinerary 1 Tap the Load itinerary icon This icon is deactivated if there is...

Page 66: ...The deleted route is no more listed 5 6 3 Calculating the route An itinerary may be calculated even without GPS reception in order to get an impression on the route The system assumes then the first...

Page 67: ...he ROUTE OPTIONS screen For detailed information on changing the standard settings refer also to Configuring MobileNavigator page 93 3 Tap the Calculate route icon The route is being calculated A mess...

Page 68: ...screen opens The itinerary is highlighted in orange The route points are marked by flags For information on working with maps please refer to Working with the map page 71 5 6 5 Simulating the route Si...

Page 69: ...he Show on map button The itinerary is displayed on the map 2 Tap short on any place on the map The ADDITIONAL FUNCTIONS screen opens 3 Tap Simulation The route will be recalculated for simulation pur...

Page 70: ...avourites page 51 OR You have selected one of your RECENT DESTINATIONS as described in Recent destinations page 53 OR You have planned or loaded an itinerary as described in Indicating several destina...

Page 71: ...the route The first indicated route point is then the first stage point of your route Standard mode 1 Tap Start navigation The system calculates the route The map screen opens Your current position i...

Page 72: ...g message appears You have two possibilities Wait until navigation starts This will happen as soon as the GPS reception is sufficient Tap Cancel and restart navigation as soon as the reception of GPS...

Page 73: ...ith the map 71 6 Working with the map Topics covered in this chapter 6 1 Selecting a map page 72 6 2 Operating the map page 73 6 3 Representation of the map in navigation mode page 79 6 4 Displaying a...

Page 74: ...orer Select the directory of your DVD drive and double click the Setup exe file Note Maps for which you have not purchased the right of use must be activated Please refer to the separate manual in the...

Page 75: ...nd on whether you are in navigation mode or not Displaying the map You may display the map while planning an itinerary in order to show destinations on the map or in order to select destinations on th...

Page 76: ...ace on the map makes the ADDITIONAL FUNCTIONS screen appear Depending on whether you are in navigation mode or not this screen offers different functions Tapping long a certain place on the map tap an...

Page 77: ...he Freeze icon to toggle between Frozen map and Frozen position Frozen position default This mode button down makes the map scroll continually Your current position green arrow is always centred in th...

Page 78: ...n up to orientate the map in driving direction 3D view Tap this icon to display the map in 3D mode bee flight view 2D view Tap this icon to return to the 2D mode standard Zoom in Tap Zoom in to scale...

Page 79: ...mode Tap Quit navigation to exit navigation mode Block road Unblock These functions are only available in navigation mode For details please refer to Blocking a route section page 87 Set interim dest...

Page 80: ...hen you are working in extended mode Use this function if you want to skip the next stage point Example You have planned an itinerary from your office to Company A and then to Company B and you are al...

Page 81: ...e to be executed immediately after the next manoeuvre d The green arrow indicates your current position on the map Since the displayed sector of the map changes continually your current position is ce...

Page 82: ...artographic material Caution Information contained in the cartographic material can be wrong e g due to road works Traffic situation and road traffic regulations are absolutely prior to the informatio...

Page 83: ...utton on the MAIN MENU or by tapping short into the map and selecting Preferences The SETTINGS screen opens 2 Select Map information using the arrow buttons Info bar The Info bar at the bottom of the...

Page 84: ...ent stage lower section will be displayed at the right hand side of the map Section Information This symbol means itinerary All information displayed below refers to the final destination This symbol...

Page 85: ...tion The Show traffic signs command indicates whether signposts indicating exits from motorways or highways are currently being displayed or not 9 Tap the Show traffic signs command to toggle between...

Page 86: ...lt up areas This command indicates from how much speeding on you want to be warned when driving within built up areas Tap the Warning in built up areas command to select another value or to set it to...

Page 87: ...ctions for navigation 85 7 Useful functions for navigation Topics covered in this chapter 7 1 Adding a stage point during navigation page 86 7 2 Next destination page 87 7 3 Blocking a route section p...

Page 88: ...itinerary The route will be recalculated in order to make the new stage point the next destination to navigate to The other remaining stage points will be navigated to after the new one Adding a stag...

Page 89: ...next here Company B The system recalculates the route Company B will be your next destination 7 3 Blocking a route section Blocking a route section manually You may block a route section manually in...

Page 90: ...e route which had been calculated originally 7 4 Using TMC functionality TMC receiver A TMC receiver provides the navigation system with the latest traffic information and enables dynamic route calcul...

Page 91: ...eceived since the TMC screen has been opened Closing the TMC screen 4 Tap the OK icon to close the TMC screen Considering TMC information for route calculation Considering TMC information for route ca...

Page 92: ...e Ignore button to ignore the reported obstruction Considering TMC information at a later moment If you have selected Route modification With confirmation you may evade or ignore a reported obstructio...

Page 93: ...ing received press straight on the centre of the cursor pad as often as necessary to display Hold station The TMC receiver holds now this station Nevertheless it changes the frequency when the same st...

Page 94: ......

Page 95: ...avigator Topics covered in this chapter 8 1 Settings page 94 User mode Map information Route information Signpost information Speed limit Volume Representation Touch screen calibration Automode Routin...

Page 96: ...see page 98 Touch screen calibration see page 98 Automode see page 99 Routing options see page 100 Itinerary see page 101 Time zone see page 101 Format see page 101 TMC see page 102 Home address see...

Page 97: ...hanges Tap Yes Restoring the factory settings 1 If you want to restore the factory settings tap the Factory settings command 2 Confirm the restoration 8 1 2 Map information This function is only avail...

Page 98: ...Remaining distance to the final destination estimated Tap the respective command buttons to display On or not Off the respective information on the map All information displayed below refers to the fi...

Page 99: ...sts indicating speed limits are currently being displayed or not Tap the Show traffic signs command and select whether speed limits should be displayed Always On speeding only or Never Warning in buil...

Page 100: ...page 28 Representation On the REPRESENTATION screen you may effect the following modifications Setting Signification Skin Skins are made to personalize the user interface of MobileNavigator Tap the Sk...

Page 101: ...utozoom or No Autozoom With Autozoom the system changes the scale of the map depending on your current speed When you drive slowly the scale becomes small When you drive fast the scale becomes high 2D...

Page 102: ...when a TMC receiver is connected With this option the quickest route will be calculated Reported traffic obstructions on your route will be considered automatically The Fast route is being calculated...

Page 103: ...e zone Calculation of arrival times On the TIME ZONE screen select the time zone of the region you are currently staying in This is necessary for the system to indicate correct times of arrival in nav...

Page 104: ...in Entering an address page 40 3 Tap the Set as home address button The address is indicated on the HOME ADDRESS screen 8 1 16 Radio Mute This function is only available in Extended mode For informati...

Page 105: ...latitude of its own current position The signals of at least three satellites are needed to determine the longitude and the latitude With the signals of at least four satellites the elevation may be...

Page 106: ......

Page 107: ...8 54 102 I Indication of destinations Favourites 51 Home address 54 On the map 49 Points of interest 42 Recent destinations 53 Saved destinations 51 Info bar 81 95 Information Itinerary 82 Stage 80 82...

Page 108: ...ation 40 Favourites 52 Itinerary planning 58 Point of interest 43 Recent destinations 53 Settings 94 Search facilities 4 Security information 13 Service 5 Settings Auto mode 99 Exit signposts 97 Forma...

Reviews: