background image

10


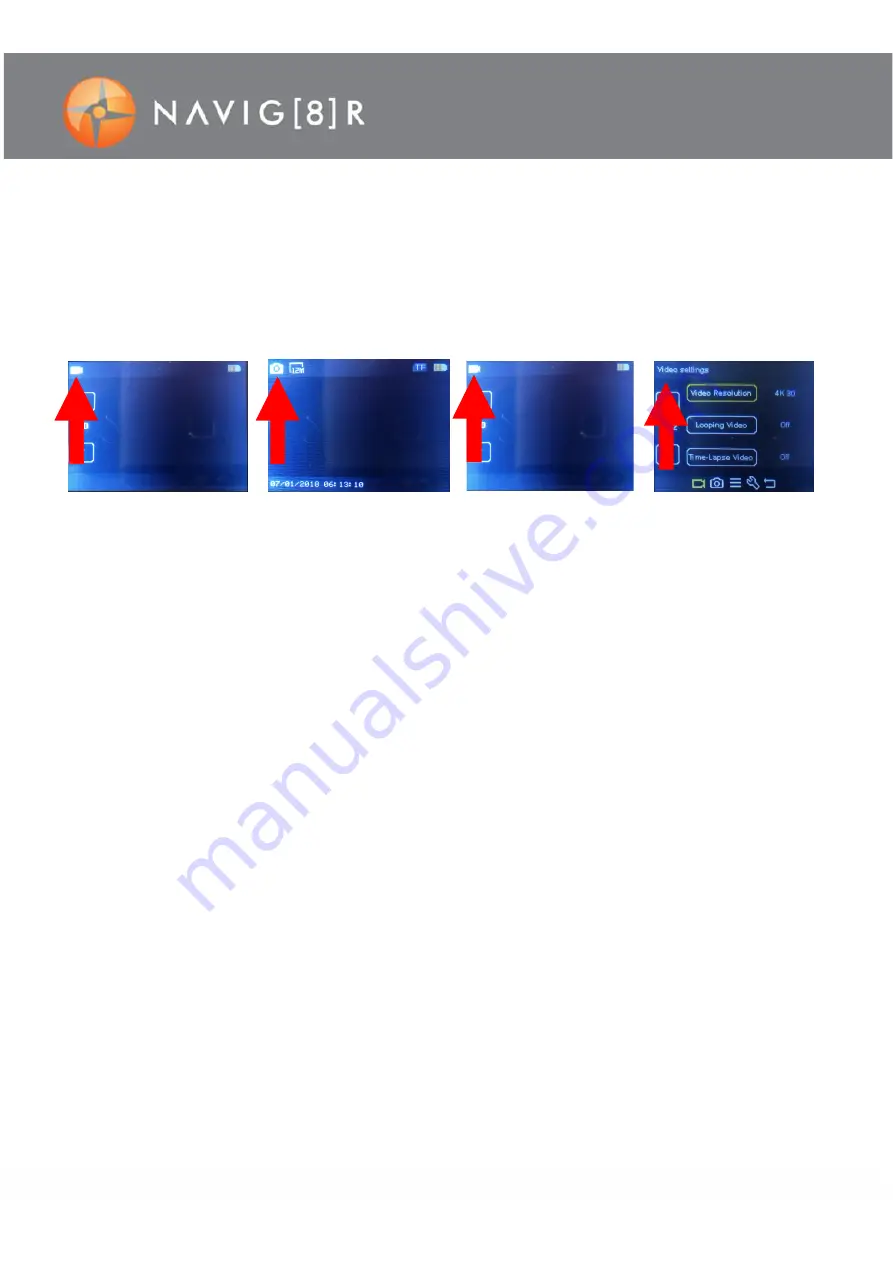
SWITCH BETWEEN VIDEO AND PHOTO MODES 

Use the mode bu

on to change between modes. A di

erent icon will appear each 

me at the top le

 of 

screen.  

 Video mode:


Record video  

(To start recording press the shu

tt

er bu

tt

on)  

Picture mode:


Digital S

ll Camera opera

on 

(To take a single picture, press the shu

tt

er bu

tt

on) 

START RECORDING / TAKE PHOTO 

When the camera is turned on, it will automa

cally enter video mode. Either select another mode or start 

recording videos by simply pressing the shu

er bu

on. To stop video recording, press the shu

er bu

on 

again. When the memory card is full or the ba

ery is too low, the camera will also automa

cally stop 

recording. 

PLAYBACK MODE 

A

er turning on the camera, press the mode bu

on to select playback mode. A 

fil

e screen will then 

appear with a preview thumbnail image. Use the UP and DOWN arrows to select your 

fil

e and tap 

the 

le name sec

on to begin playback. 

Note: During extended sessions of playback, the screen may 

automa

ti

cally turn o

 to conserve power. Press the display bu

tt

on or the shu

tt

er to turn the screen 

back on if required.  

PLAYBACK VIDEO: OPTIONS 

The op

ons available on playback are: PAUSE and PLAY. 

Note: The UP and DOWN bu

tt

ons control volume.


PLAYBACK PHOTOS: OPTIONS 

The op

ons available on playback are: PREVIOUS IMAGE and NEXT IMAGE. 

CONNECTING TO A COMPUTER 

Files can be played back directly from the Camera to a Windows ® Computer via a USB cable. The 

camera will appear as a common removable disk under Window Explorer. (Drivers are not required) 

Video mode 

Photo mode 

Playback mode 

Se

ngs mode 

Summary of Contents for NAVSPORT4KX2

Page 1: ...1 NAVSPORT4KX2 USER GUIDE...

Page 2: ...stop using the camera and let the condensation evaporate i e don t try to wipe it off Do not expose to excessive heat such as sunshine fire or the like Do not leave unit in the car during hot weather...

Page 3: ...OOF CASE 9 INSERTING THE MICRO SD CARD 9 START UP SHUTDOWN 10 SWITCH BETWEEN VIDEO AND PHOTO MODES 10 START RECORDING TAKE PHOTO 10 PLAYBACK MODE 10 PLAYBACK VIDEO OPTIONS 10 PLAYBACK PHOTOS OPTIONS 1...

Page 4: ...SSORIES IN THE BOX Waterproof case with mount Tripod mount bracket Handlebar mount Clip on mount Velcro and clasp straps 90 Degree short adapter mount Mount post male USB Cable Adhesive pads Remote Co...

Page 5: ...5 PRODUCT CONNECTION AND BUTTONS Wi Fi On Off...

Page 6: ...App via WiFi The steps to connec ng your smart device to your App are as follows 1 Switch on the Wi Fi feature on your Smart Device 2 Switch on your NAVSPORT4KX2 sport camera 3 Search and wait for the...

Page 7: ...p via WiFi The steps to connec ng your smart device to your App are as follows 1 Switch on the Wi Fi feature on your Smart Device 2 Switch on your NAVSPORT4KX2 sport camera 3 Search and wait for the D...

Page 8: ...ly pull the release lock and clamp in the direc on of the arrow on the clamp 2 Inspect the white rubber water seal gasket to ensure it is in good condi on and then insert the camera in the correct ori...

Page 9: ...s on memory cards Pending your user settings it is recommended that a CLASS 10 MICRO SD Card be used to avoid Read Write complications which will appear as an error message on the screen during use If...

Page 10: ...turning on the camera press the mode bu on to select playback mode A le screen will then appear with a preview thumbnail image Use the UP and DOWN arrows to select your le and tap the le name sec on...

Page 11: ...Incandesc ISO Adjust image sensitivity for enhanced images and less grain High ISO is best for low light condition Auto ISO100 ISO200 ISO400 ISO800 ISO1600 ISO3200 Effect Normal Sepia B W Negative SYS...

Page 12: ...will record up to 50MB of data So a 4GB card will store up to 80 minutes and a 16GB card up to 320 minutes How long does a full charge take and how long will it last A full charge can take up to 4 hou...

Page 13: ...rchase cannot be veri ed your place of purchase or Laser will make an assessment based on the date of manufacture the condi on of the Laser product and the type of defect Step 2a Contact your place of...

Reviews: